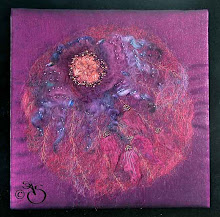
We have just returned from the hospital where my OH had a check up on his eye which had a cataract removed some weeks back. He can see better than ever and doesn't need any more checks - brilliant.
My GS was with me most of the Easter weekend and brought with him an Eyewitness book about the Ancient Egyptians. I already had a huge reference store having covered the subject as one of the history modules when I was teaching and I also had numerous encyclopaedias and reference books on the subject and I had downloaded a lot of info and images from the web so I didn't think I would see anything different but I have.There were lots of images I hadn't seen before and it set me off with lots more ideas and designs. The project is going to rival the Craster one.
Even though I said I wouldn't make any more jewellery after the 200 pieces I did for the book - I have succumbed and designed numerous pieces based on Ancient Egyptian jewellery and designs. They may come in handy if I need to produce a second book although I would rather cover a different theme.
The piece I was part way through from the last blog is now finished. I used some silver mesh and silver beads and stitched them over the unstitched areas of silk fibres even under where the text was to go. These pieces of silver mesh also couched down some purple dyed yarn.
The text was placed over the top and remained in the centre. The silver beads held the text away from the background and could still be seen through the voile marche. (I have just ordered some more of this fabulous fabric ,mainly white, so that I can dye my own.) The piece was, as with all the others, satin stitched to pelmet vilene for support.
In answer to the request about using the soldering iron on the background - sheer fabric can be burned back using a heat gun but I wanted to be more accurate as to where I wanted the sheer to be removed so I used the soldering iron and roughly drew around the area I wanted to remove and pulled the sheer away. I have a soldering tip with a bend on it so if I tilt it slightly I can run a greater surface of heat over the sheer - difficult to explain but I hope you get the drift.
Having completed this piece I set to on the first of the jewellery pieces. In the book was a picture of a beautiful embossed and beaten silver dish. I used this design to create a feature necklace. I traced the design then transferred it to silver metal shim. Then I worked from both sides creating the embossing of the design. I added some silver beads as it was a piece of jewellery. It was backed with a pale grey thin felt to keep it light. I wanted to keep the pattern around the edges and putting it through the machine would have damaged the embossing so.... I hand stitched the edged with buttonhole stitch using flat silver thread. I went round twice to get a dense enough effect. It was attached to a stainless steal wire ring with a barrel fastener - courtesy of my very handy husband.
Here is a close up of the embossing.
I am now on with another one - after a cup of coffee....
Wednesday, 26 March 2008
Saturday, 22 March 2008
Artistic licence!!
The next three Egyptian pieces take a bit of artistic licence. I was becoming tired of the Ancient Egyptian colour scheme so I decided to use a different one - purples. I don't think I have seen any purple in any of the Egyptian art that I have seen but the detail on the pieces is still based on Ancient Egyptians.
The first mini panel used the theme of the hieroglyphics. The base fabric was painted canvas covered with dyed synthetic fibers. I used dyed mohair yarn to create the the vertical lines couched down with a zig zag machine stitch. Flashes of silver net ( don't know why I decided to do this - it just looked right and that is a good enough reason for me) were laid over the top of this. I cut an obelisk from some printed hieroglyphics on walnut ink dyed paper I made some time ago. It is held in place by some very fine clear net and stitched down with an invisible thread and believe me when you are working with it, it is invisible! I had already digitised a hieroglyph for previous pieces but needed a second one so I digitised the other stamp design I had made. These two digitised designs were stitched over the silver net. I then free machined some hieroglyphics representing the letter and sound 's' for my initials. The one that looks like a walking stick is apparently a representation of folded cloth - rather appropriate for me. It was mounted and satin stitched to a piece of pelmet vilene.
The second one was had a base fabric of painted thermal lining. It was covered with pieces of web fabric and dyed silky goat hair. This was covered with the fine clear net. I cut bits of squared silver net and these were held in place with tiny Delica silver beads. The silver feature of Nefertiti's bust profile, was created using silver lame fabric free machined in place and the mask created from silver synthetic padded leather outlined with a couched silver thread. Again it was mounted onto pelmet vilene with a satin stitched edge.
The third piece is not quite finished. The base fabric is painted canvas covered with dyed silk fibres. I put a layer of sheer fabric over the top of this. Next I computed some text 'Ancient Egyptians' into the machine and stitched lines of the test over the sheer. Then I took my soldering iron and burnt away the sheer from around the text to reveal the silk fibres.
Next I used a digitised text piece that I had used before and stitched it onto some purple voile mache using a lilac metallic machine thread. This was to go onto the top but I couldn't decide exactly where - top left hand corner or centre. I placed it in the top corner first and hand stitched over the silk fibres but decided I didn't like it that much. So I have unpicked the stitching and moved the text to the centre and used some silver net and silver beads around it and it looks much better now. Should get it finished tomorrow. It only needs edging and photographing.
Wednesday, 19 March 2008
Serendipity paper and fabric
I was asked about serendipity paper which I used on one of the mini panels so I thought I would answer it on this blog.
I came across the name 'serendipity paper' when reading somebody's blog but I can't remember who it was. Before that I always called it 'mop up' which doesn't quite have the same ring to it so I call it serendipity now.
It is simple to make - always have a pieces of hand made paper and pieces of white silk on hand whenever you are painting with acrylic paints or other and silk paints. When you have finished painting or sponging with a colour - rather than rinse the brush or sponge out wasting the remaining paint use up whatever is on the brush on the paper until there is no more on the brush. I always wet the silk and scrunch it into a small pot to help disperse the silk paint and let the colours bleed into each other and create a creased effect. With the acrylic paints, when I have brushed all the wet paint off onto the paper, I wet the brush and brush it out again onto the paper until there is no paint left.
Do the same with bronzing powders if you have been sponging with them and also use up any paint left on stamps by stamping them on the paper until there is no paint left.
I do this whenever I paint until I like the covered paper and silk. It can take many painting sessions to completely cover and possibly over cover until I like the result. Then I iron the silk and store it and store the paper to be used as backgrounds for future pieces of work.
Here are a few sample I made recently or are ongoing - one has just been started but has lots of texture in the surface so should make a good serendipity paper.
They usually turn out better than if you tried to create them intentionally.
Three pieces of serendipity silk. It doesn't show but I also brushed out metallic paint on the silk which has added to the effect. Ironing sets the paint. These look as though they need ironing!
This is a piece of craft vilene.
This one has just been started - lots of paint to go on this surface.
I have finished two of the three prepared mini panels so will photograph them tomorrow and post.
Monday, 17 March 2008
More mini panels
The frogs are still busy in the pond and there is more and more spawn appearing.
Had another lovely weekend with my grandson.
I have finished a few more mini panels for the Egyptians project which will now be a talk for a local guild in October.
The first one used a piece of serendipity paper which was almost too nice to cover up. Some of these papers turn out better than if I tried to create them intentionally rather than by using up paint on brushes and sponges before washing them. It was backed with iron on vilene to strengthen it for stitching.
The main centre part was created by wetting some hat shaping mesh and drying it over a rubber stamp to take the relief then painting it with acrylic paint and highlighting it with a gold leafing pen. I put dyed silk fibres and gold mesh over the surface of the paper and placed the motif in the centre. The motif was covered with a layer of sheer fabric then free machined in place with gold thread and surface hand stitching to pick out detail.
I used a machine pattern to stitch a frame around the motif and at the same time fasten down the fibres. Two bead dangles were attached and tiny beads dotted around. It was mounted on a piece of green card.
The next piece used dyed silk mohair fibres, synthetic fibres and tiny bits of Angelina fibres. They were spread over the surface of a piece of painted canvas. I places a dyed silk pod down the centre. I machined a digitised urn over the silk pod using a red metallic thread. I had a machine pattern which looked like a lotus flower and stitched single ones over the silk fibres. Tiny burgundy beads followed the line of some of the silk fibres. It was satin stitch edged to pelmet vilene.
The third one used painted canvas covered with dyed fibres held down with a toning tulle More of the gold mesh and some more dyed fibres then a dyed silk pod were layered up. I stitched out a digitised Nefertiti onto black felt then placed it in the centre. I free machined it in place then stitched a row of beads along the bottom of the collar. I used the same lotus flower stitch around the sides and made a feature with a painted bead and metal dangle. Other beads were stitched around the piece and it was edged with stain stitch.
I was about to start another piece when I realised that I didn't have enough purple based fibres so decided to dye some. This led me to dying the wool fibres and mohair yarn ready for a workshop in October.
A number of years ago I asked my OH to ask his friend who had a small holding and some sheep on the small field in front of his house if he could let me have some wool. He sent me a FULL fleece from his best 'tupp'. I have washed about a third of it so far and given some of that away and still have many bag fulls to use.
This is some of the dyed wool, mohair yarn, synthetic and silk fibres.
The smell of vinegar and wet wool has taken some getting rid of. Lots of spraying with Fabreese.
I have spent much of today carding the wool which is resulting in an aching arm. This image shows only about two thirds of it. There are more purples , greens and blues. I wonder how long it will take me to card it all.
Wednesday, 12 March 2008
Frogs galore and Nefertiti!!!
Last weekend we happened to look at the pond in our garden and saw that it was heaving with large frogs. We have had frogs in the pond for many years now but had never seen this many and so big. They had all woken from hibernation and were responding to spring in the air. The pond now has a lot of frog spawn floating in it. My OH took a photograph of them and I only looked at them today. It was taken through the conservatory window so it is not so good. He didn't want to send them diving. This photo is only a small area of the pond. There were 4 or 5 times this number. I think some of them may have been visitors from next door's pond!!
I have spent this evening painting fabric backgrounds and will have to wait for them to dry. So I will post the two small pieces I made yesterday.
They too had painted fabric backgrounds. The green one was layered up with Japanese tissue paper, dyed mohair fibres,eyelash thread,gold mesh and gold tissue paper with the bust of Nefertiti drawn on it. I free machined the drawing and then partly removed the tissue paper. Some was left to look like al fresco - peeling paint. I hand stitched some fly stitches to catch down some of the loose fibres and then applied some beads. The piece was mounted on pelmet vilene and satin stitched around the edges using two threads together in the needle. It looks better in reality than the photograph shows.
The second small piece was created in the same way on a blue painted background, layered up with blue dyed scrim, dyed mohair fibres gold mesh and tissue with the Nefertiti bust drawn on it. I free machined the drawing and removed some of the tissue. I used a gold leafing pen to paint the remaining tissue then fly stitched the fibres and applied bead. It was satin stitched to pelmet vilene using , again, two threads together in the machine. I may pick off a bit more of the tissue from the face- not sure about it yet.
I stitched out a digitised motif earlier today ready to apply on another small piece. Will go now and see if the next batch is dry.
Finished Nefertiti book
I have at last finished the stencilled Nefertiti book. When I returned to it, after finishing all the photography, I was again unhappy with it and unpicked a lot of the stitching. It was basically a problem with the pile of the velvet. Eventually, using some choice words of encouragement, pinning and repinning, I managed to finish it.
This was the stage which caused so much hassle.
This is the finished book open showing
the front, back and spine.
This is the finished front. The panel was stitched on and framed with some metallic copper braid.
This piece definitely had the Egyptian curse on it.
I have taken a booking to give a talk later in the year on this project so I am now making more pieces. I made two small pieces today and hope to photograph and post them tomorrow.
Sunday, 9 March 2008
Cyber Fyber post card
Well, the book and all the photography is complete. The jewellery for the photographer has been packed, named, labelled with instructions etc and the rest of the jewellery has been packed away.
I can now put my mind to other things.
The first thing on the list was a card for the Cyber Fyber exhibition which I finally decided to join. I received my ATC from Susan very quickly with a lovely email from her.
I began to plan my return when my OH suggested I use some metal shim - don't know why but it gave me an idea. I decided to make a smaller version of one of my Egyptian Nefertiti profile pieces as Susan had been on my blog and commented that she too liked Egyptian art. I had put an image of one of Nefertit's busts into the filters in Phtoshop and came up with a lot of ideas most of which I have used in my project.
One of this effects suggested a mask which I have interpreted in many ways one of which was using metal shim.
As I began planning it, it became obvious that it would be better done on the post card size so I emailed Susan and asked if that was OK. She said that was fine but - bless her- she was concerned that I had only received a small ATC and not a larger post card.
I made a stencil and a tracing of the profile in the size I needed. I created the shim part of the card first using copper shim burnished in a flame to bring out the lovely colours. Then I painted the craft vilene backing with byzantine blue metallic paint - very rich. I also free machined my name on this in copper thread although I wish I had used a lighter colour as it doesn't stand out too well. I cut a piece of blue satin fabric and using a copper bronzing powder, sponged the outline of the lower part of the stencil.
Then I vermicelli stitched the surrounding surface of the satin and satin stitched the two pieces together.
Finally I applied the metal shim mask.
It has now occurred to me that it will have to be well packed as it would be spoiled if it were bent in transit. I never do things simply!!! I like it though and so will pay the extra postage to get it there safely.
And here it is -
Subscribe to:
Posts (Atom)