We are still in the middle of major refurbishments of our home. As
one part is finished we decide to do yet another. We hope to be finally
finished by the end of October. We are pleased with what has been done
so far.
As a consequence, I have little time to do my hobbies. I
have managed to photograph the pieces finished so far so now I can post
an update to my Paris project.
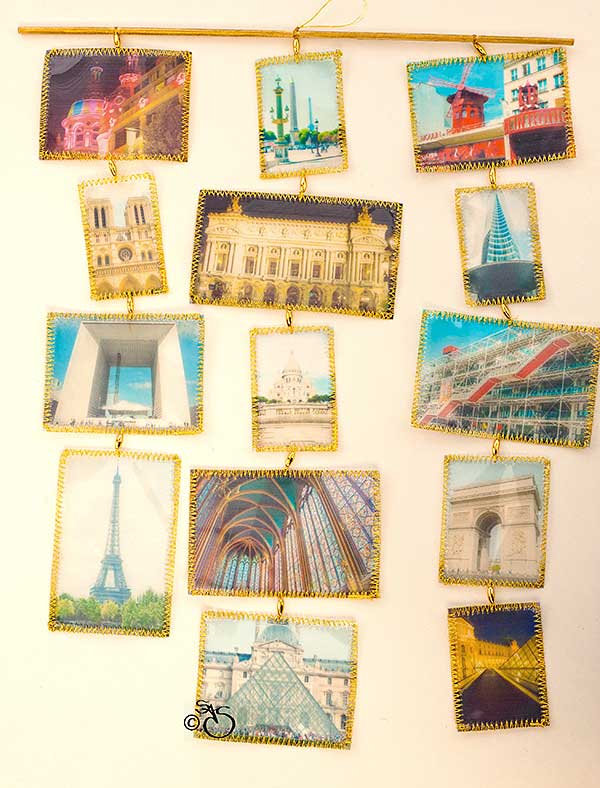
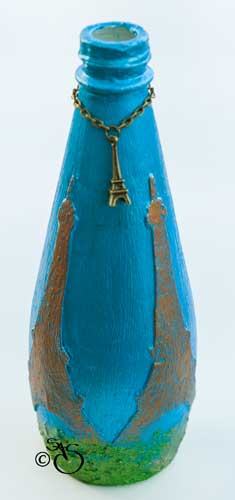
I usually make a mobile with images
off iconic landmarks of the city, in this instance Paris. I chose a
number of images, printed them onto acetate , edged each image and then
strung them together into a mobile. Using both landscape and portrait
format means that the images have space to turn when hung.
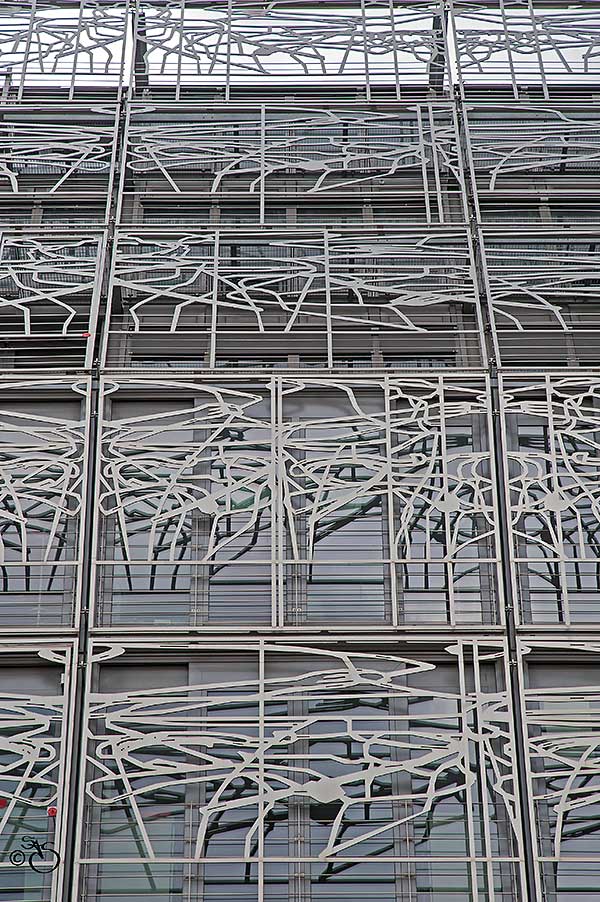
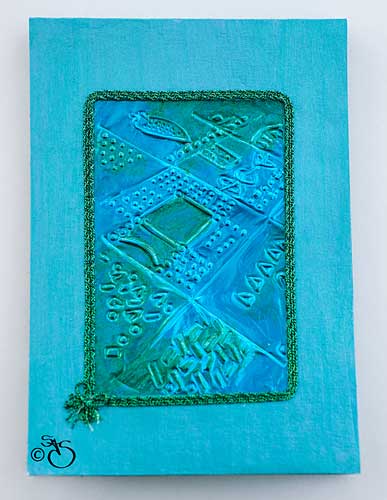
In the La Défence region of Paris are some fantastic modern buildings. I chose the following building for a series of pieces.
I applied a filter in Photoshop to achieve a very colourful pattern.
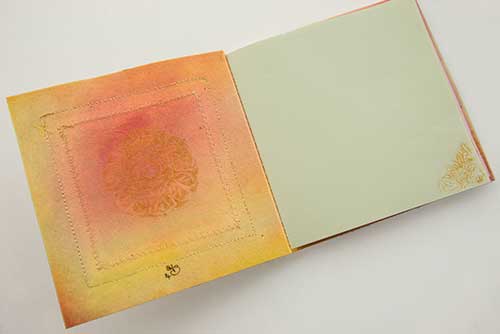
I
used this pattern to create a pocket booklet. I used garden mesh and
sheer fabrics and to interpret the shimmer in the windows I put some
Irisé film under the sheer so that it catches the light and changes
colour. All the lines were created by using a 1mm wide satin stitch
over the garden mesh.
I
then applied a distortion filter which gave me an oval design. I used
this design on several pieces. The first stage was to print the design
onto gold metal shim which I then embossed. This was the centre piece
on the front of a small booklet. I had some fancy gold braid in my
stash which fitted nicely as a border around the shim which was mounted
on dyed and painted pelmet vilene.
As well as a small pad, I made a folded pocket from colour washed tyvek.
I printed the oval onto transfer paper, cut it out and ironed it onto coloured pelmet vilene to make a bag tag.
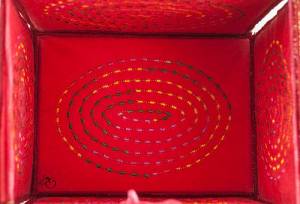
Next
I made a box. I had to change the oval shape to a circle for the two
ends of the box and kept the ovals for the top, front and back. The
designs were printed onto transfer paper and ironed onto felt. I
embellished the ovals with machine stitching and beads then stitched them
onto the red fabric and edged them with red metallic twist.
I used the oval design for the inside of the box.

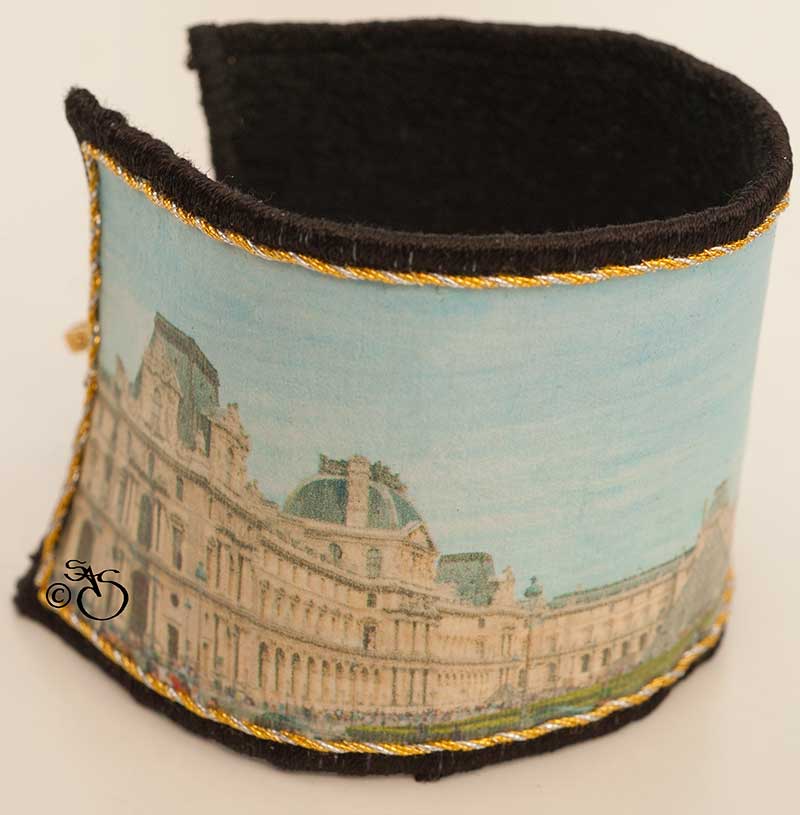
I
used a panorama image of the Louvre and the pyramids to make a wrist
band. The image was printed onto transfer paper and ironed it onto
black felt then machine edged. I used a toggle for the fastening. I
also gave it a coat of clear varnish to protect the image.


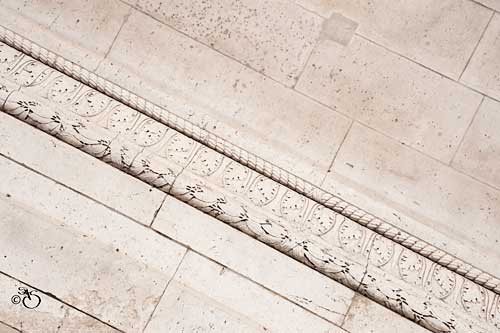
We
visited the French National Armouries museum - not to be missed. As
long as we didn't use a flash or a tripod we were free to do
photography. As I have a Nikon D3 camera, I was able to get good images
in difficult lighting conditions. I really liked this staircase.
I
gave the image a colour change in Photoshop and used the result to
create an art quilt. The fabric was painted and sponged then machined.
In
front of the Armouries was a plaque. It was dedicated to the Armouries
building which was and still is in parts a hospital for injured
soldiers. The plaque was cast copper which had a lovely green patina.
I used the flower design from the centre to create a box. The lid was embossed shim brushed with bronze gilding wax.
The
front and sides used some patina metallic shim which I embossed then
machined. I also used the same technique for the inside lid.
On each of the inside walls I free machined the flower design.
This is the final box.
We
went up to La Défence one evening to see what lighting there was after
dark. Unfortunately there was not as much as we were expecting.
Apparently Paris has reduced illuminating lighting to save money. The
Grand Arch was lit up and there was some coloured lighting on the front
of the Mall.
I
used this array of neon squares to create a black velvet purse. I used
a machine satin stitch over cord to make the raised squares.
One of the buildings in the older part of Paris was covered on the outside with a metal facade in an art deco style.
I
took this idea and created a purse. I used silver lame covered with
black sheer and then free machined the art deco design over it. This
small panel became the flap of the purse. I recycled some silver grey
satin from an old blouse. I also recycled some silver braid which had
edged a Caftan mini dress of mine many, many years ago. Just goes to
show that keeping things will eventually find a use.
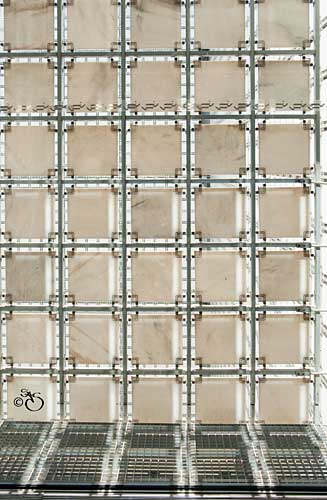
One
of my favourite buildings in Paris is the Institute of the Arab World.
There is some incredible engineering within it. I have already shown
the metal tiles on the roof in my last post. I used the image of them
for the front of two booklets. I also used this image to create a
quilted art panel. I applied another special effect on the image to
give me yet another colour palette. I printed it onto printer transfer
paper and ironed it onto black felt. I free machined it and highlighted
some of it with metallic paints.
Here is a close up.
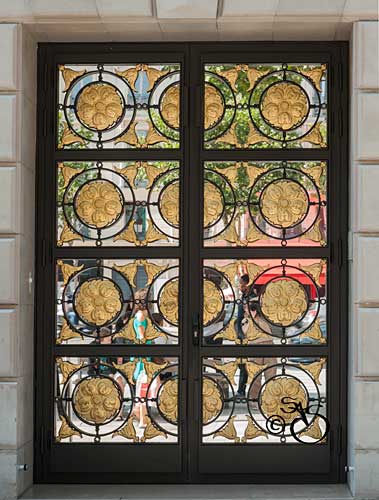
Finally
on the Champs-Elysées we came across the American Embassy. There was a
long queue outside - people waiting to apply for visas to enter the USA.
On this wall was a doorway. It was made up of coloured glass panels. I
liked the design and decided to use it to make an art quilt.
I
isolated just one of the squares. I opened this square in Photoshop
and applied numerous filters on it changing the colours and effect. I
had twelve new squares - all different. I printed each of the squares
onto fabric then painted and highlighted different parts of the design.
Next each square was made up into a quilt panel and free machined. When
all twelve panels were complete they were joined together with black
ribbon separating and framing them .
Well
that it is for this post. I have a bit of time now between jobs. The
next refurb is scheduled for the middle of September so I hope to manage
both some more photography and textile work 'til then.
Cheers for now.
SAS