Thursday 13 December 2012

Progress on my Venice project and a tote

Hi
This will probably be my last post for 2012.  We haven't been away since the last post and as yet haven't made any plans for next year either.  I have, however been busy and not just with Venice. 
I have just altered a wedding dress for a wedding taking place after Christmas and will be doing a portrait photo shoot of the bride to be when she has the trial run for her hair and make up.

My grandson becomes a teenager, officially, on Friday.  I say officially because he has had all the traits of a teenager for some time - as they do these days.  We gave him an iPad which we now call his 'appendage' for obvious reasons.

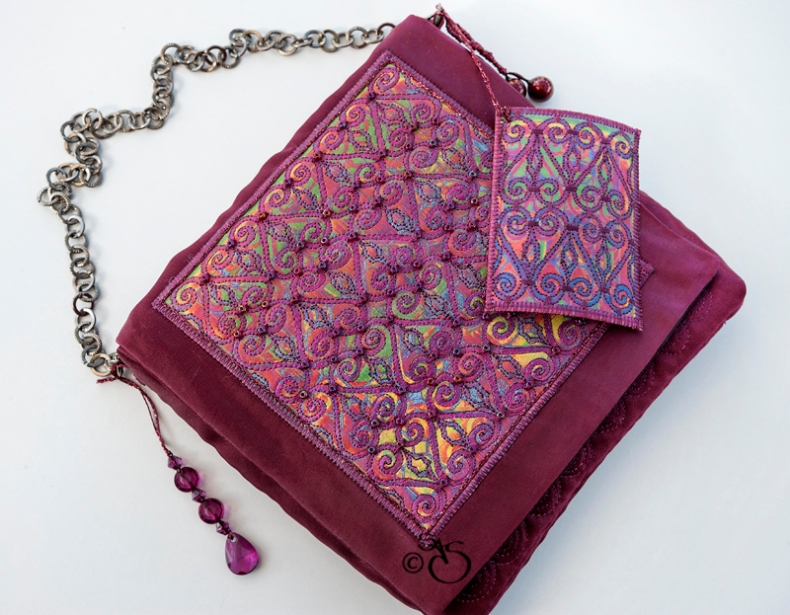
Now back to the Venice project, although I did complete a bag which has nothing to do with Venice so I will deal that first.  I impulse bought a couple of dresses last year and I usual with impulse buys haven't worn them.  I had considered putting them into a charity shop but one of them had such a lovely front (which is why I bought it) that I was determined to put it to some use.  As the front design was so big I decided to use it for a tote.  I quilted the design for the front of the tote.

Black-&-Gold-tote-bag

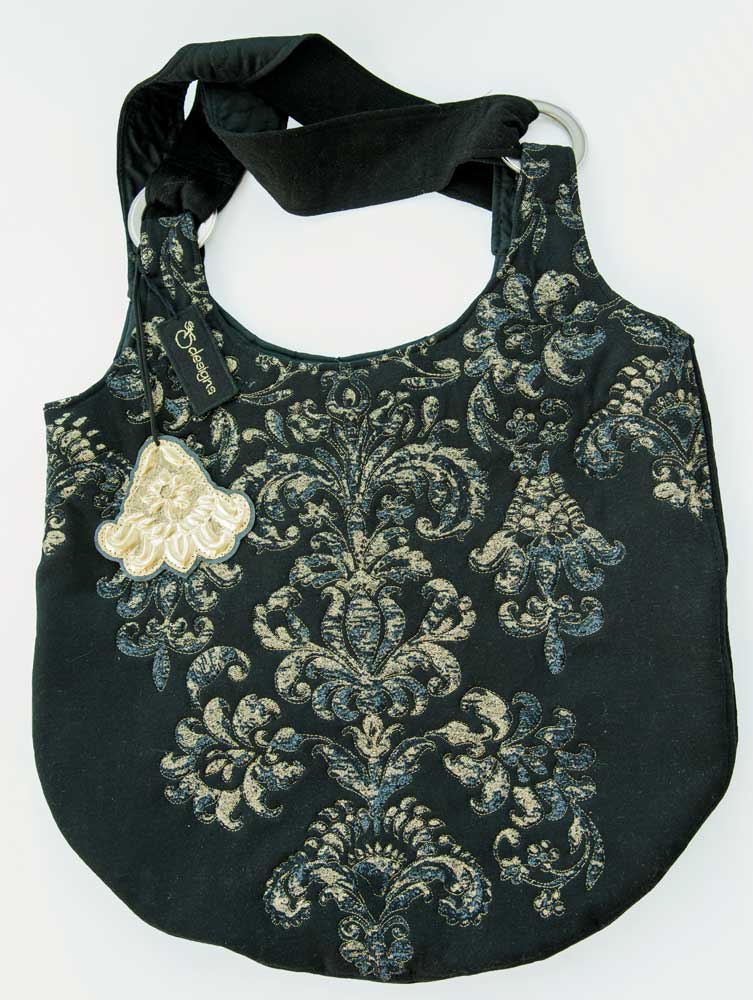
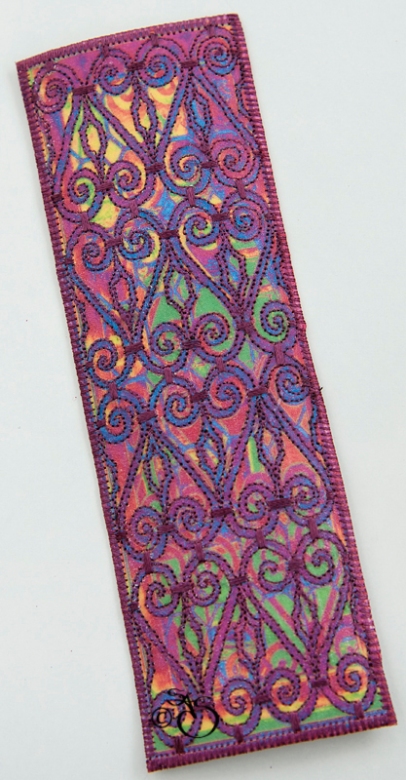
I made a bag tag by embossing part of the design on the front.

Black-&-Gold-tote-bag-detail

No back to the Venice project.  I have had the pieces finished for a while but have only just managed to photograph them.
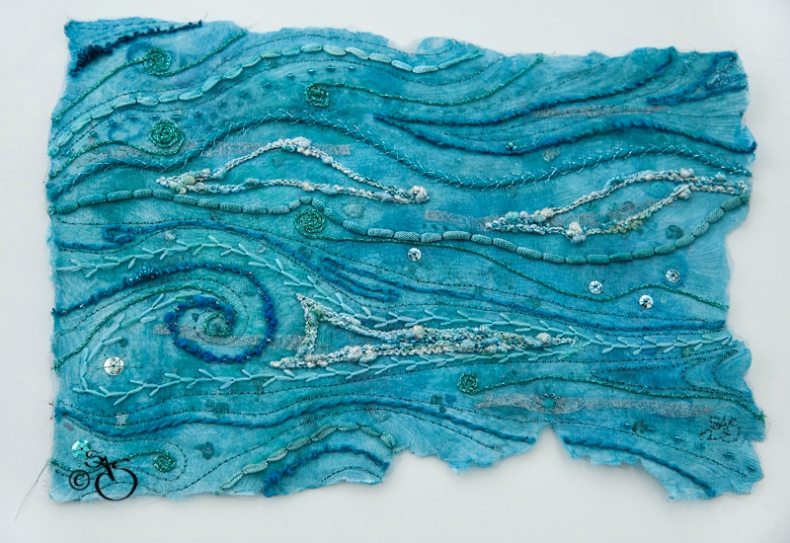
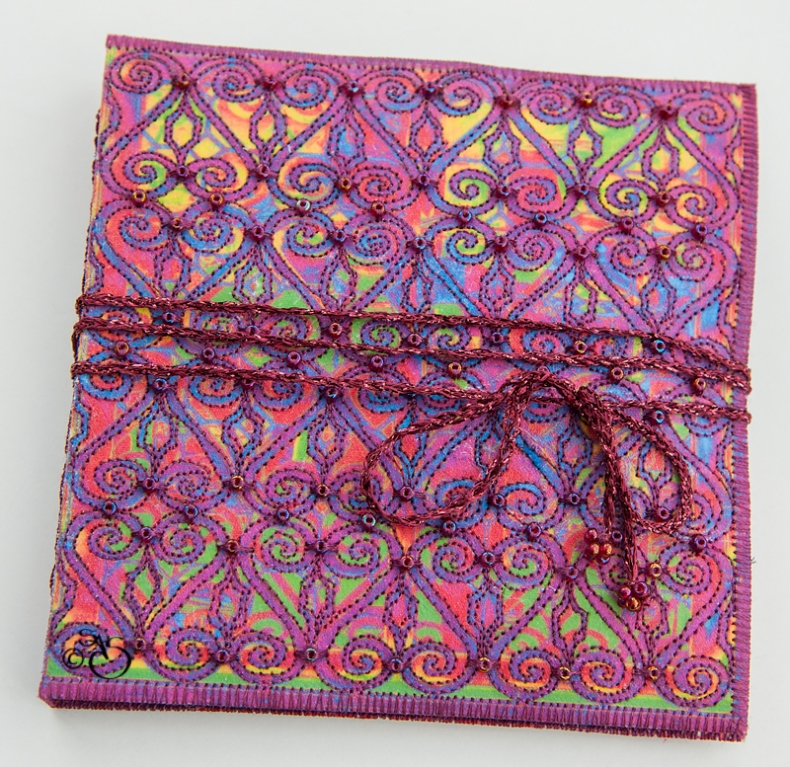
On the last post, I mentioned that I had some surplus panels from the Ripple art quilt (because I forgot to flip them for printing!).  I used one for the book cover I posted last time and I have used another one to make this pocket page booklet.

Ripple-pocket-book-front

I wasn't sure at first if this would work because I would have to simply fold the panel in half and turn it but it did work.  I quilted  the panel and lined it with colour washed pelmet vilene and then edged with machined satin stitch.  The inside pages were stitched down the spine.  I wrapped some matching cord for a tie.
I mentioned that I planned to create some jewellery using the bronze fret design from the vessel in the last post and here it is.

Window-fret-bronze-jewellery

I had to manipulate the design in Photoshop in order to create the necklace.

D-decorative-lamp---1600iso

As well as the water buses and water taxis to ferry back and forth across the Grand Canal, there are also gondola ferries. The landing stages for these gondolas are marked with green lanterns like the one in this image.  I decided to create a tassel based on these lanterns.  This one was quite a challenge as it was octagonal.  I did discover that they are not all the same and there were some square lanterns which would have been easier to construct - but...
I constructed the tassel head from some jade Thai silk.  I used a mixture of the largest beads I had for the glass panels. It was a fiddly job.

Lamp-tassel

The next piece uses the carved flower stonework featured in the last post.  I made a pattern of the flowers and used my 'jewelled fabric' technique to make four small sheer flowers which were joined together to make a mobile.

Carved-flower-sheer-mobile-upright

On the Basillica there was a large carved block depicting a peacock design.

D-carved-panels

I used this design to make a stencil and a stamp which were then used to create a box.  I had a piece of ''mop up' paper towel in the colours I wanted to use.  I ironed vilene onto the back to give it strength.  I stamped and stencilled the design onto the paper.  I also traced a pattern to free machine on the top and inside of the lid. I noticed that using a dense satin stitch to machine around thee edges was in places serrating the paper.  The vilene held it together. Perhaps a slightly less dense stitch in future.

Peacock-box

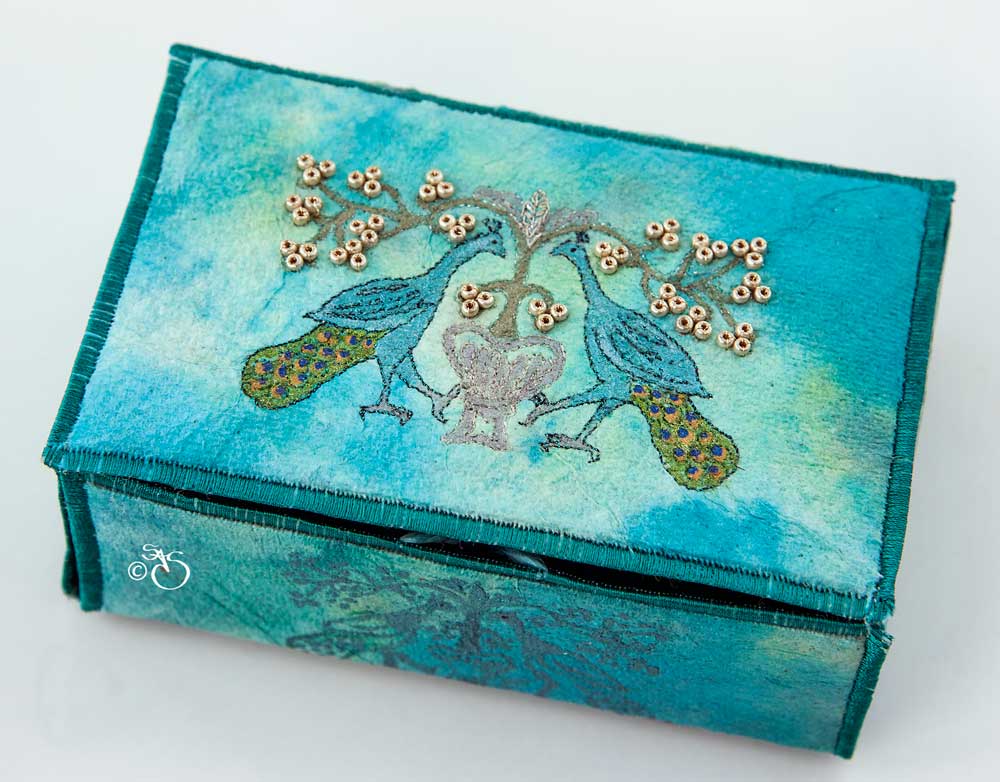
Some hand painting and beads finished the detail on the piece.
That is where I am at the moment. I have just begun a book and there are many more pieces on my list to create so watch this space.

Cheers for now and I wish you all a merry Christmas and should see you in the new year.

Saturday 3 November 2012

Back from Dubai and on with my Venice project again.

We have had a lovely hot week in Dubai. We didn't do as much photography as usual. We wanted to have a more relaxing time this visit.  We hit a festival week while we were there and we were able to watch folk dancers from around the world.  They performed every night on a stage on the side of The Creek.  There was a firework display half way through the performances.  It was holiday week in Dubai so everywhere was very busy - a bit too busy.  Even so, we enjoyed our week.
Now it is time to get back to my Venice project.  Again, I have quite a number of pieces finished so this might be quite a long post.
This set of pieces was the result of playing with a close up image of the decorative stone work around a church door.


The first of the pieces was a panel.  It is A4 in size.  I made a stencil and a stamp of the stone flower tile which was stamped all over the background fabric.  I used interference paints on a silver and dark grey fabric.  I stencilled the design onto black cotton, then padded and stitched the outline of it.  These three padded accents were stitched onto the background.  The spiral column was made by creating a paper cast of a piece of fancy wood.  It was painted black and wrapped with dyed metallic fingering and interference paint finger rubbed along the dips.  The narrow spiral was a straw, wrapped with black tape and over wrapped with the metallic fingering.  Three stamped black cards were hung from the bottom. The finished piece was mounted on thick card.


Using the same colour scheme and design, I made a small pocket page booklet.


The pocket pages were stamped with the flower design.


I also made a purse and a bag tag using this colour scheme and design.


The next piece used the image of the facade of a hotel in Venice.


I put this image into Photoshop and applied a posteriser filter.


I liked the effect so decided to create an art quilt.  I made line patterns of the image and joined them together.  It was to be a large art quilt so it took eight A4 sheets to print out the pattern.  I traced this onto white cotton lawn.  I used fabric paints to paint the design.  I made a quilt sandwich and free machined the design.  When the machining was complete I sponged the hanging basket flowers and then hand stitched hundreds of French knots over the top.


In the last post I showed a set of pieced which were based on a bronze window metal grill.  I decided to use this design again only this time keep to the bronzy colour of the metal grill.
I selected an area of the grill and sized it to create the four sides of a vessel. This was printed out and traced onto tracing paper for the machining pattern.  I used pelmet vilene for the base of the sides.  I painted them with bronze metallic paint.  Next I ironed copper transfer foil over the surface and covered this with a layer of bronze metallic sheer fabric and a layer of black voile mache over that.  The pattern was pinned in place and I free machined the design.  I used a soldering iron to cut away some of the design at the top centre of each side.  They were satin stitch edged and joined together to create a vessel.


The final two pieces for this post was another one of my rescue pieces.  The design used an image of the ripple reflections under a bridge in Venice.


I took this image into Photoshop and applied different colour effects.  I came up with twelve different designs.  I planned to make these twelve designs into one long art quilt.  I intended to print two at a time on white cotton. The idea behind this was to give my A3 printer a run once per month to prevent any clogging which I had  to clear when it was left for a long time between uses. When they were all printed and I came to lay them out I realised that I had forgotten to flip half of them.  Rethink.
If I made an eight long panel, used some of them for a tote bag front panel and one for a book cover, I would only have to reprint a couple of them. So that is what I did.  Each small panel was free machine quilted, satin stitch edged and joined together to create this art quilt.


I made one of the panels into the front for a book cover.


I still have the four panels to make into the front panel of a tote bag but as I became a bit tired of machining so many ripple panels, I decided to put them to one side and do something else for a change.
As I like the result of the bronze sides of the vessel, I decided to use this technique again and create some jewellery.  Hope to have it completed for the next post.

Cheers until then.

Sunday 30 September 2012

The Venice project is on a roll!

I thought I had better post an update of the Venice project when I realised just how many pieces I have completed since the last post.
The design source for the first piece was simply the waters of Venice.  You see water from every aspect but the colours are determined by where in Venice you are and what is reflected in them.  This piece was to represent the waters near the sea entrance to Venice which are more sea coloured.

Image

For this panel, I made the base paper using my PVA and loo paper method.  It was made on a piece of frosted, textured glass which had a wavy sea like effect to it.  I colour washed and painted it using metallic paints then covered it with a layer of bluey green sheer fabric.  Next I used lots of different textured yarns in the same colours to couch and stich over the surface, picking out the rolling sea. Beads and sequins were added for the sparkle of the sun on the water.
I made a second piece of this paper because I had intended the first one to be a book cover but I hadn't greased the glass surface enough and so the edges were torn away when I lifted the paper. It was perfetly OK for a panel though.
In order to make the paper robust enough for a book cover, I ironed Vilene onto the back. This time I did not overlay the surface with a sheer fabric so that the texture from the glass was more evident. Other than that, I embellished the surface the same as the panel but with more beads for added texture. I coulr washed sheets of paper and stitched them into the cover using a decorative metallic thread. The tie was some knitted ribbon which just happened to be the right colour.

Image

The next  five pieces stemmed from the fancy hinges which I used on the file cover.  I decided to make a box and wanted to use some fine leather which I have had for many years.  The hinges were made from burnished metal shim.  I used my panel method to make the box.  It opens flat for storage.

Image

Sadly the leather was more fragile than I thought and the satin stitch edging acted a bit like a cutter so I have had to glue to mend it.
Again using the hinge design, I made some bag tags.  Two of them were made using painted pelmet vilene. One painted bronze and one copper.

Image

The other two were made using air dried clay.  I pressed a stencil I had made into the clay forcing it up through the stencil.  The other had a stamp I had made pressed into the clay.

Image

The next series of pieces was based on a fret covering a window in Venice. It was very ornate.
Image

I put this into Photoshop and applied a filter which gave me a wonderful colourful effect.  It sparked numerous ideas.

Image

I cut, pasted and selected to create several pieces.  They were arranged on an A4 size and printed onto transfer paper for black.  These were cut and ironed onto pelmet vilene to make a pocket book, a book mark and a bag tag. I free machined the outlines of the fret design.  Card stock in a matching colour was glued onto the back before machining the edges.

Image

Image

Image

I liked the design so much I printed out another square of the design onto transfer paper for black and this time it was ironed onto black felt. Again I outlined the fret design.  the panel was then used to make the centre panel of a purse.  I had some deep burgundy red cotton satin which was a perfect match for the panel.  I enlarged the design, turned it into a black and white lined drawing to make a pattern.  This was traced onto tissue paper and I free machine quilted the body of the purse.

Image

Image

I used beads and  to make bag tags and also attached the above bg tag to this purse.
Finally, I returned to my music mask design.  I printed a full A4 size mask onto transfer paper for black and ironed this onto black polyester cotton.  This was for the centre panel on the front of a tote.  I painted the gold scrolls with gold twinkling water then free machine quilted the mask.  I used black thread and bullion knots for the music notes.  Once the centre panel was complete, I used a faux black leather fabric to make up the tote.  To make the bag tags, I printed small versions of the masks onto acetate sheet which was backed with the leather fabric but I had to insert a white card behind the acetate to reveal the print better.


And that will have to do for this post.  I do have four more finished pieces but I will keep them for next time.
                                                                                                                           Cheers for now.

Thursday 23 August 2012

Back from Paris and on with the Venice project.

We are back from Paris and have recovered from all the walking carrying our heavy camera equipment.  Our hotel was one street back and mid way between the Louvre and Place de la Concorde. Very central and handy to walk to most places and for the metro.  The weather was very warm and we didn't even need a sweater even at midnight.  Perfect. Apparently it became very hot after we left so pleased we missed that.
I am now working through the processing of some 1300 images.  However I do have some textiles to show.
These are for the Venice project.
I have already shown two of the iPod pouches which were inspired by the patterns of the carved windows of the Basillica. Here is one more which I finished stitching in Paris.


There were many impressive doors in Venice most of which were very neglected but wonderful for me as they had so much texture and character.


This door must have been so grand originally and taken such a time to construct.  It has, however, led to a number of designs, this being one of them.


It was a bit of a rescue (yet again) as I was trying to use up some old paint. It had gone off and was full of gritty bits.  I added patina fluid to create the verdigris as on the door. Then I washed it with some diluted black ink.  I had thought of putting some sheer fabric over it but decided I quite liked the gritty texture and the colour had turned out well.  I used some variegated dyed sari ribbon to make the woven squares.  The centre of this ribbon was silver metallic and as the other embellishment was to be copper I decided to over stitch it with a dark green metallic thread to tone it down.  I made four flowers with embossed burnished copper shim.  These were held in place with brads which I dabbed with black paint.


Another impressive door was decorated with embossed and studded black leather panels like this one.


I used this design and created a pattern in numerous sizes.  I digitised this design and stitched it using silver metallic thread onto black felt made up into a glasses case.


I used it again to make a bag tag.


I embossed the design onto silver shim and made it the centre of this pad booklet.


In keeping with the original door, I used a faux black leather fabric for the backing fabric.


I had a really nice silver/black mottled card for the inside of the booklet.  I hand stitched the front to the back to make a flexible hinge.
We found this amazing workshop door while wandering in the back streets one day.


The hinges were a work of art in themselves.  I decided to use this as the design source for the file cover for this project. I will keep sketches, patterns and printouts etc and some of the small pieces in it.
I dyed and painted some heavy duty linen which was given to me by my father many years ago.  It was unused filter bed fabric. It was ironed but not thoroughly so that it kept some of the creases for the wood effect of the door.  I made the hinges from pelmet vilene which I painted with bronze metallic paint sponged with black to age it.  I used brads for the studs on the hinges and on the wood effect fabric.  I digitised the name of the project 'Venice' and stitched it out on the front and again for the spine.  I free machined my name down the spine too.


That is it so far with more to come.
Until then
Cheers everyone.

Tuesday 3 July 2012

Venice project begins

It s a long time since my last post but I have been busy travelling.
I spent a couple of weeks in Florida just chilling out by the villa pool and in the hot tub.  As always I took some work with me.  I took my Inktense pencils to paint over some printed silk (I will explain why later in this post) and some blackwork and gold work.
We were only home for 7 days before flying off to Venice.  This was a return visit.
It was very, very hot and very, very busy.  Not the best conditions to walk and walk and walk taking lots of photographs with a very heavy camera.  It was certainly more of an endurance than a holiday.  I am so glad we were there two years ago when it wasn't quite so hot nor so busy.  The two visits have given me a huge design source now that all the images have been processed.  I created a few pieces after the last visit but now I have begun to develop a project based on my visits to Venice.

I did post one of my art quilts last year which was created from images of the Basilica.


This was the image I used.  I played with it in Photoshop and applied a special effect with this result.


I added a colour for the sky.


Then I duplicated the image, inverted etc.etc to create this final design.


I painted a piece of silk using the colours for the background sky although a lot paler than the design shows. I then printed the domes design onto another piece of silk, reinforced it with iron on Vilene and cut it out. I made a quilt sandwich with the sky background and free machined the domes onto this using a pale copper metallic thread. I made some changes to the design as I progressed.  I still need to make a decision about an edge for the quilt but this is it so far.


The next piece or pair of pieces were based on two images I took of two masks hanging outside a small shop in a side street in Venice.  They caught my eye because they were more subtle than most of the other elaborate masks in the Venice shops.


I isolated the masks, printed them onto transfer paper for dark fabrics, cut them out and ironed them onto black cotton. I used gold twinkling H2O to paint over the gold scrolls.  Next I quilted around the edges of the masks and eyes then quilted the background.  I covered the masks and sprayed the background with gossamer gold moondust. Finally I free machined over the music and used French knots for the notes.


The next piece was created from an image of the Grand canal.


It was rather a dullish day that day so the image was also a bit dull so I put it into Photoshop and applied a filter called cartoon.  It produced a nice stylised effect which I printed onto silk.

Unfortunately one of the inks banded during the printout so I took it away with me and used the Inktense pencils to paint over the printed silk to cover the banding. Once home I made up the quilt sandwich and free machine the design with a fine black thread.   I edged it with a dark blue satin. Another rescued piece.


The next piece is a favorite.  It turned out better than I expected.
It was inspired by the Palazzo Contarini del Bolovo.  It was very difficult to find down some very narrow passageways.


I used a close up of one level of the spiral stairway.


I put this into Photoshop and applied a number of special effects.  I created six different effects and printed them onto cotton.  Then I selected the wall area of the image and created vertical and horizontal spacers and printed them onto cotton.  They were all made up into small individual quilts.  I free machine them all using a fine black thread.   They were edged with satin stitch and joined together.  I had to take care to keep the sizes correct throughout the stitching so that they would fit together in the final construction.  Love it.


I have completed the hand embroidery on a number of iPod pouches which are now waiting to be lined and made up into pouches, hopefully for the next post.
I have some time at home now before the next trip, so I can get on with more pieces which are in various stages of progress.  So back to it.

Cheers for now everyone.