Tuesday 29 April 2008

Bags and dolphins

Well, I have talked with my family over in America twice already using the webcam. The first time my grandson simply waved to me and then told me he was going back into the pool now - Bye grandma - and that was that. I couldn't compete with the pool so had a good chat with my daughter instead while my son-in-law was blowing up the large inflatable dolphin my GS rides on in the pool.

(Goodness - loud thunder and lightening and hailstones - English weather!! It is in the 80's on the other end of the webcam!! Grrr )

Back to what I was saying - the second time we talked I was given a detailed run down of his day including finding a large furry dolphin in one of the wardrobes which must have been left behind by one of their guests. Probably too big to pack. They were off to Sea World next , my grandson's favourite place. One of many, many visits I have no doubt. He is going to swim with the dolphins later and he doesn't know it yet, but he is going to spend a whole day with them, feeding, looking after and playing with them. I expect that will be a very excited webcam exchange.

I gave my daughter a list of goodies to get for me while she is there. They are half the price over there. Sadly, Walmart, which was THE best place to shop for our kind of goodies has reduced this side of their sales dramatically in spite of every effort by the American quilters, sewers and textilers to change their minds. It is now only about a quarter of what they used to sell - a great pity. It was much better than the Joanne store we hear about. I am now going through my wish and replace list to give her any further lists. She has already bought the very large roll of freezer paper I asked her for, for a fraction of the price here .

Now to some creative work. I have made another bag for my Egyptian project.

I began by stripping down a hardly worn cream linen skirt. I used just one of the back panels. I spray dyed it then give it a coating of gold glimmer dust which I had to seal using 'hair spray' which seems to have worked. This dust gets everywhere and I glowed in the light for days as did everything else. Once the fabric was dyed and dusted, I stencilled the Nefertiti stencil I made onto it and stamped the lotus flower stamps I made using a subtle aubergine metallic paint. I did try screen printing but that was a disaster as the screen I made - re the DVD'd that Lynda sent me - clogged up with paint - just as well it was a tester and not on the bag. Wrong paint - it dried too quickly so back to the drawing board on that one but I will persevere- pity about the carefully created stencil though!!
I did the same for a circle base. Now I had to find a way to create a top edge which when it was closed up would resemble a lotus flower.
Eventually I came up with the solution. Six petal shaped zig zags along the top edge.
Next I cut some purple satin lining for the bag and stitched the two together. The base was stiffened with some stiff polythene stitched inside.
Those ex- bras strap rings came in useful again. (Although I did have to go and sort out some more old and never worn bras to obtain some more rings of the same size. Two birds with one stone here - more room in the drawer now!!) I covered six of them with several different threads together. These were stitched at the bottom of and between two petal shapes. I crocheted two lengths of cord using the same mixture of threads and threaded them through the rings. They were passed through two large gold beads (brought back from America a few years ago) and knotted to finish them off. In order to keep the petal effect, I stitched a small bead on each petal to hold the shape when the bag was closed.
And the finished bag which has turned out rather well. Quite pleased with it.


And here is one for Karen. I know they are a weed but they are beautiful. It is a matter of managing them. The grass verges on the country roads look so sunny and uplifting thanks to the dandelion. The seed heads too are quite beautiful and the source of many an embroiderer and artist - weed or no weed. A bit of macro lens photography here Sharon, and digital imaging to isolate it from the background.


Now to decide what do do with two printed images - one on Thai silk and the other on gold sheer fabric and the woven machined text. Decisions, decisions. They take up more time than the doing.
I'm off for a cracker and a coffee while I think about it.

Friday 25 April 2008

Another pyramid bag and a garden piece

Well my GS has gone off to their villa in Florida for 2 weeks and so I won't miss him so much we have set up Skype on the computers so we can keep in touch. I will be able to see him and talk to him live using web cams. Aren't computers brilliant??

First I will show the bag I mentioned on my last post. I used the pyramid shape as the design source. It was a lot more complicated than the little gold purse and there was a lot of trial and error. I used some brocade that I had in stock which had flowers on it similar to some in the Egyptian wall paintings -(well close enough).

The base was square and I made four double sided triangles stiffened with a stiff polythene which used to be scan cards for our old video recorder. This was also used to stiffen the base.
Between the triangles were inserted gussets so that the bag would open.
Because of the construction I had to hand stitch one side of the base.

I used four bras strap rings (I throw nothing away) and covered them with a blue and gold thread. These were attached to the peak of each triangle. I made cords using the same thread and large gold beads and threaded them through the four covered rings to make a draw pull fastening. The gussets - unfortunately - have to be pushed in when the bag closes. I tried several ideas to make this automatic as the strings were pulled but none worked satisfactorily.


This is the completed bag when closed.


Many thanks to Karen for her award. I have been looking at her garden blog and her garden is much further on than mine. My bluebells are just throwing up the flower head buds whereas her bluebells are in bloom. I use my garden as a design source so I am going to include a photo of one of the plants which is at its best at the moment. It is the Piris which has incredible pinky red new growth. In the next couple of weeks these leaves will change to variegated green like the rest of the plant.


I used this plant and this photo (taken this time last year) as the design source for a piece of work. We had just replaced a fence and I took photos of the newly sawn wood which had a really nice texture.
I combined the two in Photoshop.
Then interpreted this image into textile piece.
It involved inkjet printing onto dyed scrim and craft Vilene then hand and machine stitching. The Piris was cut out and proud mounted onto the wood interpreted background.
I also created this digitial image which is on my web site with many others.


I have a lot of work in progress at the moment and have spent this evening spray dying some fabric for another bag. I am having a go at screen printing and have made a screen stencil of Nefertiti which will be printed on the bag fabric. So... watch this space.

Tuesday 22 April 2008

Gold purse

First of all I must thank Debbi for her two beautiful postcards - so much thought and work in them. They complement my present project on the Ancient Egyptians and I will be adding them to the project when I give a talk about it later in the year. She also sent me a piece of hand made paper - she thinks came from Thailand - which has hieroglyphics printed on it. I intend to use it in another piece for the project but not sure how as yet. Watch this space Debbi. She posted them on the Monday in Australia and they arrived through my letterbox on Thursday morning. I was amazed - only 3 days. I wish our internal post was so quick.


Well my GS is back at school, the Easter break over, so I can now do some work during the day. There is no substitute for daylight when working with colour.
Spent yesterday preparing for a string of new pieces most of which are stemming from ideas which I am not sure will work as yet so it is go with the flow and fingers crossed.

I have made a stencil for some screen printing thanks to Lynda. It is now ready to mount and then to test!!
I have coated some sheer fabric with InkAID ready to print out a digital image I created in Photoshop.
I have soaked several pieces of silk in Bubble Jet liquid ready for some more printing of digital images.
I have applied some walnut ink to some thin beige felt ready to do some machining of text and then to weave the text strips together.

I have also made a very large birthday card for my son-in-laws 40th - large card, big 40 - which is exactly what it is - a very big 40 on its own on the front.

Sooooo, now to do all the 'ready for's' and hope they all turn out as I am hoping they will.

Now to post the finished piece I mentioned on the last post. It is a gold purse.
I used the pyramid shape and the lotus flower as the design source, gold lame fabric for the body of the purse and white satin for the lining. I ironed a soft iron on Vilene to the back of the fabric before cutting it out. Here is where I made a mistake. I cut the shapes out with scissors and only at the end did I remember that I should have cut the gold lame using a soldering iron to seal the gold threads which fray very easily even with the Vilene on the back. (So many things to remember when using so many different materials and techniques).

Once the shapes were cut I used a gold thread and a lotus flower machine pattern stitch to stitch rows of lotus flowers across the gold lame.


I left the surface of the flap clear and created a padded gold leather lotus flower. It is surprising how many different golds there are and so I couldn't use my favourite gold leather because it was the 'wrong' gold colour. At least it made me use some of my other gold leather stock. The petals were outlined with a couched Japanese gold thread.

The lining was cut and the two pieces were satin stitched together with gold thread.
I made two tassels - one to hang from the flap and the other to hang from the bottom point of the purse.


I used a piece of gold braid for the handle.

A quick and simple evening purse.


I have also made a pyramid bag - not quite so easy to make - and will post that next time.

Wednesday 16 April 2008

A trip out and some photography and jewellery!

We took our grandson to the newly revamped Darlington railway museum - he being a train lover. It was worth one visit as it housed the original Locomotion Number 1 engine.
It was a good opportunity for our grandson to use the camera we gave him and we both took lots of photographs. I took photographs which I could play with and perhaps create some interesting digital images.
As we entered, there was a beautiful old wrought iron spiral staircase winding up to a door - don't know if the door led to anywhere or not. I took several photos of the staircase and played with them in Photoshop.

These two images were a result of that play time. There are lots of others and I still have to explore composites yet. Looking promising.


I also came across this wall sculpture of Locomotion Number 1.


I took some close ups too and then played with them - again in Photoshop.

I love the colours in the metal funnel created by one of the filters - well two filters.


Even the engine nameplate and this is the original nameplate, has given me a rather nice digital image.


On the way out facing the exit doors was a shelf and on it were three larger than life-size wooden carved dog's heads. No idea why they were there but had to admire the work in the sculpting of them.
As I may not manage to blog again until after the weekend I am posting some pieces that I have made grabbing the time when I could - usually during the late hours and into the early hours which is the norm for me.

After I had finished the first Egyptian wrist band I made another - very similar but using the lotus flower as the decoration. I also covered the dyed fibres with some dyed voile mache and gave it a coat of acrylic wax and some polish to try and create a more metal effect. I didn't really get the effect I was looking for.


While I was making this wrist band I was also making some jewellery - again using the lotus flower as the design source. This took a long time as it there was a lot of hand stitching. The base was made using the dyed fibres sandwiched between dyed voile mache. I used three sizes of the lotus flower and managed to fit them all onto the piece of jade fabric paper. This is the resulting set of jewellery.

This leaves me with just one more piece which I will keep for the next blog.
Now it is on to the next piece for the project and as always, the deciding what and how will take the most time.

Sunday 13 April 2008

Pyramid box

It is a while since I blogged so thought I would post a little pyramid box I made a couple of weeks ago.


After all the fibre dying, I began making pieces of fabric paper using some of the dyed silk fibres. I chose the yellow fibres for the pyramid box I had planned as it represented the sand and sandstone of the pyramids.


Once the fabric was made I made a pattern of the square base and four triangle sides and fitted them onto the fabric. I wanted to maximise the fabric so the base had to be made up of the left over pieces after cutting out the four sides.


I chose to put the lotus flower motif on each side of the pyramid. This motif was digitised on my machine software and then sent to the machine and stitched out. They were then outlined with couched Japanese gold thread and gold purl.


Next I cut the lining from some thin beige felt. I made a stamp of the lotus flower and stamped a flower on each of the felt triangles and in each corner of the square base. They were then outlined with free machining.
I satin stitched the face and the lining together leaving one side open. I cut card and inserted it in the open side then satin stitched it closed. Using a right and left buttonhole stitch I stitched the triangles to the square base.


I stitched gold faceted beads to the top of each side - three with stems and one with a loop to loop and fasten the other three beads. Tiny gold beads were stitched at intervals around all the sides.


The gap between two of the sides was caused by the digitised stitching pulling the fabric. I didn't have the tension right. The other three joins are fine.

I am entertaining my grandson for a couple of weeks - it is their delayed Easter break - so blogging will be somewhat reduced until he returns to school.

Thursday 3 April 2008

Gold cuff

The magazine Design-IT arrived today with one of my pieces on the front and the article for it inside. Nice start to the day.

I made two postcards yesterday to send to friends - they were copies of one of my mini panels - that's the only way I can part with my work - hope they don't mind.

My OH brought a bag full of books home from the camera club last night. The wife of one of the members died and he sent me her embroidery books because he knew I did embroidery. Need to find a home for most of them as some are repeats or not my field. It was a kind gesture.

I keep getting distracted by a pair of Dunnock collecting moss to build a nest in the hedge just outside the window. They are my favourite bird. They have a beautiful song - similar but much sweeter than the blackbird.

Now for a little workshop.


I have been making some jewellery using the Ancient Egyptians as the design source to add to the project.
Most illustrations of the Egyptians show them wearing broad wrist bands so I decided to make one using fabric and fibres.

First I made a sandwich of sheer fabrics with a filling of dyed synthetic fibres.

This was pinned to soluble fabric stretched in a frame.


I used spirals and a simple flower which were used by them for decoration.
I drew the design on the soluble fabric so had to work from the back. I couched gold twist following the design.
Once the design was applied I pulled some cord through a length of gold Rowan knitted tube yarn to make it solid. Then I used a zig zag machine stitch to couch the gold yarn in rows along the top and bottom. I had to unpick and restitch part of the top two rows to smooth then out. You can probably see where that was as I took the photo before I altered it.
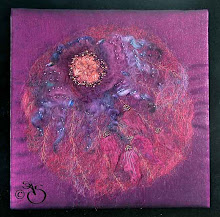
Once the stitching was complete it was removed from the soluble and the surplus fabric cut away using a soldering iron to seal the edges.

Loops of gold covered elastic and two gold beads were used for fasteners.


Simple to make, comfortable to wear and washable!