This will be the last post for 2013. As I said at the end of my
last post, I still had a few serendipity pieces to post. A few is just
that – three of them.

This started out as a piece of brown paper. I used it to wipe excess paint from any brushes before washing them. The colour scheme and knowing when it is complete gets easier the more you do. The colours of this piece of serendipity reminded me of some metal shim which had been printed with Lazertran and baked to fuse the two. I embossed the surface, picking out the slightly abstract design. I used a piece of card and cut out two windows slightly smaller than the shim. I covered the card with the serendipity paper. The printed shim was placed behind the windows and held in place by gold metallic knitted ribbon and machined to the surface using a zig zag machine stitch and gold thread. I proud mounted it onto green card.
The next serendipity piece is an open box.

The paper for this piece was hand-made paper so it had a textured surface. It was large enough to make four sides to an open box. I used another piece of Lazertran printed metal shim. I cut it into four pieces and secured each piece behind a window cut in each side of the box. Each window was in a different quarter of each side. The sides were lined with black felt and joined with a machined zigzag stitch.
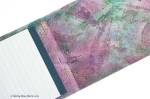
The final serendipity piece is a book mark.

I used a small piece of serendipity hand-made paper and applied it to a piece of card cut into the shape and size of a book mark. I stitched a piece of gold braid down the centre and some matching eyelash thread around the sedges.
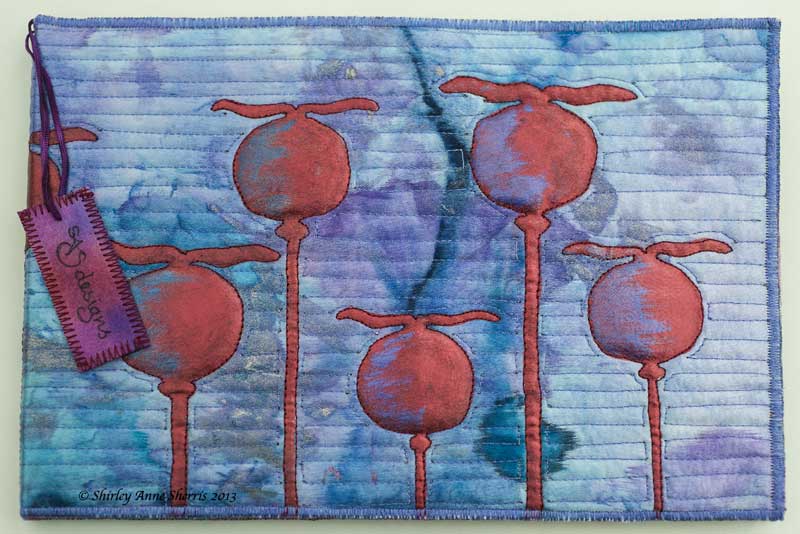
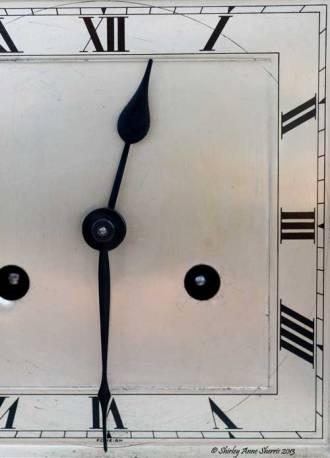
Having used up quite a bit of my serendipity paper, I turned back to my art quilts. I have a large number of them finished now. the first one I am posting began as the image of a clock which had belonged to my mother-in-law. The image had been taken as part of my photographic file on time pieces which became an AV. As is my style, it was only part of the face which I called ‘Half Time’.
I put this into Photoshop and applied a filter which gave me colours which inspired me to use for an art quilt.

I printed this design onto white cotton. I used both free machining and straight stitch to quilt the piece.

Once the stitching was complete I used metallic paints over parts of the surface to add to the effect.
The next art quilt began as an image taken at a mining museum up in the Durham Dales. I love to photograph all things rusty. They have such wonderful colours and textures. This image was of a pile of old rusty wheels.

Once again I applied a filter in Photoshop and loved the colours it produced.

This was printed onto white cotton then free machined. Once the machining was complete I dry brushed metallic paint over the surface.

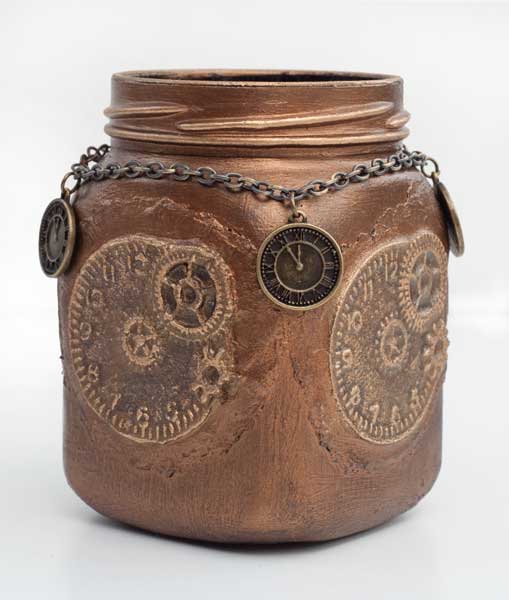
The next art quilt began as a macro image of the workings of an old battered clock.

Once again I applied a filter to create a pleasing colour scheme.

This was printed on white cotton but as you will see in all previous prints, the result of the printing onto cotton reduces the impact of the colours from those on screen even though I always increase the saturation greatly to compensate. I have, in the past managed to over print to get a stronger colour finish. To do this, it is important to get the printed cotton in exactly the right place and ‘fool’ the printer to accept it. The printer will reject an input which is already printed – clever huh? I have developed a way to fool the printer. Occasionally, the feed is not always perfect and so the second print is slightly offset giving a ghost print. This is what happened this time. So…. I decided to print another one with just one print.

As you can see, the colours are a bit washed out, but I still stitched the quilt and added some metallic paint to the surface. However, I could not let the other printed quilt not be used, so I decided to free machine it anyway. This was a difficult task as I had to find and define which lines I was stitching. When it was complete and I had applied the paint, unexpectedly, I preferred this quilt.

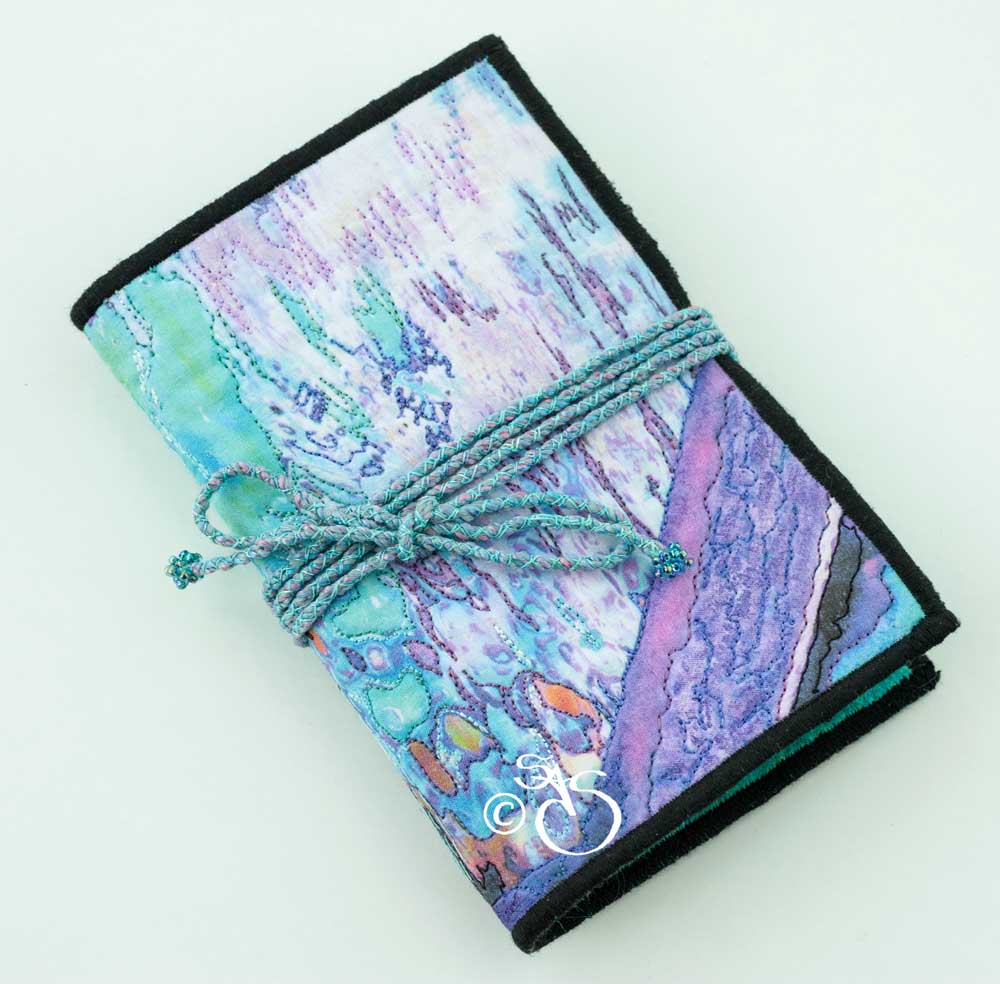
The next art quilt began as an image of a laburnum archway at Newby Hall gardens. It was in full bloom and looking beautiful.

I used the filter ‘cut out’ on the image then I selected different parts of the image and duplicated them. I created a composite using these images.I had a lot of small images of different sizes and shapes. Each of them was printed onto white cotton. Each of them was free machined. When they were complete the were assembled into the final composite and stitched together.
I applied some paint onto the surface to add effect.

This is a close up of the final art quilt.
The final art quilt for this post is one which I have posted before. It was a black and white zentangle quilt with black zentangles on the white squares. It has been hung in my workroom for quite some time and I had always wanted to fill the black squares with white zentangles but wasn’t sure about it. Eventually, as I had used the time sitting on a long haul flight to create another eight designs, I decided I should use them so I free machined these designs in white thread on the black squares. I am glad that I did.

So, that is it for this post and for this year. There is still a big pile of finished art quilts to be posted but they will be posted next year in 2014. Doesn’t time fly?????
Here’s wishing everyone an enjoyable, creative 2014.
Cheers
SAS
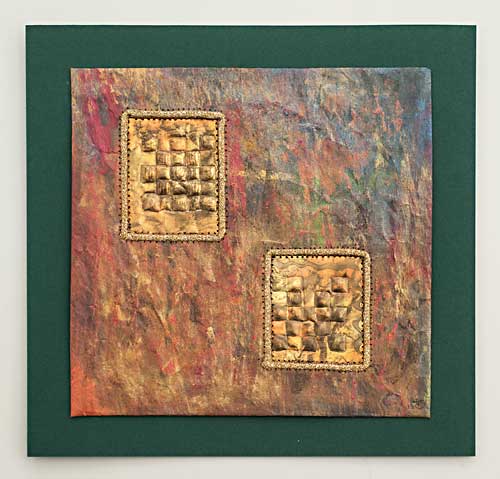
This started out as a piece of brown paper. I used it to wipe excess paint from any brushes before washing them. The colour scheme and knowing when it is complete gets easier the more you do. The colours of this piece of serendipity reminded me of some metal shim which had been printed with Lazertran and baked to fuse the two. I embossed the surface, picking out the slightly abstract design. I used a piece of card and cut out two windows slightly smaller than the shim. I covered the card with the serendipity paper. The printed shim was placed behind the windows and held in place by gold metallic knitted ribbon and machined to the surface using a zig zag machine stitch and gold thread. I proud mounted it onto green card.
The next serendipity piece is an open box.

The paper for this piece was hand-made paper so it had a textured surface. It was large enough to make four sides to an open box. I used another piece of Lazertran printed metal shim. I cut it into four pieces and secured each piece behind a window cut in each side of the box. Each window was in a different quarter of each side. The sides were lined with black felt and joined with a machined zigzag stitch.
The final serendipity piece is a book mark.

I used a small piece of serendipity hand-made paper and applied it to a piece of card cut into the shape and size of a book mark. I stitched a piece of gold braid down the centre and some matching eyelash thread around the sedges.
Having used up quite a bit of my serendipity paper, I turned back to my art quilts. I have a large number of them finished now. the first one I am posting began as the image of a clock which had belonged to my mother-in-law. The image had been taken as part of my photographic file on time pieces which became an AV. As is my style, it was only part of the face which I called ‘Half Time’.

I put this into Photoshop and applied a filter which gave me colours which inspired me to use for an art quilt.

I printed this design onto white cotton. I used both free machining and straight stitch to quilt the piece.
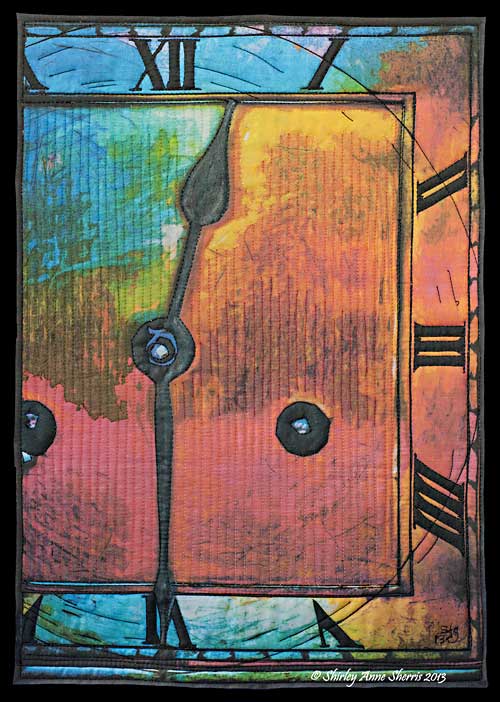
Once the stitching was complete I used metallic paints over parts of the surface to add to the effect.
The next art quilt began as an image taken at a mining museum up in the Durham Dales. I love to photograph all things rusty. They have such wonderful colours and textures. This image was of a pile of old rusty wheels.

Once again I applied a filter in Photoshop and loved the colours it produced.

This was printed onto white cotton then free machined. Once the machining was complete I dry brushed metallic paint over the surface.

The next art quilt began as a macro image of the workings of an old battered clock.

Once again I applied a filter to create a pleasing colour scheme.

This was printed on white cotton but as you will see in all previous prints, the result of the printing onto cotton reduces the impact of the colours from those on screen even though I always increase the saturation greatly to compensate. I have, in the past managed to over print to get a stronger colour finish. To do this, it is important to get the printed cotton in exactly the right place and ‘fool’ the printer to accept it. The printer will reject an input which is already printed – clever huh? I have developed a way to fool the printer. Occasionally, the feed is not always perfect and so the second print is slightly offset giving a ghost print. This is what happened this time. So…. I decided to print another one with just one print.

As you can see, the colours are a bit washed out, but I still stitched the quilt and added some metallic paint to the surface. However, I could not let the other printed quilt not be used, so I decided to free machine it anyway. This was a difficult task as I had to find and define which lines I was stitching. When it was complete and I had applied the paint, unexpectedly, I preferred this quilt.

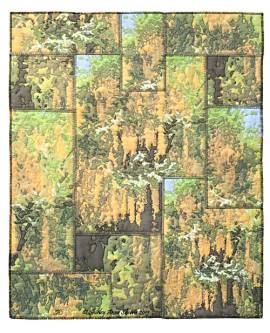
The next art quilt began as an image of a laburnum archway at Newby Hall gardens. It was in full bloom and looking beautiful.

I used the filter ‘cut out’ on the image then I selected different parts of the image and duplicated them. I created a composite using these images.I had a lot of small images of different sizes and shapes. Each of them was printed onto white cotton. Each of them was free machined. When they were complete the were assembled into the final composite and stitched together.

I applied some paint onto the surface to add effect.

This is a close up of the final art quilt.
The final art quilt for this post is one which I have posted before. It was a black and white zentangle quilt with black zentangles on the white squares. It has been hung in my workroom for quite some time and I had always wanted to fill the black squares with white zentangles but wasn’t sure about it. Eventually, as I had used the time sitting on a long haul flight to create another eight designs, I decided I should use them so I free machined these designs in white thread on the black squares. I am glad that I did.

So, that is it for this post and for this year. There is still a big pile of finished art quilts to be posted but they will be posted next year in 2014. Doesn’t time fly?????
Here’s wishing everyone an enjoyable, creative 2014.
Cheers
SAS