Saturday, 27 December 2008

SAGE, music and metal

Christmas is over although it won't seem a year before it is here again! I bought myself a couple of books to add to my textile, fibre and embroidery library. My daughter managed to grab one of them to give me for Christmas - she likes to give me something she knows I want - so I didn't get a chance to look at it until Christmas day. Really liked it and would recommend it - The Art of Stitching on Metal by Ann Parr. I have always used metals in my work - even given a workshop on its use in textile and embroidery - but this book is so full of ideas all in one book it is a very useful reference of techniques and samples.

The other book was the latest by Sherrill Kahn. It is a very thin book - only 28 pages - a bit disappointing really. I do love her fabulous use of colour and if it wasn't for that I would have felt very disappointed indeed. However, I never tire of looking at her work so it is more of that at least.

I have been busy creating all through Christmas even on Christmas day until the family arrived and I continued after they left so I have a lot of unshown work.

One piece I made at the same time as I was creating the Rievaulx Abbey piece was a bag. It didn't turn out as I had planned because I tried to use two metallic threads in the needle together and it wasn't a complete success. I have done this before with other threads and it worked fine but metallics are difficult to use at the best of time so I wasn't too surprised at the result. (Didn't stop me trying though). It did mean that I had to cut back on what I had planned for the bag. I used a dark green velour which is another difficult material to work with. (Talk about making life difficult for myself!!) I drew the music and scanned it into my digitising software. I had planned to use an actual piece of music but it would have taken too long for a one off digitise so I simply repeated the same line three times. I also suffered the results of cutting and using velour - tiny dark green bits everywhere and on a cream carpet too. Another reason to cut back on what I had planned. One of those things you wished you hadn't started!! I covered the lining with lots of musical notations and on the shoulders of the handle which don't show but here is the finished bag.

Another piece I made was based on a photograph I took of some purple sage in my garden.


I put it into photoshop and played with the image creating a special effect composite image which I have added to my digital imaging file.


This was to be the basis of the design. I sized it to A3 and made a black and white pattern for it thinking I would create a painted and quilted piece. Then I changed my mind and decided to create something a bit more stylised instead. I masked off the black fabric background and left some strips to spray with Moon shadow mist - mystic malachite. It works wonderfully on dark colours and is as far as I can see is a spray form of Golden's interference oxide green(BS). Next I sorted lots of green textured threads and pinned them onto the sprayed background. These were to be the stalks.


They were machined down with decorative machine stitching. Next I needed to create the flowers. These were made using lutrador and dry brush painting it lilac. They were free machined and cut out and then couched over the stalks. The leaves were made using black scrim brushed with the Golden interference oxide green paint - a perfect match to the sprayed background. (It is times like this which justify having such a huge stash of materials!)
A very different piece to the one I first envisaged. Now I must get on with a new piece I have planned.
The next blog will probably be in the new year 2009. Where has 2008 gone?? Can't believe a whole year has passed so quickly.
Here's wishing you all a happy new year and look forward to reading all your blogs next year.
Cheers everyone.

Friday, 19 December 2008

Ruined 'Paper' Arches

This will probably be the last post until after Christmas. My OH and I went to visit family today to deliver cards and presents.

It was my grandson's 9th birthday at the weekend. He was so excited about this birthday for some reason he couldn't get to sleep. He went bounding into his parents bedroom at 1am and shouted "Well, what do you say to the birthday boy then?" They were waiting for him to go to sleep so that they could sneak his present into his playroom ready for the next morning. Then he set his alarm clock so that he would wake up early......

It reminded me of someone else who did that!! a long time ago!

Apart from all the seasonal preparations, of which I do as little as possible, I have still been able to do some creative work of the textile variety or should I say of the 'paper' variety.

Earlier this year we went to Rievaulx Abbey to do some photography on the abbey ruins. Two of the many photos I took were of some ruined arches with beautiful carving still very evident.


I decided to represent the carved patterns with 'paper' casts.

When I was in a well known DIY store I found some lengths of wood decorative mouldings with carved patterns on them. I bought several of them with an eye to using them for moulding the patterns. Now was the time to put that idea to the test. I used the same method as for the shells in the previous post. I covered about 15cm of the moulding with wet 'loo' paper and a stiffening agent. When there were enough layers I gave it a final coat of stiffening agent and left it to dry.

I wanted some different patterns and sizes in these casts so I made some card moulds of smaller squares and triangles and still using the 'loo' paper method, made more lengths of moulded patterns.

Next I had to prepare the background fabric. I chose one of my favourite fabrics - a sandy beige simulated suede. I mixed some acrylic paint and sponged the shape of the two ruined columns using a cut paper template to obtain the shape of the side of the column. After several different layers of colour and sponging, I had the background ready for the patterned moulds.

When the paper moulds were dry, they were removed from the card and wood, painted and sponged to match the background. Some were cut in order to create the curves. Then they were stitched in place with couched threads and cords and free machined stitching. I left the loose thread ends as I quite liked the effect. I can always cut them off later if I change my mind.

The piece will be mounted on a frame when I find the time to make it.


So another piece completed. I have completed four others but they will have to wait until the next post.

Seasons greetings to all.

Cheers

Monday, 8 December 2008

Rescued Foxgloves

I have been busy with new pieces but some of them have not gone too well so I will not b posting them. I do have one, however, which I almost - yes almost- binned but being someone who can't bear waste or giving up I did have a go at a rescue and it is now acceptable!!

I began with a photograph I took of some foxgloves.

I opened this image in Photoshop and played with some of the special effects to create this image.

I decided to print this image onto coated Habutai silk and then quilt it which I did. The textured background on this image didn't show on the printed silk so when the quiting was finished I thought that I would gently catch the ridges of the quilted background with gold treasure gold. It looked terrible - as though it was dirty. I hated it. I tried something else. Sponging over it with some metallic pink paint but I didn't like that either. Then I started to sponge some green over that to create a two tone sponging effect but didn't like that either.

So I put it to one side not wanting to succumb to putting it the bin. I kept having a look at it until eventually I decided to use one of Val Campbell-Harding's solutions. If you don't like it cut it up and reuse it. I didn't want to cut it up completely so instead I cut out the foxgloves from the background and edged it with satin stitch using green rayon thread. I tried laying it on different backgrounds until I found one which looked acceptable. It was some hand made paper which had different coloured threads embedded into it some of which complemented the green edging.

It needed something else. I decided to use text and machined out the name of the flower in a lovely cursive font stitched onto a white sheer. This was stitched onto the background as was the quilted foxglove - the finished piece

I felt much better now that I had rescued the piece. I have even kept the cut away background - you just never know!!

I also managed to get a few photographs in the garden in spite of the dreadful weather. The winter jasmine is blooming at the moment. here is one of the tiny delicate but obviously very robust flowers which survives all the snow and frost of late.


I am working on another piece now which- thank goodness- is looking good -so far!! So hopefully it will appear on the next post!!

Cheers for now everyone.


Wednesday, 26 November 2008

Paper shells and Doodle birds!!

Yesterday, I went to watch my grandson in his school production. It was his first speaking part and he was so nervous. Apparently all the boys try to sing and speak badly so that they will not be chosen for parts. it didn't work but at least there were only a few lines for him. He says he prefers just to be in the choir doing the singing. So, no treading the boards for him then!! It was lovely to see his little face light up when he saw us in the audience and he gave us a sneaky wave. He had it to do again in the evening when his parents were in the audience. Not so nervous the second time round apparently.

Now.....

As I mentioned in my last post, when I took the paper shells out of the moulds they had turned out really well. All the detail I'd hoped for was there. They were separated and then I gave them a coat of matt varnish so that the paint wouldn't soak into the paper. I painted them matching the colours loosely to my digitised image. They were given a final coat of varnish.


Next I had to decide on a background. I chose a white polyester velvet which I sponged with the colours of the digital image background. This was overlaid with a turquoise sheer also sponged with metallic paint and then sprinkled with embossing powders. The embossing powders were heated and set and the paper shells positioned. The background fabric was touched to create the effect of waves of wet sand. This was free machined to hold it in place. The shells too were free machined in place.

I added swathes of beads along the ripple lines and some dyed curly mohair to represent the seaweed. It was cut to size and satin stitch edged.


An unconventional image of shells on the beach but the colours worked well and I do like to be different!! Unfortunately, it hasn't photographed well as there are too many metallic and sheer surfaces and the shells are three dimensional.

While I was working on this piece I was also experimenting and playing with another piece. I have always been a 'doodler'. I cannot hold a pencil without doodling. In fact, when I was at college, the art students would pass me pieces of paper, even pads, to doodle on during lectures. Then they would take them and use the designs. It is a compulsive thing and I can't not do it. I am banned from handling some papers and magazines.

I bought a new machine earlier this year and with it came software which had sketch and pattern designer modules. I have been digitising for years using the earlier version of this software but now I had the bits I needed to do what I had always planned to do. As always, to learn how to use something, I plan a piece so that I have to learn what I need to in order to fulfil my ideas.

First I had to draw a design which was this bird.


The idea was to fill every space with a different pattern - doodles. In the software there are some built in patterns which I used and I designed some patterns myself as part of the learning curve. The drawing was loaded into the software and the spaces were filled with patterns. As with all digitising, you have to work in a logical way so as not to create long jumps from area to area.

When the digitising was complete and the final painstaking editing done, it was time to stitch it out. Ooops!! I had created it to be A4 size but my largest hoop would not take the design so..... I treat myself to a bigger grand hoop. It also means that I can now go the step further with some free hand doodling next time.

I chose an ivory Thai silk as the background and mounted it in the hoop with a stabilising fabric. Then I had to learn how to get the design from the computer and into the machine. I had to read the manual this time - not something I a do as a rule. Once the machine was ready I chose the threads - mainly rayons and metallics - and stitched out the design. lots of changing of threads and rethreading the machine but I have never minded that. The finished result was what I had in mind.


Now I plan to really doodle and will be using the sketch module to create some abstract doodles so watch this space.

While I have been creating these two pieces, the second draft layout for my book arrived from the publisher so I have been reading that through and making the final edits and amendments. It is ready to go back. The next draft to arrive will be how it will be going to the printers. The end product is in sight.

I think that's it for now so cheers everyone.

Monday, 17 November 2008

Paper shells!!!

Having flirted with peacocks and the work of Aubrey Beardsley it is time for a new subject. This time it is to be a piece using one of my own photographs.

I had a photo shoot at Whitby and Sands End and this is one of the photos taken down on the beach at Sands End.

shells-seaweed-original

As usual, I put the photo into Photoshop and played with it, coming up with this effect which I quite liked - shells with a difference.

shells-seaweed

I saw the piece as three dimensional which meant that I needed to make some shells which could be applied and stitched to the surface. This would have to be paper in some form. First, I needed to make moulds of shells. I was going to use Forma blocks or clay but then decided to use up the plasticine which my grandson used to play with. I soften up the plasticine and pressed shells I had collected into the plasticine. I put them in the fridge to harden.

shell-molds

There was plenty of detail there so I hoped this would transfer to the paper. I used loo paper. I put layers of paper over the moulds wetting it to dissolve it and pressing it down into the moulds. After a few layers I used some stiffening medium and covered the paper with it followed by more layers of paper and a final coating of stiffening medium. They were left to dry and then into the fridge to harden off again before I separated the paper from the moulds.

paper-prep

I have now separated them and the results are brilliant. Very detailed 3D shells ready to paint and apply to my textile surface. I will post an image of them when I have photographed them. Now to make the background fabric and texture. Hmmm!!!

Yesterday as it was a sunny day for once and not to be missed, my OH and I went down to the river Tees estuary to a place called Paddy's Hole. The Tees estuary is very wide and there are indents along the estuary mouth. They are used by fishermen who have built huts and moor their boats in a little natural harbour. It isn't as pristine and picturesque as it used to be - a sign of the times - which means there are different kinds of photos to be taken. The tide was out so the mud flats were revealed. All the boats were grounded alongside old derelict boats and empty hulls - right up my street. It was midday and the sun was blazing across the water. I chose to set the exposure to make it look as though it was a moonlight shot with lots of silhouettes. It has taken me most of today to process all the photos and I am really pleased I managed to get so many great images. Here is one of them.

paddys-hole-1

And another one.

inner-harbour-sand-banks-2

Now it is time to put some thought into my shell piece so cheers everyone.

Thursday, 13 November 2008

More Peacocks!

It has been a while since my last blog but I have been busy with checking through the first draft of my book which is now complete and has been returned to the publisher and the piece I have been working on has taken a long time too so I didn't really have anything to blog about - textilewise that is. That piece is now compete at least enough to blog about so here goes.

Last year I bought a book from Dover books. It was a book of all of Aubrey Beardsley's illustrations which were on a CD too. He was an illustrator of the 1890's. He was a controversial character and his works vary from the strange and somewhat grotesque to stylised and decorative. I like a lot of his work and ignore the not so nice illustrations.

I quite liked the two illustrations of peacocks and they followed on from my first peacock based piece. They are very stylised and I have interpreted them with art quilting. This is the second quilt.

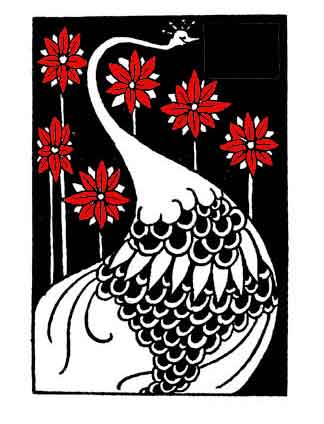
I began with the black and white illustration from the CD.

beardsley-peacock-in-the-farden-immageI put this into Photoshop and applied the filter 'Find Edges' which gave me a pattern. I resized this and printed it out for a pattern to trace. It was to be about 65cm high.

peacocks-on-the-garden-find-edges

I had to make a few edits and fill in the white square at the top. Once that was done I prepared the base fabric. I used a fine white lawn and colour washed it. Then I trraced the design onto the fabric with a soft pencil. This was placed over 2oz wadding and a backing fabric of white polyester cotton.

The design was then developed using a mixture of paint, over painting, sheers, free machine quilting and some final hand stitching. I edged the piece with a rich dark blue satin. I added a few tiny petrol coloured sequins on the peacock combs.

peacocks-in-the-garden

I have made a support rod, painted it metallic blue and dyed some threads to make a hanger and tassels to hang down the sides of the piece.

I had planned to make sheer feathers and layer them over each other to create the tail but having made one I decided against it and painted the tail instead which has worked quite well.

I am still deciding whether or not to add decoratrive quilting to the cloak of the girl.

Close up detail of the tail

Now I am off to finish the hanging and tassels and to plan the next piece so ...

Cheers everyone until the next blog.

Wednesday, 29 October 2008

Two more finished pieces

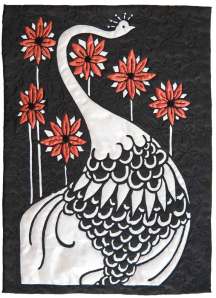
I have completed the Aubrey Beardsley based peacock piece and finally managed to photograph it. I traced the design onto a satin fabric using a white pencil crayon which rubs off when needed. I painted the peacock design with white acrylic paint and the flowers with red metallic paint. I gave the white several coats of paint but was never completely happy with it. However, I continue with the piece. I used a black rayon thread to free machine quilt the peacock and all other white areas. I used a red metallic thread for the red petals.

I was still unhappy with the white painted areas and almost ready to put the piece away and not finish it which isn't me. Then I remembered I had a bottle of pearlised medium and wondered how that would look painted over the white paint. It solved the problem and saved the piece. I was then able to continue to quilt the background and embellish with beads.

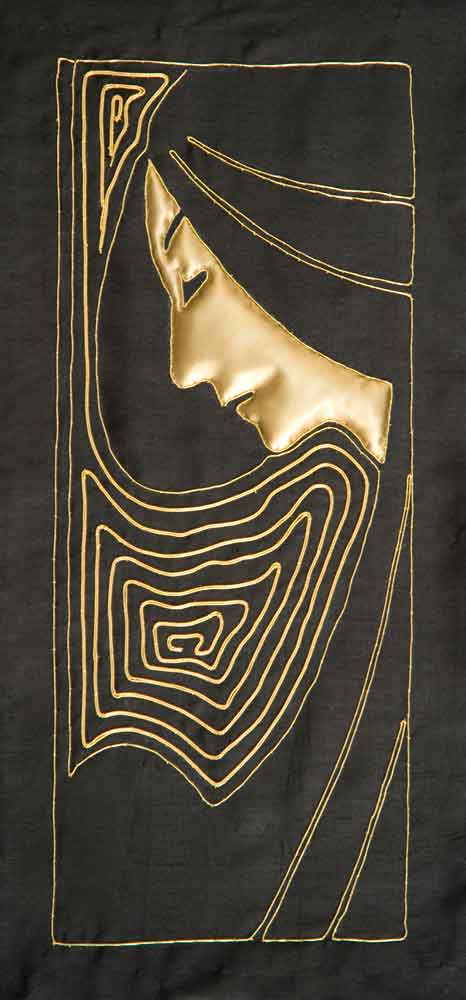
When this was finished I started a new piece. This was another Art Nouveau design. A very simple one which I could see as a goldwork piece. I chose a piece of black Thai silk for the background fabric. The face was created using padded gold synthetic leather. This was outlined with a gold thread. The remainder of the design was created by couching gold threads. Very simple and effective.

I haven't decided how to mount and present this piece as yet. I now have to decide on the next piece but that might be a bit delayed as I have finally received the first draft layouts of my book and have to work my way through it checking and making notes of any changes.

I also have my granson with me for the rest of this week - half term. So not much sewing anyway.

That's all for now.

Cheers everyone

Sunday, 19 October 2008

New printer and peacocks

After much research and deliberation I now have my new printer. It is so good I am rather pleased that my old one gave up on me. The down side is that I had just stocked up with several batches of new inks. Fortunately they fit my daughters printer so they will not be wasted. I hate waste of any kind as you will all have gathered from my previous posts.

I have finished the peacock piece I began last week.

The girl was created by couching copper fingering on black Thai silk. I bought the silk many years ago while on holiday in Thailand. I made my daughter a suit with it and it has returned to me me for recycling. I had to unpick the skirt for this piece. The rest is now ready for future pieces.

I have already begun the next piece. It is a peacock design by Aubrey Beardsley who was a popular turn of the century artist who transformed the art of illustration. . I don't like all of his work in fact some of it is quite grotesque but this is one which I do like. I was having problems deciding on a colour scheme but with the help and suggestions from Lynda I have finally made a decision. It has already been drawn and painted onto black satin and is ready for stitching.

It would have been finished but I have had my grandson staying and I have also been preparing for a workshop I am giving next week. We have also had a day out at Thorpe Perrow arboretum. It was a glorious day with clear blue skies and warm sunshine. It was still wet underfoot so we had to use poly bags to kneel on while taking some of the photos. I took so many that it has taken two days to process them all.

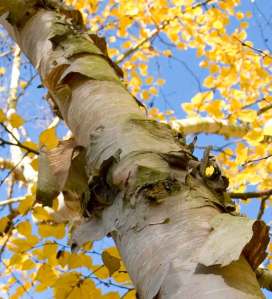
The bark on this tree was peeling off but it was too high to reach. It would be interesting to use it on a piece!!

This was the bark at the lower level - a useful piece of texture.

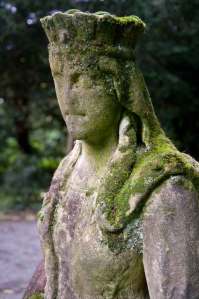
I have been to this arboretum several time but can't really remember these stone statues which were covered in moss and 'grunge'. Couldn't resist taking photos of them. They were apparently some king and queen according to the owner. I was more interested in the textures and colours on the stone much to his puzzlement.

I quite liked this shield which was on one of the stone angels. I can see a piece in this.

I have a day to myself today (Sunday) as my OH is off to act as support crew for a rally team he gives advice to. Hoping to get a lot done so I had better get to bed.

Cheers for now everyone.

Sunday, 12 October 2008

Printers!!!

My general A4 printer refused to cooperate last week. It printed out one piece then when I asked it to do a head clean, I got a couple of flashing lights and messages telling me it needed service and there was a communication problem. I have done everything I know to fix it but no go so I think I will have to get a new one. So.. I have spent the last few days sourcing, comparing and pricing printers until my head spun. i think I have finally made a decision and will get it next week. Decided to change make this time. Grrrr.

We had a nice day last week and we went out to the town's park to do some photography. It received grants and has gone through a big regeneration - not before time. It had been allowed to deteriorate and was well vandalised. It is looking good now so hopefully they can prevent those vandals spoiling it and to leave it alone.

We took a number of photos and here is the first one which shows just how the trees are turning.

There was a Mahonia bush which had beautiful autumn colours on it which was rather surprising as I have a mahonia and they are evergreen and mine stays the same dark green all year round. I have never seen one with these colours.

They have built new play and adventure play areas for young children and a separate one for teenagers - a good idea. There were some strong colours and shapes in the teenage area which was empty so we felt OK to do photography in there. We didn't take any in the young children's playground as it can be dodgy now to take photos with young children around.

This climbing panel was taken on its side to give a diagonal pattern.

Now onto some textile work.

I forgot to post one of the art quilts I finished a couple of weeks ago so I will post it now. It is a representation af a well known painting of a Geisha with a Fan. I printed it on silk , added embellishment and stitching to some surface areas before I quilted the whole piece.

This is the original picture of the Geisha with a Fan and this is how my quilt looks.

The hair and hair decoration were stitched first as you can see in this close up.

I also embroidered the design on the fan.

It turned out much nicer than I expected it to.

As I mentioned in my last post, I am creating another Art Nouveau piece. I said I had decided on the technique for the peacock feather and it took a couple of days to work it. I couldn't stitch it on an evening as the flare back from the metallic surface made it too difficult to see and was very tiring so I had to wait for daylight. I am now working on the lady and the background. here is the finished feather. Apologies for the poor quality of the photo. I took it in a hurry and bad light but it still shows the effect.

I gave a talk about my Egyptian project yesterday to a local embroidery group. I think I talked too much and some of the ladies missed their cup of tea as they had to rush off. Apologies to any that may read this blog.

Waiting in anticipation for the first draft of my book to arrive from the publisher. It is due in the next few days. I was told Monday 13th but.... post being post.

I will get back to the AN lady now - so cheers everyone until my next post.

Tuesday, 7 October 2008

Disappointing show

Well I went to the Fashion & Embroidery Show with great expectations especially as it had improved last year over the previous one.

There was a lot of very beautiful and high standard work to see from groups and individuals but sadly there were very few traders. I have never seen so few at a show. Consequently I didn't spend as much as I might have done with more to choose from.

I bought some transfer paints, more medium for making silk paper/fabric, a couple of jars of Lumiere paints, some gold and silver wax crayons to grate and melt, a few reels of thread and metallic twist and a few half meters of metallic fabrics which I couldn't resist. This small amount wasn't exactly cheap but no where near what i usually spend at a show. Unfortunately Ally Pally is too far from me and would mean overnight stays and I would prefer to spend that money on 'stash' so will not be going.

I am, therefore, a bit disappointed and down. Should not have built up my expectations so high. Came away early and got on with my own work.

I did meet up with a former coleague who had been staring at my OH who asked me if I knew this person. When I looked, I recognised her and we had a good chat and looked at each others pictures of grandchildren. Ahhh!!! Her friend, as it turned out, was going to the cub camp that evening which is where my grandson and his parents were going too for a cub camp weekend. Small world.

I finished the art quilt I was on with but not sure about it. (Twice now, although when a friend saw the last one I wasn't sure about, she liked it so.. but it didn't photograph well either so will not be posting it)

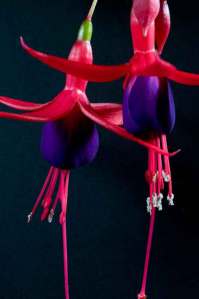
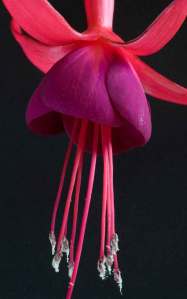
Instead I am posting a couple of the photographs I took of the fuchsias I did a study on last week.

I quite like them against a black background - more moody.

It did make me use a tripod - the one we dont't take with us because it is so heavy BUT it is fabulous for indoor work and I loved it so will use it all the time indoors and probably the garden although with this latest camera I hardly ever need to use a tripod even in the dark. A macro study is a bit different.

I am now in the process of creating a new piece. It is based on another Art Nouveau design and I think will be a layered piece with different techniques for each layer. I have decided on the peacock feather but not the rest as yet.


So on with the feather...

Cheers everyone.

Tuesday, 30 September 2008

Dizzy heights!!

Today it is the usual dull miserable rainy day we have become accustomed to. However a couple of days ago it was warm and sunny and the gable end wall of our bungalow was ablaze with the most incredible colour of the ivy. A photo opportunity not to be missed before a gale comes along and blows it all away. The garden is already covered with these red leaves which I don’t mind at all.

The best of the colour was up high on the gable which meant a climb up the ladder onto the garage roof!!! Now there was a time when that would have not been a problem but as I have aged - (and I aged another year yesterday as my grandson reminded me when he made me a birthday card with my age boldly on centre front) - I find heights bother me more.

My OH put up the ladder and held it while I climbed onto the roof. He then handed me the camera and I took several photos of the ivy. Going up wasn’t too bad. Coming down was not so easy. It is getting the foot round and onto the first rung that is the worst. Can’t believe how I used to go up and down ladders and hang from guttering while painting dorma windows etc and now!!!! However, I did it in spite of how comical I must have looked to the neighbours. It was worth it - just look at these colours.

The colours went from these

to these_

We have a spoil pipe up this wall but it is almost invisible behind the ivy. just the odd bit of pipe still showing. Funny, but I quite like this photo. Eventually, this means - no more painting.

I have been busy with some drawings for the publisher but I have also managed to be creative. I have stitched three more art quilts.

The first one uses the photograph I took of a Victorian wrought iron staircase at the Darlington railway museum. I put a filter onto it in Photoshop - then I used Find edges - and came up with a design I could use. I printed this in A3 size onto coated silk using pigment inks. Then I free machine quilted it using several different coloured threads. It is edged with black silk fabric.

The next piece used a design I had used before but this time I printed it onto coated silk and then free machine quilted it. It is smaller than the first one which I silk painted and traced before stitching. It also keeps the filled black design. I had problems finding a way to edge the piece as I couldn’t find a suitable colour which complemented all of it. Black dulled the piece and other colours didn’t suit all the other colours in the piece so I turned in the edges and stitched them with invisible thread as no one colour thread would do the job.

The third piece was originally a photograph of lichen on the stone wall of the North Yorks moors. I put it into Photoshop and again, as I always do, played with it. I used a special effect filter which gave a crazy paved look. I decided to use this as an art quilt. I printed it it in A4 size onto coated silk. Then I free machine quilted it using a number of metallic threads defined by the colours on the print - black metallic on black outlines, and similarly with silver, gold and copper metallic threads. I edged it with a brown and gold fabric which I found in my ’stash’.

I am, at present, nearing the end of the next one as well as preparing for another piece. I couldn’t decide about a background fabric for it so I have been crazy dying a piece of silk which is drying at the moment. Then I can iron it for the next piece.

Looking forward to Friday as I am going to the Fashion and Embroidery show at Harrogate.. It isn't the ‘crème de la crème’ of shows it used to be when it was run by Sarah McPherson under Madeira’s umbrella but it has improved over the last two years. I have a small shopping list and money given to me for my birthday to spend at the show. I will undoubtedly buy things I don’t need but can’t resist - oooooh can’t wait.

So cheers everyone