Saturday, 25 April 2009

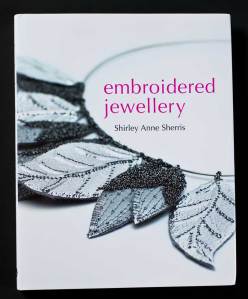
'Embroidered jewellery' has arrived!

I have just received an advanced copy of my book hot off the press.

printed-embroidered-jewellery-book

It is due for release on 3rd August (according to Amazon).

It was really nice being able to handle it and flick through the pages as you do at the shows.

I do hope it does well and embroiderers like it.

Cheers everyone

Tuesday, 21 April 2009

Lace versatility and a walk in through the woods

Finally I now have Windows installed within my Mac so I can now use all the software which isn't compatible with Mac. My embroidery machine software isn't compatible with the Mas so needs Windows installed to run. I installed all the embroidery machine software and connected everything - switched on the machine and then opened the module which enables the computer to talk to the machine. They weren't talking! Horror, fear, panic, despair, sinking feeling in the stomach. After much checking and even swapping machines over with no success, I decided to contact a friend for help and even put out a plea for help on the Pfaffie site. I lay pondering in bed instead of sleeping - hate going to bed with a problem unsolved - and as a result decided to try one of the installations on the disc which I had ignored as I didn't think it was relevant. The next morning, I took out the start up manual and the disc and yes, I should have installed this driver as per the manual. Once installed, the machine and computer were talking. Moral - read the instructions and follow them. I was thrown because I had been connected by serial port previously and so didn't need the driver but now I am connected by USB I needed to install the driver. Grrrrr. I had to then quickly get in touch and cancel my requests for help and own up to my mistake. I have now transferred some machine patterns over to the machine which I have used on one of the pieces in this blog. Phew!!! All back to normal now thank goodness.

Following on from the butterfly book I went in search of some more suitable lace to use for relief work - preferably offcuts or samples. I found the kind of lace I wanted on the web listed as Venice lace much of which comes as motifs - the kind that is applied onto wedding dresses - and is of course, expensive. I tried to find heavy lace net curtaining which is where the butterflies came from but again nothing. It must be out of fashion now. I did find one suitable heavy lace curtain in a local curtain warehouse - the shallow kind which hangs from poles half way up the window. I bought a metre of this and have used it to make a number of pieces. I will have to resort to designing and digitising my own heavy reliefs.

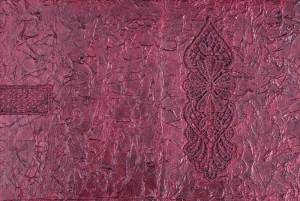
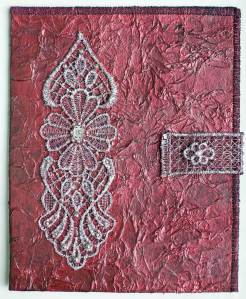
The first piece I made was a notelet folder. I used the same technique as for the butterfly book cover - pelmet Vilene and crumpled tissue paper. Again I painted the tissue surface with black gesso. Next I cut one of the motifs from the curtain and stained it with a burgundy Starburst stain. This was stitched onto the gessoed surface and then I painted the whole surface with a coat of burgundy metallic acrylic paint. When this was dry I brushed a light coat of black orchid silver Starburst Stain which toned down the shine slightly.

painted-surface

This net curtain had lace loops for hanging so I used one of these loops for the fastener of the folder. I used a silver leafing pen to highlight the relief of the motif and the fastener. The edges were over sewn, the bottom 5cms were turned up to create the note holder and stitched in place. I used a black press stud to fasten.

lace-motif-notelet-folder-complete

A very easy and simple folder.

The next piece I made used the bottom half of one full panel of the lace. I stitched it to some stabilising backing first. I stained it with some dye, then painted it while wet so that the different colours would blend. It was highlighted with a gold leafing pen and finally embellished with sequins and beads.

beaded-lace-motif-hanging

The next piece was very much a 'go with the flow'. The size was determined by the size of the piece of calico I had. I cut three of the motif and arranged them on the piece of calico. Not wanting to waste the squared part of the net (see above) , I cut them up and arranged them on the calico. A design was beginning to emerge. Now I needed to colour and texture the background calico. I decided to use painted Bondaweb. I chose my colour scheme and with the help of my grandson, wetted then painted the Bondaweb. I had a narrow length of Bondaweb which I wanted to use up so I used this piece and made up the difference with a newly cut piece from the roll. Only after it was painted did I see that the two pieces were not in the same direction. When Bondaweb is wet and painted it ruckles in the direction of the roll. Th two pieces were not in the same direction so when they were dry, I cut the two pieces in half and rearranged them into a quartered pattern. The Bondaweb was then ironed onto the calico. I arranged all the pieces of cut lace over the surface again and decided it still needed something else. It needed stamping. I sorted out a string stamp I made a few years ago and had still not used.

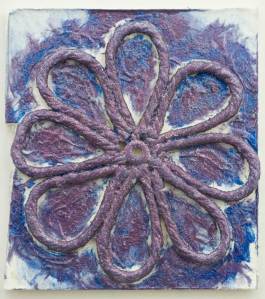
string-flower-stamp

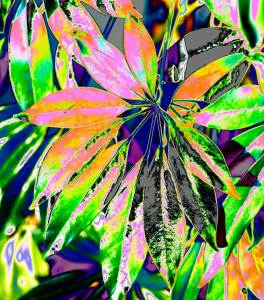
I used the same colours as for the background and stamped the string daisies over the background. Later that night I used this stamp as my image for the day and I played with it in Photoshop and created this digital image. (Two birds with one stone!!!)

106-apr-16th-flowers-to-infinity

Back to the piece.

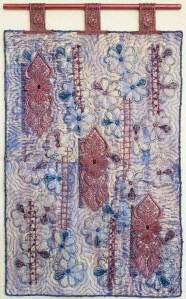
Next I stained and painted all the lace pieces, arranged them onto the backgound and pinned them in place. The ladder pieces were stitched in place first using machine patterns. I cut petal shapes from synthetic web - angel fabric I think it is called - and stitched one petal of each flower. Then I made up a quilt sandwich and free machined the large motifs in place followed by outlining all the flowers. I used dyed and painted baby pasta for the flower centres. I pondered for quite some time about quilting in between the flowers and which colour to use. Eventually I decided to do the quilting.

Not wasting any part of this lace curtaining which wasn't cheap - I stained and painted the off cut zigzag edges and machined them around the edges of the quilt. The loops from the lace were stained and painted and attached to the top edge. Last of all I cut and painted a length of dowel for the hanger.

lace-motif-art-quilt

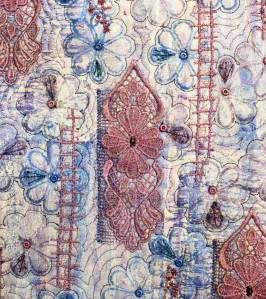
lace-motif-art-quilt-close-up

It looks a bit pink and blue here but it is more burgundy pink, purple and ultra violet. Couldn't get the right light to take the photo. It does look much better in reality. It is about 50 x 30cm.

This is a better representation of the colour palette.

I did complete another piece today but I will keep that for a future blog.

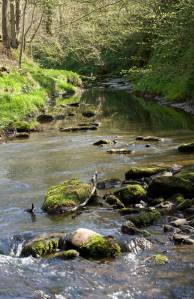
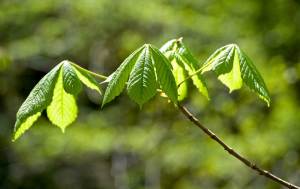
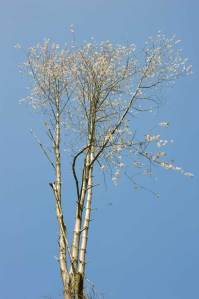
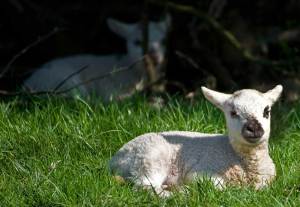
It was the most glorious warm and sunny day today so we went for a walk through Kildale woods and did some photography. I have spent much of this evening processing all the photos we took. Thought I would share a few with everyone.

river-view-1-ken

new-horse-chestnut-leaves1

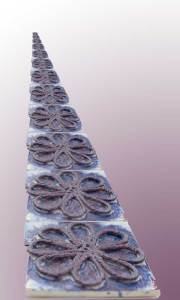
cherry-tree-on-the-horizon

There had been a lot of tree clearance on the hillside but they have left all the cherry trees which were standing on the top of the hill against the blue sky.

lamb-lying-down

Lots of new born lambs around too. Ahhh!!!

I am ready to begin designing some new pieces and I am also looking forward to a delivery of goodies.

So cheers for now everyone.

Tuesday, 7 April 2009

More art quilts a la computer

In my last post I showed how I transformed a desk diary into a note book. Well I am still plodding through the pages painting and doodling out the dates and calendars. I can only do so many pages at a time as I have to wait for the paint and gel pens to dry. Some dry quickly but others take ages so it is going to be a elongated project. My grandson booked the colours for his birthday. I have to use gold to paint out the dates and silver gel pen for the doodle.

While I have been doing this I have also created and completed two more art quilts.

As you know, I use photography and the computer a lot when designing and these two pieces were created initially in the camera and then in the computer.

The first quilt used a photograph which I have already blogged about some time back but here it is again.

splash-of-colour1

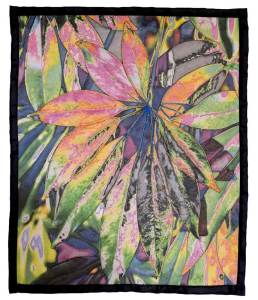
It was a close up photograph of the leaves on one of my house plants. I put it into the computer and played with it. I liked this effect and decided to use it for a quilted piece.

The image was sized to fit onto an A3 sheet of paper. The A3 sheet was to be the carrier for the treated silk onto which I would print the image. After a trial run in greyscale draft print I mounted the silk onto the carrier and printed it using an A3 inkjet printer with a flat feed. I wouldn't attempt to print such large pieces on silk without the flat feed.

When printing onto silk, I always boost the saturation of the colours as they tend to print out paler than you see on screen. However, even with the saturation boost it wasn't as vibrant as I wanted it to be so I positioned the printed silk in exactly the same start position and then - after fooling the printer into thinking it was a clear new piece of paper - I put the silk through again with all my fingers crossed that it would overprint exactly. IT DID!!!!!! and the colours were bright and vibrant just as the screen image.

While the silk was still on the carrier I used metallic acrylic paints and painted and highlighted the main central set of leaves leaving the background unpainted.

The silk was then made up into a quilt sandwich ready to stitch. First I machined around the edges of the painted leaves and down the centre vein of some of them. these leaves were to be left like this so the stood out from the background.

The rest of the image was free machined following the edges of all the different colours. When complete it was edged with black silk. I call it Psychedelic Leaves.

psychedelic-leaves-art-quilt

It is more vibrant than this image shows. Not the best light for photographing unfortunately. And, I should have ironed it too.

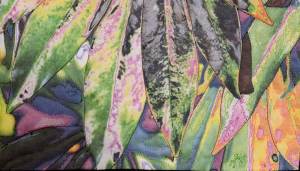
Here is a close up of the stitching.

psychedelic-leaves-art-quilt-close-up

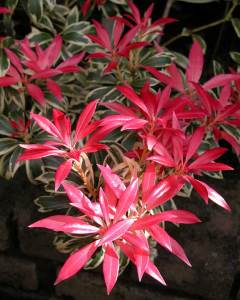
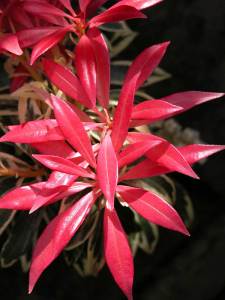
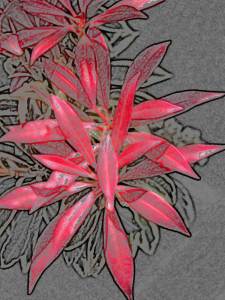
The second quilt was the result of combining two photographs of the Piris in my garden. At this time of the year the new growth is bright scarlet and this one hangs over my front pond.

piris-4

piris-close-up1

I put then into the computer and played with the special effects until I came up with this one which I liked.

piris-close-up-crayon

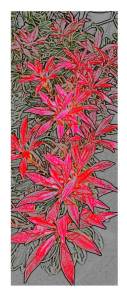
The next job was to select and combine the images into one long one. This image was three images blended together.

piris-design

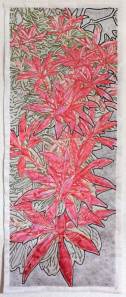
As with the previous quilt, I printed the design onto coated silk, painted the foreground reds and pinks and quilted it leaving the painted leaves unstitched.

piris-art-quilt

This quilt is about 60cm long and 24cm wide.

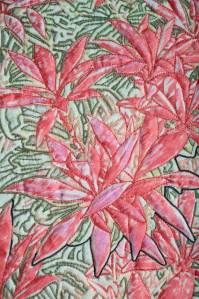
piris-art-quilt-close-up

This is a close up of the stitched surface - a lot of free machining.

Now I am ready to start some new pieces but not sure what yet. I bought a roll of pelmet Vilene a couple of days ago and quite fancy making some more book covers. We shall see.

I managed some gardening yesterday and planted up some tubs. While sitting in the conservatory having a coffee we noticed a little wren pottering around. It disappeared into the hole of the drum we wind the garden hose onto and it didn't come out for some time. Eventually it did come out and pottered around some more and then took some dried bits of grass into the hole. Yes, it is building a nest inside the drum. While it was out I went and took enough of the hose to do the watering off the drum. It will have to stay on the floor until the nesting is over. A Dunnock was also pottering around and the wren gave it short thrift. Very aggressive. The dunnock is bigger than the wren but it still chased it away. Cheeky and brave!

It is the Easter school holidays so I have my grandson for company for a couple of weeks so not sure how much time I will get to sew or paint. We want to do other things while he is with us.

Time to log off until I have time for another blog and something to share.

Cheers everyone.

Saturday, 28 March 2009

Altering a desk diary into a note book

As I had hoped, I DO have something to show, so a new blog.

I was given a couple of desk diaries by my son in law. He is given lots of them every year by different clients and some of them are very substantial and expensive hard backed books - too good to go unused. I was given them to see if they were of use to me.

I didn't need another diary for this year but as I said too good to go unused so I decided to convert one into a note book.

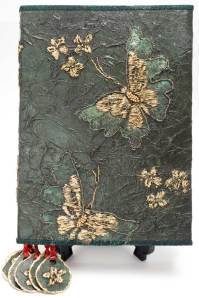
First I made a cover for the book which you can see here.
tissue-fabric-butterfly-book

I used pelmet Vilene as the base. I mixed some diluted PVA and sized the Vilene before I glued some scrunched tissue paper all over the surface. I used old dress pattern tissue - thanks to Lynda for this idea. I have a huge stash of this.

Next I cut some butterflies and flowers from a scrap piece of net curtain. I really must make a visit to a fabric and curtain store and source some oddments of nets and lace. They are such a useful source of relief designs.

I free machined these onto the surface of the 'tissued' background. There are also some of the flowers down the spine of the book.

I painted the whole surface with black Gesso. I bought the black Gesso recently and I am so glad I did. It is so useful.

When this was dry I sprayed the surface with Mystic Malachite Moon Shadow Mist. Gorgeous colour and effect.

When this was dry I finger brushed Golden Interference Oxide Green (BS) onto the raised surface of the butterflies. This oxide green interference is the exact same colour as the Mystic Malacite - one is in liquid spray form and the other in paint form.

I used a Krylon gold leafing pen to highlight the inner butterfly wings and its body and also the raised flowers. I added beads to the flower centres and a cluster of beads for the thorax of the butterflies. It is a good idea to wear finger protection as stitching through this surface is tough.

I machined all the edges with satin stitch and a matching rayon machine thread. I placed the book onto the cover and turned the ends in and stitched them to hold.

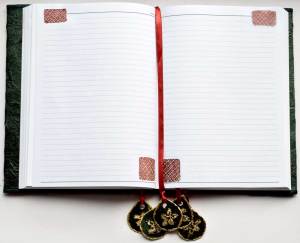
I would be dividing the book into sections for notes on different things so I wanted to make some way of finding the sections easily. There was already a red ribbon book marker attached to the book so I decided to make some more and make tags for them all.

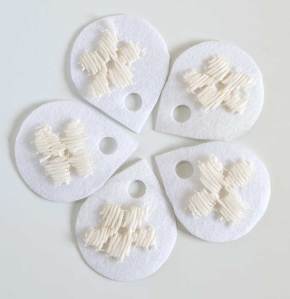
Again I used pelmet Vilene and cut out raindrop shapes.
085-mar-26th-tags-to-be

I cut more of the flowers from the net curtain and machined them onto the raindrop shapes. They were treated in the same way as the book cover.

I mixed some bronzing powder with a medium and dipped the edges of the raindrop tags. I also highlighted the flowers.

I attached the tags to the red ribbons.

Now that the cover was complete, I began to alter the inside. I needed to erase the dates and calendars on all the pages.

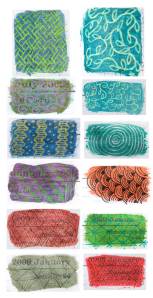
I painted them out with acrylic paints using as many different colours as possible. I had to do this a few pages at a time to allow the paints to dry so that they would not stick together.

When they were dry I used gel pens and doodled a different pattern on every page.
open-book

I have not finished this task yet. Still a lot more pages to paint. It is also a challenge to create so many different patterns.
untitled-1

These are just a few of them so far.

I can now begin to to use the book.

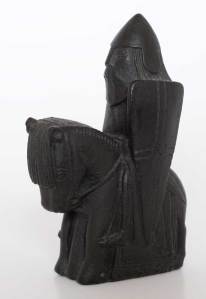
I am continuing to create an image a day and spent some time photographing one of the pieces from my Lewis chess set. I love the knight.
knight-2

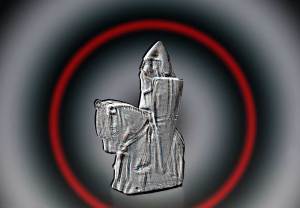
I had a little play with this image using some special effects and came up with this.
087-mar-28th-hammerite-knight

I would rather like to use this effect and at the moment I am trying to work out how to obtain this metallic effect. It looks a bit like hammerite paint!

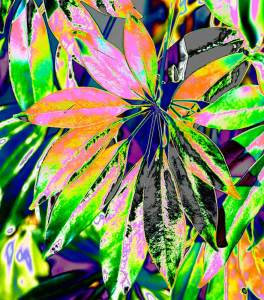
This image I created recently for my image a day is very tempting and I have the foundations of an idea how to interpret it.
068-mar-9th-splash-of-colour

I love the colours

Now I must decide what I am going to do next and I will blog again when I have created something else, until then

cheers everyone.

Thursday, 19 March 2009

Daffodils and a bag.

Time for another blog.
We are having the most glorious weather at the moment. Very warm sunny spring days.
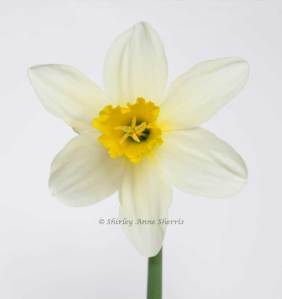
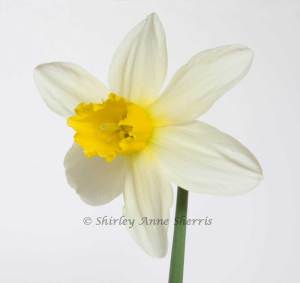
I am using all the spring growth for my 'images of the day' and could not resist the daffodils which are bursting into bloom all over the place including my garden.
I have to confess that on this occasion I had to cut and bring one of the daffodils inside to photograph. The position of it was too difficult to get a good photograph and the breeze too inconsistent to time.
I was then able to play a little with different settings on the camera and positioning the flower head as I wanted it.

dafodil-09

dafodil-side-on

As usual I couldn't resist a play and using the images I took created this little composite.

daffodils1

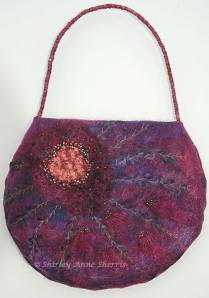
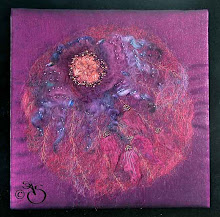
As I haven't created a lot of textile work while I have been writing my second book, I thought I would show you the piece which I use as my avatar and it appears sometimes on blogs and other textile sites I have joined.

The piece is a panel which hangs on my wall at the moment but I liked it so much that I decided to repaeat the technique and make a bag.

purple-embossed-bag-21

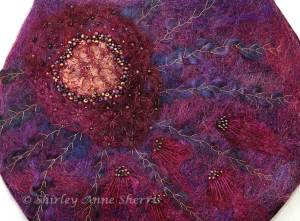
The background is a purple satin. I stretched it over a frame to embellish the fibres onto the surface. This helps to prevent shrinkage which usually happens when embellishing. The fibres were embellished much more for the bag than they were for the panel as the bag would be more vunerable to catching the fibres while in use. Once the background was covered with dyed fibres, I dyed and teased out some curly mohair fibres and radiated them out from a point on the top left side. These were couched in place with hand stitched herringbone stitch.

I made the patch by teasing out some more dyed fibres and placing them on a piece of card. I sprinkled some embossing powders into the centre and placed the card on top of my toaster to melt the powder. When the powder began to melt I quickly pressed a wooden stamp into the hot melted powder to create the sun impression. The whole patch was then placed onto the embellished background and couched in place with hand stitching and beading. I also added some pieces of dyed silk pods which looked like little buds. These too were embellished in place and then further embellished with beads and stitching.

purple-embossed-bag-close-up

I made up the bag and made a handle of wrapped threads and cords.

OK - textile part over.

Now I need to decide where I am going next. I have lots of new materials and goodies which I have bought recently to play with and I have a thick folder of sketches and ideas to work through. Hmmm - a child in a sweet shop springs to mind!

Well I am off to the workroom now so cheers everyone until the next blog. Hope to have something to share then.