In my last post I showed how I transformed a desk diary into a note book. Well I am still plodding through the pages painting and doodling out the dates and calendars. I can only do so many pages at a time as I have to wait for the paint and gel pens to dry. Some dry quickly but others take ages so it is going to be a elongated project. My grandson booked the colours for his birthday. I have to use gold to paint out the dates and silver gel pen for the doodle.
While I have been doing this I have also created and completed two more art quilts.
As you know, I use photography and the computer a lot when designing and these two pieces were created initially in the camera and then in the computer.
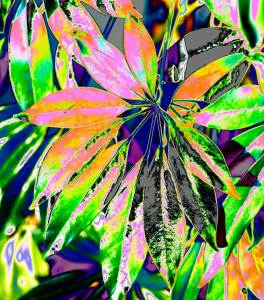
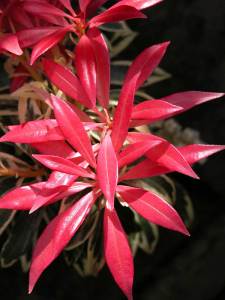
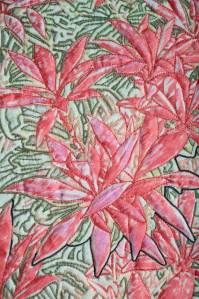
The first quilt used a photograph which I have already blogged about some time back but here it is again.
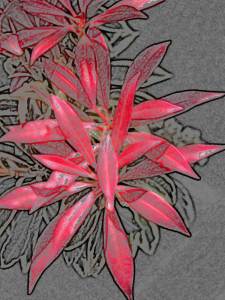
It was a close up photograph of the leaves on one of my house plants. I put it into the computer and played with it. I liked this effect and decided to use it for a quilted piece.
The image was sized to fit onto an A3 sheet of paper. The A3 sheet was to be the carrier for the treated silk onto which I would print the image. After a trial run in greyscale draft print I mounted the silk onto the carrier and printed it using an A3 inkjet printer with a flat feed. I wouldn't attempt to print such large pieces on silk without the flat feed.
When printing onto silk, I always boost the saturation of the colours as they tend to print out paler than you see on screen. However, even with the saturation boost it wasn't as vibrant as I wanted it to be so I positioned the printed silk in exactly the same start position and then - after fooling the printer into thinking it was a clear new piece of paper - I put the silk through again with all my fingers crossed that it would overprint exactly. IT DID!!!!!! and the colours were bright and vibrant just as the screen image.
While the silk was still on the carrier I used metallic acrylic paints and painted and highlighted the main central set of leaves leaving the background unpainted.
The silk was then made up into a quilt sandwich ready to stitch. First I machined around the edges of the painted leaves and down the centre vein of some of them. these leaves were to be left like this so the stood out from the background.
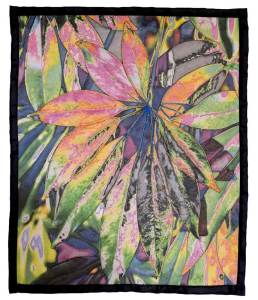
The rest of the image was free machined following the edges of all the different colours. When complete it was edged with black silk. I call it Psychedelic Leaves.
It is more vibrant than this image shows. Not the best light for photographing unfortunately. And, I should have ironed it too.
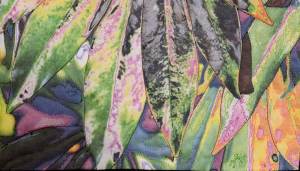
Here is a close up of the stitching.
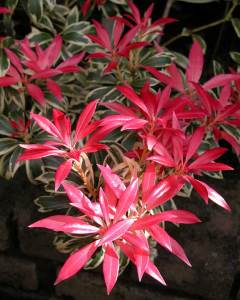
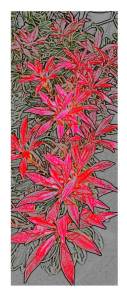
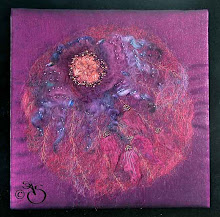
The second quilt was the result of combining two photographs of the Piris in my garden. At this time of the year the new growth is bright scarlet and this one hangs over my front pond.
I put then into the computer and played with the special effects until I came up with this one which I liked.
The next job was to select and combine the images into one long one. This image was three images blended together.
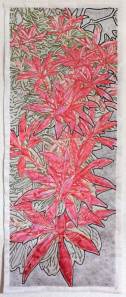
As with the previous quilt, I printed the design onto coated silk, painted the foreground reds and pinks and quilted it leaving the painted leaves unstitched.
This quilt is about 60cm long and 24cm wide.
This is a close up of the stitched surface - a lot of free machining.
Now I am ready to start some new pieces but not sure what yet. I bought a roll of pelmet Vilene a couple of days ago and quite fancy making some more book covers. We shall see.
I managed some gardening yesterday and planted up some tubs. While sitting in the conservatory having a coffee we noticed a little wren pottering around. It disappeared into the hole of the drum we wind the garden hose onto and it didn't come out for some time. Eventually it did come out and pottered around some more and then took some dried bits of grass into the hole. Yes, it is building a nest inside the drum. While it was out I went and took enough of the hose to do the watering off the drum. It will have to stay on the floor until the nesting is over. A Dunnock was also pottering around and the wren gave it short thrift. Very aggressive. The dunnock is bigger than the wren but it still chased it away. Cheeky and brave!
It is the Easter school holidays so I have my grandson for company for a couple of weeks so not sure how much time I will get to sew or paint. We want to do other things while he is with us.
Time to log off until I have time for another blog and something to share.
Cheers everyone.




4 comments:
Just love what you are doing with the altered photos.
You could turn your blog into a book Shirley - I'm sure it would be a bestseller :)
Its always so full of wonderful pieces. I really don't know how you keep coming up with all these different ideas. You are amazing.
The desk diary transformation alone is just superb.
How I wished I lived closer to you. :)
These pieces are wonderful. I love the colours!
it's very interresting, I like the colours and the forms. it's superb ! I am sorry for my english.
pascalepassioncreative.over-blog.com
Post a Comment