Monday, 12 January 2009

Busy beginnings

It has been a very busy start to the new year. I have been creating work to expand a project I did a few years back adding some new techniques and materials which were not around at that time.

Today I was multi tasking - machining the panels for a box while loading music albums onto my new iPod. I didn't realise how many CDs I had and had not listened to for a long time. Once they are all loaded onto the iPod I can listen to them in my studio while I am working. I just love all this new technology.

The other piece of technology is that of my embroidery machine which stitched out ten Celtic motifs for me today. I digitised the motifs as I needed so many of them. I usually free machine a 'one off'. However, after I had machined the first side I changed my mind about the colour and spent several hours unpicking it. I have a friend who manages to get her husband to do her unpicking or 'reverse stitching' as she calls it. This motif was a quadruple stitch so it was very difficult to unpick. Here's how it looked after unpicking and restitching.

celtic-a-la-lichen

There are four panels like this and a different one for the top and inside the lid.

At the beginning of the year I made the commitment to take at least one photograph/ image every day and began on New Year's day. I have kept to that commitment and have taken image number 11 today. They do not have a theme or anything - just whatever comes to mind each day. Today I did the washing and before I put the linen bin away decided to use the pattern on the front for an image.

linen-bin

I simply tipped the bin onto its back and took the photo. Pity I needed the light on as it has created a slight shadow of me taking the photo. There's a 3 dimensional textile piece in there -'maybe'.

I am quite surprised at the diversity of the images. Some are indoors and some outdoors. It depends a bit on the weather too. I did a still life study on a cup of coffee yesterday as it was so bitterly cold outside. Problem was that the coffee was cold by the time I had finished taking the photos. Turned out well though.

On Friday I had a special delivery in the post. The final layout for my book arrived. This one is how it will go to the printers. It will be sent for production today - Monday. I have to create the index for it now. The publisher has done a great job on the layouts. It looks very stylish. Can't wait to see the actual book.

My OH went to the NEC on Friday - he engineers for a rally team- and now I have a stack of photographs to process for him. They will have to wait. Too busy at the moment.

The conifer hedges will be getting their annual cut today. It is later than usual - they must be busy too. I wouldn't have been able to take this photo if they had come at the usual time of year.

starlit-conifers

This is another of my daily images. I got a bit wet taking this but... needs must.

That will have to do for this post. I need to do some more indexing.

Cheers everyone

Saturday, 3 January 2009

Well, here we are three days into the new year and already it is flying – sloooow down time please!!! How I wish!!

I didn’t make any New Year resolutions but I did make one commitment and that was to create an image journal of at least one image a day. I say ‘at least one’ as opposed to ‘one’ because when I start to take photos I always take quite a number and then find it hard to decide which one I like best so there may be days when there are several images although they will be on the same subject. I have just taken my third day image of the mahonia in flower and with lovely sunshine on it too. Not sure if I will be posting them yet. It depends on what else I have to post. They will probably appear as a weekly block or something along those lines. WTS

Back to the creativity which is what my blogs are usually about. During the ‘festive’ season I have managed to create quite a number of pieces (about 9 I think- I was on a roll and that cannot be suppressed for anything.)

One thing I was wanting to do was to use some of my serendipity samples which have accumulated over the year while painting other things. They were piling up - numerous pieces of both silk and hand made paper just waiting to be used.

I will cover four of them in this post. They were created very quickly.

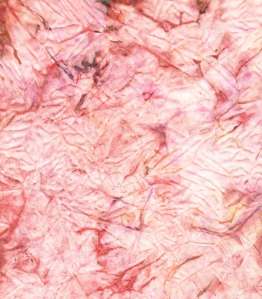
The first one used a piece of serendipity silk.
serendipity-pink-silk1

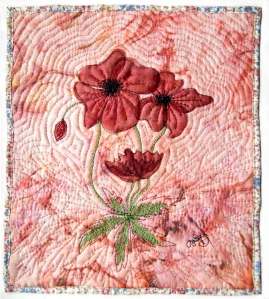
I had been browsing a book about Asian art and some of the Japanese flower paintings caught my eye and so influenced the subject for this piece. I decided to create some delicate poppies using appliqued sheer fabrics. The flowers and leaves were cut out using a soldering iron and using a sketch like free machining drew the flowers and leaves catching down the sheers. then I machined the stalks etc and finally quilted the piece following the shapes around the flowers and leaves. For the backing I used a piece of recycled dress fabric and when the quilting was finished I realised that the backing toned in quite well with the piece so I turned the edges of the backing over onto the front to make the border. Et voila!!! quick and easy.
serendipity-quilted-poppies

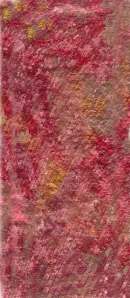
The second one used a piece of serendipity hand made paper. I made this paper years ago and had sandwiched a piece of net inside which gave the paper not only reinforcement but a textured pattern. It too was painted enough to use.
serendipity-paper-rose-and-bronze

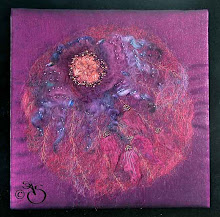
This time I rummaged through my left over bits box and found some mohair which I had dyed and made into a fabric. It was left over from making the lid of a box. I also had a length of the same mohair which I had dyed for a workshop I gave last October. It had the same range of colours so I wiggled it over the surface of the paper and held that down with some black nylon sheer. Next I free machined over the surface to hold the fibres in place, then zapped with a heat gun to remove some of the sheer. I placed the left over piece in the centre - well actually, I moved it around for a while first until I decided where I preferred it. I cut some red metallic mesh and put that underneath then decided it was all too red so I painted the left over piece with a gold leafing krylon pen. I found a large wooden bead bought many years back which I also brushed slightly with the gold and placed in the middle. It was couched in place and some red beads stitched into the holes/spaces. I also stitched more beads around the other couched red mohair to accentuate the curves. They were brushed with gold too. the next job was to decide on a background for it. Eventually the one which appealed to me most was a piece of pearlised metallic purple card. I attached it to one side of the card and voila, another quick and easy piece.
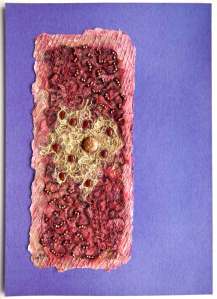
serendipity-red-and-gold

The next piece used up another piece of serendipity silk.
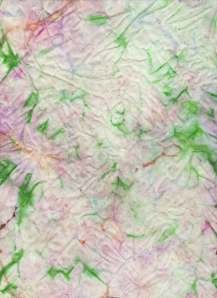
serendipity-green-silk

This one was not as easy to decide what to do as it had with the previous two. The colours were mainly green with some copper in there. Lateral thinking - green colour - green leaves, so that was going to be the subject. I had collected some samples of embossed papers from the local DIY store to use a stamps (picked that one up from Sharon). I chose two of them to stamp onto the silk which I ironed first - (can claim some domestic work can't I????)

Leaves need flowers so I used a wooden carved block and rubbed the design onto the silk with a copper oil stick. Then I quilted it using metallic threads to pick out the features. It still needed something so I decided to free machine an offset repeat of each leaf design over the top. A few copper sequins for the flower centres completed the piece. I mounted it on a kebab stick painted copper and hung copper sequins down some copper fingering for tassels. I also used the last of my sheet copper leaves which I had made for some of my jewellery ( which you can see in my book in September - plug, plug) and hung them along the bottom. Et voila, another piece.


The final piece used another piece of serendipity hand made paper.
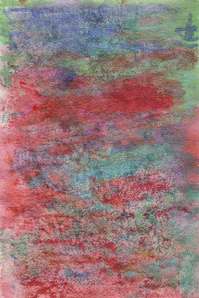
serendipity-paper-red-and-green

Looking to do something different I decided to cut it into strips and weave them to create a chequerboard effect. Another rummage discovered some paper casts of the wooden block used in the previous piece. I painted the flowers red and the leaves a bright metallic green. I used just the flower of the block to stamp the daisies in the centre of each of the squares. Beads and stitching created the flower centres and I used some puff paint along the edges of the squares and after heating painted them gold. This piece too was turned into a hanging again painting a kebab stick for the hanger and painting four large beads which matched the daisies. Another completed serendipity piece.
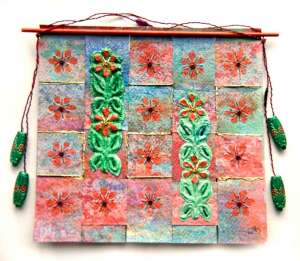
serendipity-paper-daisy-hanging

I think that is enough or you will be suffering from overload.

I am ready for a cup of coffee now. My OH is at mt daughters trying to fix her oven door which won't close properly. If it is fixed we will be invited for a meal so an incentive there although he would fix it for her anyway.

While I have been writing this I have been thinking about the next piece I propose to do so while it is still in my head I will go and start or I may forget.

Cheers everyone.


Saturday, 27 December 2008

SAGE, music and metal

Christmas is over although it won't seem a year before it is here again! I bought myself a couple of books to add to my textile, fibre and embroidery library. My daughter managed to grab one of them to give me for Christmas - she likes to give me something she knows I want - so I didn't get a chance to look at it until Christmas day. Really liked it and would recommend it - The Art of Stitching on Metal by Ann Parr. I have always used metals in my work - even given a workshop on its use in textile and embroidery - but this book is so full of ideas all in one book it is a very useful reference of techniques and samples.

The other book was the latest by Sherrill Kahn. It is a very thin book - only 28 pages - a bit disappointing really. I do love her fabulous use of colour and if it wasn't for that I would have felt very disappointed indeed. However, I never tire of looking at her work so it is more of that at least.

I have been busy creating all through Christmas even on Christmas day until the family arrived and I continued after they left so I have a lot of unshown work.

One piece I made at the same time as I was creating the Rievaulx Abbey piece was a bag. It didn't turn out as I had planned because I tried to use two metallic threads in the needle together and it wasn't a complete success. I have done this before with other threads and it worked fine but metallics are difficult to use at the best of time so I wasn't too surprised at the result. (Didn't stop me trying though). It did mean that I had to cut back on what I had planned for the bag. I used a dark green velour which is another difficult material to work with. (Talk about making life difficult for myself!!) I drew the music and scanned it into my digitising software. I had planned to use an actual piece of music but it would have taken too long for a one off digitise so I simply repeated the same line three times. I also suffered the results of cutting and using velour - tiny dark green bits everywhere and on a cream carpet too. Another reason to cut back on what I had planned. One of those things you wished you hadn't started!! I covered the lining with lots of musical notations and on the shoulders of the handle which don't show but here is the finished bag.

Another piece I made was based on a photograph I took of some purple sage in my garden.


I put it into photoshop and played with the image creating a special effect composite image which I have added to my digital imaging file.


This was to be the basis of the design. I sized it to A3 and made a black and white pattern for it thinking I would create a painted and quilted piece. Then I changed my mind and decided to create something a bit more stylised instead. I masked off the black fabric background and left some strips to spray with Moon shadow mist - mystic malachite. It works wonderfully on dark colours and is as far as I can see is a spray form of Golden's interference oxide green(BS). Next I sorted lots of green textured threads and pinned them onto the sprayed background. These were to be the stalks.


They were machined down with decorative machine stitching. Next I needed to create the flowers. These were made using lutrador and dry brush painting it lilac. They were free machined and cut out and then couched over the stalks. The leaves were made using black scrim brushed with the Golden interference oxide green paint - a perfect match to the sprayed background. (It is times like this which justify having such a huge stash of materials!)
A very different piece to the one I first envisaged. Now I must get on with a new piece I have planned.
The next blog will probably be in the new year 2009. Where has 2008 gone?? Can't believe a whole year has passed so quickly.
Here's wishing you all a happy new year and look forward to reading all your blogs next year.
Cheers everyone.

Friday, 19 December 2008

Ruined 'Paper' Arches

This will probably be the last post until after Christmas. My OH and I went to visit family today to deliver cards and presents.

It was my grandson's 9th birthday at the weekend. He was so excited about this birthday for some reason he couldn't get to sleep. He went bounding into his parents bedroom at 1am and shouted "Well, what do you say to the birthday boy then?" They were waiting for him to go to sleep so that they could sneak his present into his playroom ready for the next morning. Then he set his alarm clock so that he would wake up early......

It reminded me of someone else who did that!! a long time ago!

Apart from all the seasonal preparations, of which I do as little as possible, I have still been able to do some creative work of the textile variety or should I say of the 'paper' variety.

Earlier this year we went to Rievaulx Abbey to do some photography on the abbey ruins. Two of the many photos I took were of some ruined arches with beautiful carving still very evident.


I decided to represent the carved patterns with 'paper' casts.

When I was in a well known DIY store I found some lengths of wood decorative mouldings with carved patterns on them. I bought several of them with an eye to using them for moulding the patterns. Now was the time to put that idea to the test. I used the same method as for the shells in the previous post. I covered about 15cm of the moulding with wet 'loo' paper and a stiffening agent. When there were enough layers I gave it a final coat of stiffening agent and left it to dry.

I wanted some different patterns and sizes in these casts so I made some card moulds of smaller squares and triangles and still using the 'loo' paper method, made more lengths of moulded patterns.

Next I had to prepare the background fabric. I chose one of my favourite fabrics - a sandy beige simulated suede. I mixed some acrylic paint and sponged the shape of the two ruined columns using a cut paper template to obtain the shape of the side of the column. After several different layers of colour and sponging, I had the background ready for the patterned moulds.

When the paper moulds were dry, they were removed from the card and wood, painted and sponged to match the background. Some were cut in order to create the curves. Then they were stitched in place with couched threads and cords and free machined stitching. I left the loose thread ends as I quite liked the effect. I can always cut them off later if I change my mind.

The piece will be mounted on a frame when I find the time to make it.


So another piece completed. I have completed four others but they will have to wait until the next post.

Seasons greetings to all.

Cheers

Monday, 8 December 2008

Rescued Foxgloves

I have been busy with new pieces but some of them have not gone too well so I will not b posting them. I do have one, however, which I almost - yes almost- binned but being someone who can't bear waste or giving up I did have a go at a rescue and it is now acceptable!!

I began with a photograph I took of some foxgloves.

I opened this image in Photoshop and played with some of the special effects to create this image.

I decided to print this image onto coated Habutai silk and then quilt it which I did. The textured background on this image didn't show on the printed silk so when the quiting was finished I thought that I would gently catch the ridges of the quilted background with gold treasure gold. It looked terrible - as though it was dirty. I hated it. I tried something else. Sponging over it with some metallic pink paint but I didn't like that either. Then I started to sponge some green over that to create a two tone sponging effect but didn't like that either.

So I put it to one side not wanting to succumb to putting it the bin. I kept having a look at it until eventually I decided to use one of Val Campbell-Harding's solutions. If you don't like it cut it up and reuse it. I didn't want to cut it up completely so instead I cut out the foxgloves from the background and edged it with satin stitch using green rayon thread. I tried laying it on different backgrounds until I found one which looked acceptable. It was some hand made paper which had different coloured threads embedded into it some of which complemented the green edging.

It needed something else. I decided to use text and machined out the name of the flower in a lovely cursive font stitched onto a white sheer. This was stitched onto the background as was the quilted foxglove - the finished piece

I felt much better now that I had rescued the piece. I have even kept the cut away background - you just never know!!

I also managed to get a few photographs in the garden in spite of the dreadful weather. The winter jasmine is blooming at the moment. here is one of the tiny delicate but obviously very robust flowers which survives all the snow and frost of late.


I am working on another piece now which- thank goodness- is looking good -so far!! So hopefully it will appear on the next post!!

Cheers for now everyone.