Wednesday, 16 March 2011

More of my Dubai project

Doesn't time fly?

So many time consuming interests and not enough time to do them.

However, I have managed some more textile pieces which have been inspired from my visit to Dubai.

These pieces are all based on the beautifully designed speaker pods which surround the lake area outside the Dubai Mall. When the fountains are on, the music to which these fountains dance, come out of all the speaker pods. Incredible sight and sound.
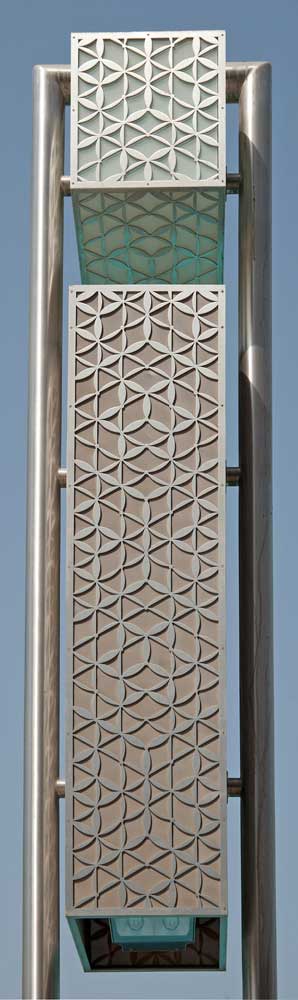

The first piece is an interpretation of this speaker as it is. I used a silver metallic sheer which sandwhiched a layer of silver angel hair. I created the pattern and free machined the whole thing using silver thread on top and underneath so that it can be viewed from both sides. Once the machining was complete- and I machined it all twice - I cut away the unwanted areas leaving an open fret which is how some of the speakers were on the approach to the Kalifa tower. I couldn't use a soldering iron as the sheer is metallic and wouldn't burn so great care was taken to prevent any fraying.


I intend to use all these small pieces to create a new fabric. Can't possibly waste them can I??

I wanted to set the textile piece into a stainless steel frame as the Dubai speakers were so my OH found some stainless steel rod and tubing and made me a frame to mount the piece into. At the moment it is hanging on a wall but I would love to use it free hanging as a mobile or divider.


Here is a close up of the top secion which on the actual pods were boxes.


As I mentioned, the top section of the pods were boxes so....... I created a box using the same design. The frets were created first but this time, as I didn't have enough sheer, I used black voile mache over silver lame. This time I could use the soldering iron to cut out all the spaces.I used opaque draughtsman paper behind to match the effect of the pod boxes. A pretty good representation.
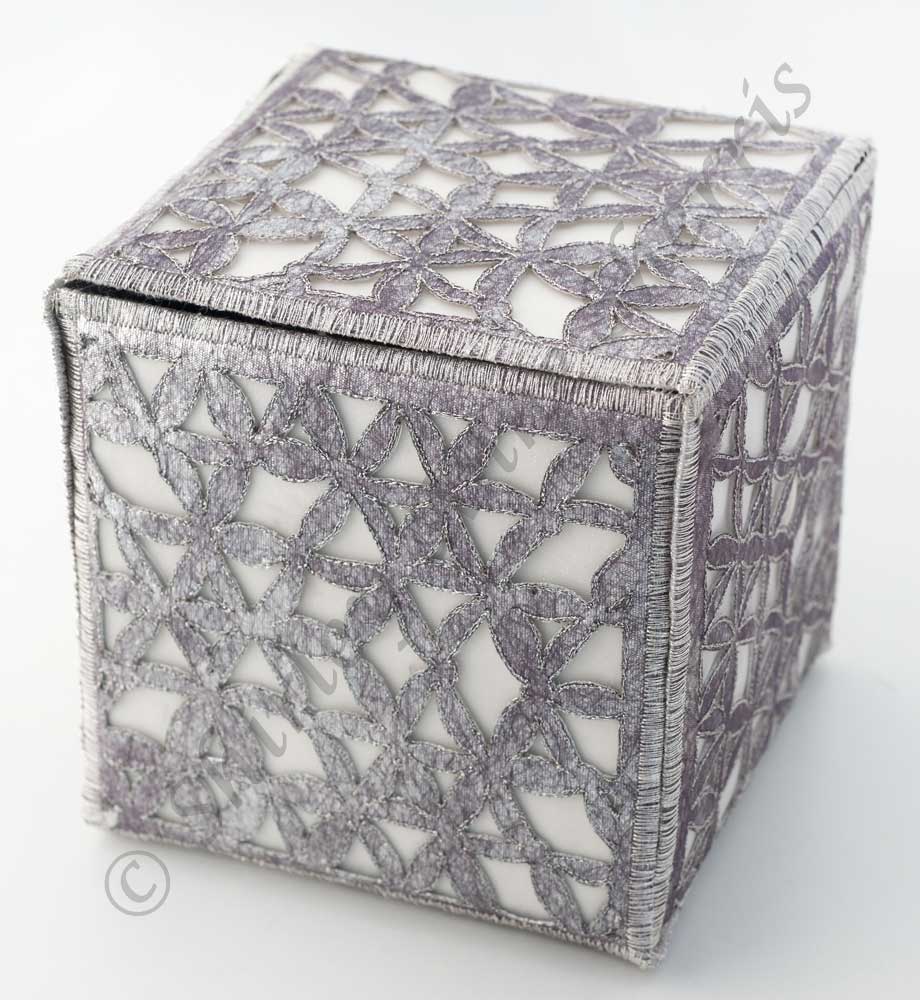

I used grey felt for the inside of the box and stencilled the design onto the felt with silver paint.


Onto the next two pieces which are related as they are both jewellery, a matching bracelet and necklace.

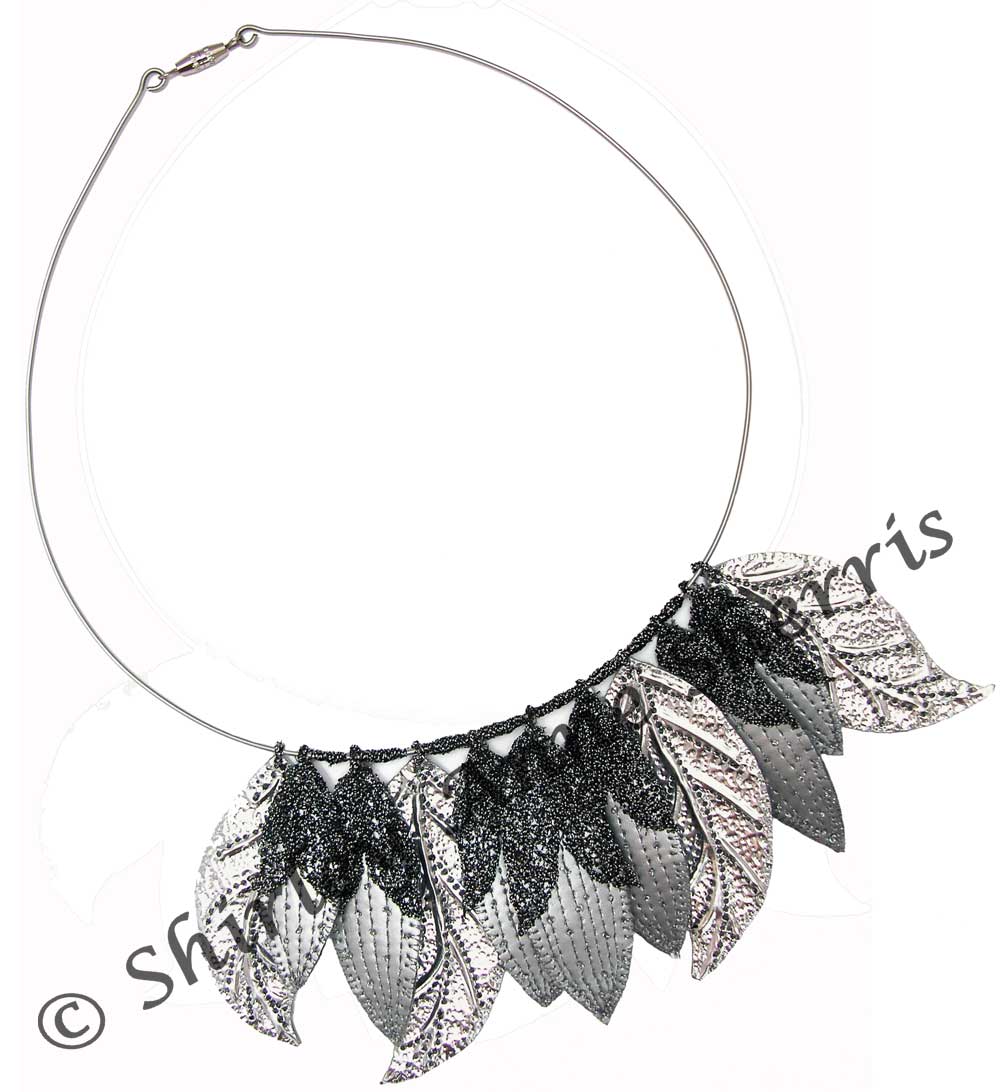
I used silver leather covered with the black voile mache to take some of the glare away from the leather surface. It was backed with grey felt. I chose a part of the fret design on the speakers to create two design - one for the necklace and one for the bracelet. They were free machined onto the leather using silver thread. When complete the spare was cut away and the edges satin stitched. I didnt cut away the fret this time. Couldn't decide whether to or not so played safe and didn't. I used a toggle and ring fastener for the bracelet and made a stainless steel ring for the necklace. I also added some silver beads around the edges. Not on the speakers but this was jewellery so some artistic license!


The next piece was an evening purse. Again I used the fret design as the source. I created another square similar to the top of the hanging. This time I used the black volie mache over silver lame and a siffener for the back. I stitched the design twice and removed the excess with a soldering iron which sealed the edges. Much needed for a purse which would be opened and closed a lot. The main body of the purse was made from a silver grey dupion slub silk. Perfect for the job. This was quilted with the design from the main column of the speaker pod. The silver fret square was free machined ontoo the front flap. The lining was gey satin and I used a silver chain for the short purse handle. I also made two bag tags - one being a smaller version of the necklace.


This is the back showing the quilted design.


That is all so far from the 'speaker pod' collection. I have more in progress. Sometimes a design can produce a lot of ideas. It is knowing when to stop!!

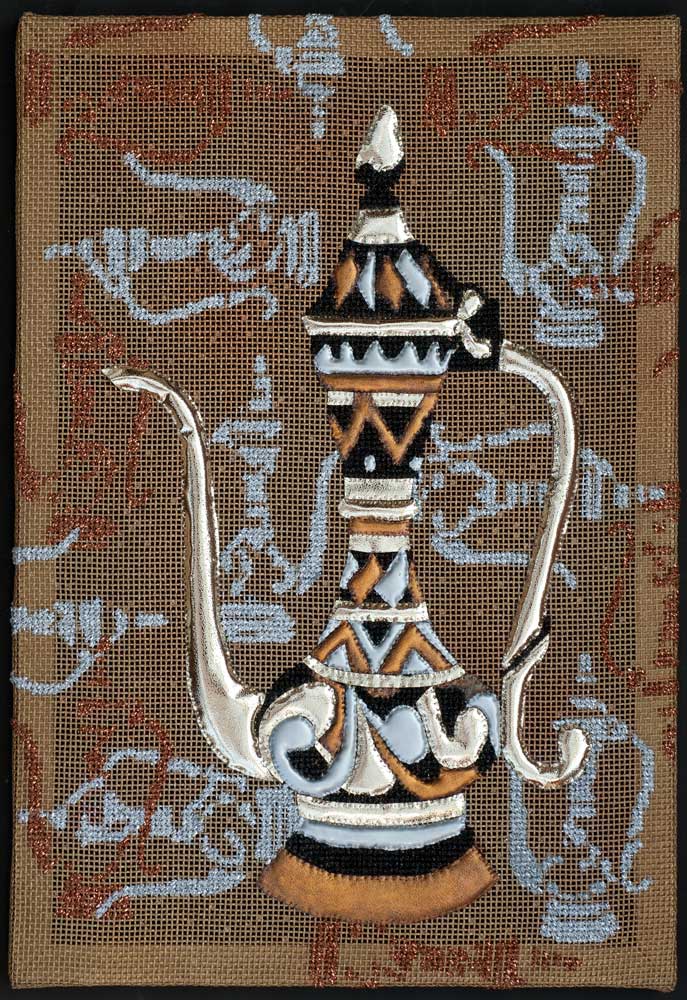
One piece which did take a long time was one which used a jug I saw on a shelf through the door of one of the Heretage village builldings. I couldn't get a good image of it so I had to source another one from the net.


I like this one but it was ambitious and took a long time to stitch. It was all stitched by hand.

I decided to create this piece using padded metallic leathers - gold, silver and bronze. The background was a traditional tapestry canvas sprayed with gold paint. The areas not covered with padded leather were stitched with black metallic fingering and cross stitch to give depth to match the padded leather. I also used silver and copper fingering to stitch abstracty jugs over the background. It is stretched over a gold frame and the background it is displayed on shows through. It looks better in reality than this image.

That is it as far as textile work is concernedJust before I started this blog post, I embossed two divers onto silver shim. They are the divers from the waterfalls in the Dubai Mall. More of them in the next post.

I have been doing a lot of photography and last week spent a day at a sculpture park. I am doing a project on sculptures so have a few more visits planned to other sculpture venues. I hope the weather is better than last weeks. We suffered every type of weather in just a few hours including a downpour of very sharp ice chips which really hurt. I think they call it 'sufferring for your art'!!!! Hmmmm. At least my macro photography is inside where it is nice and warm.

I have also created a couple more AVs. I have begun to make my textile projects into AVs and set them to music. At least, this way, I see the work which is sadly stored away in boxes and only seen when I give talks to interested groups. Fitting music to the textiles really works well and enhances showing the projects. I can view the projects whenever I wish and they are much nicer viewed with music that complements the themes of the projects. I am on with the AV for my Egyptian project and found some wonderful music by a lady in America - Gale Revilla - which fits the subject perfectly. My problem is which piece of music to use. I like so many of them.

Must away now and get on with all these things I want to do so cheers for now.

Tuesday, 1 February 2011

Dubai art quilts galore

I hope everyone's new year is getting off to a good start with lots of creativity. All this cold weather gives us a good reason to stay indoors and do lots of textiling although I did go out Sunday evening to do some blue hour photography andit was bitter cold. So cold I could hardly feel my fingers to set the camera. A few reasonable shots from it and there could have been more but it will have to wait until it is a bit warmer. Having said that - we are planing to go to Whitby this week to do some evening photography!!!!! Gluttens for punishment. It is forecast to be warmer by then - they said!!!!!

We have taken the plunge and made the decision to have the two settees reupholstered. We are waiting for the fabric to arrive and once they are recovered I can get rid of the throws which are a pain to keep straightening.

Now, as I said I would, the art quilts I have created form photographs I took in Dubai. As I alsways do, I openend the photographs in Photoshop and played around with them until I came up with an idea that I liked.

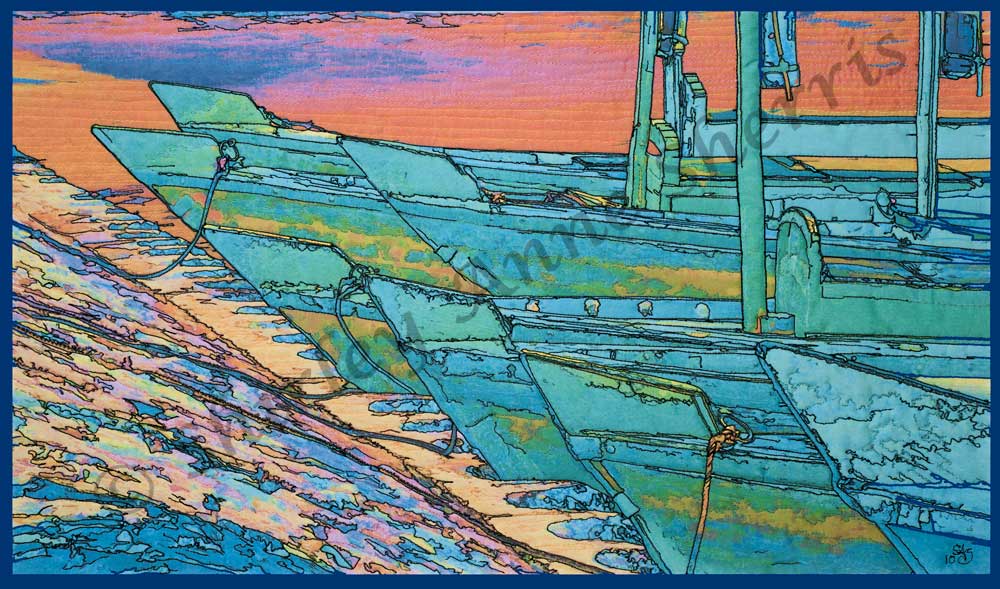
The first photograph was one of the water taxis tied up and parked on the Creekside.


This is the effect which I liked and used for the art quilt.


This was printed on silk then some surface highlighting with metallic paints was applied followed by free machining.


This is the finished art quilt. I haven't actually applied a border yet but when I do, it will be blue as above.

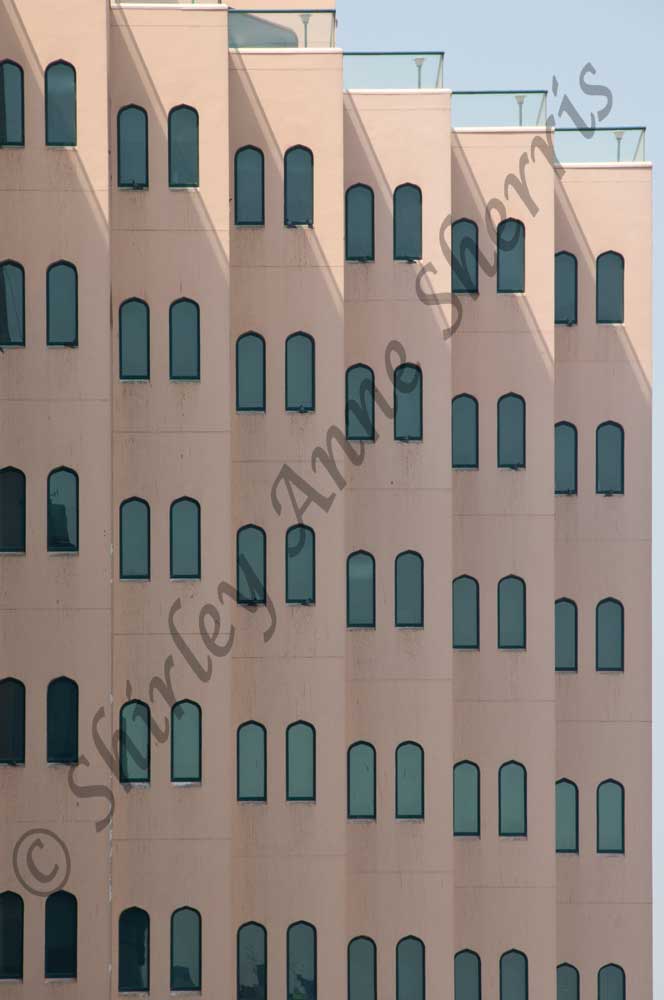
The next photograph was one of the buildings next to the water taxi parking place. I liked the arched windows.


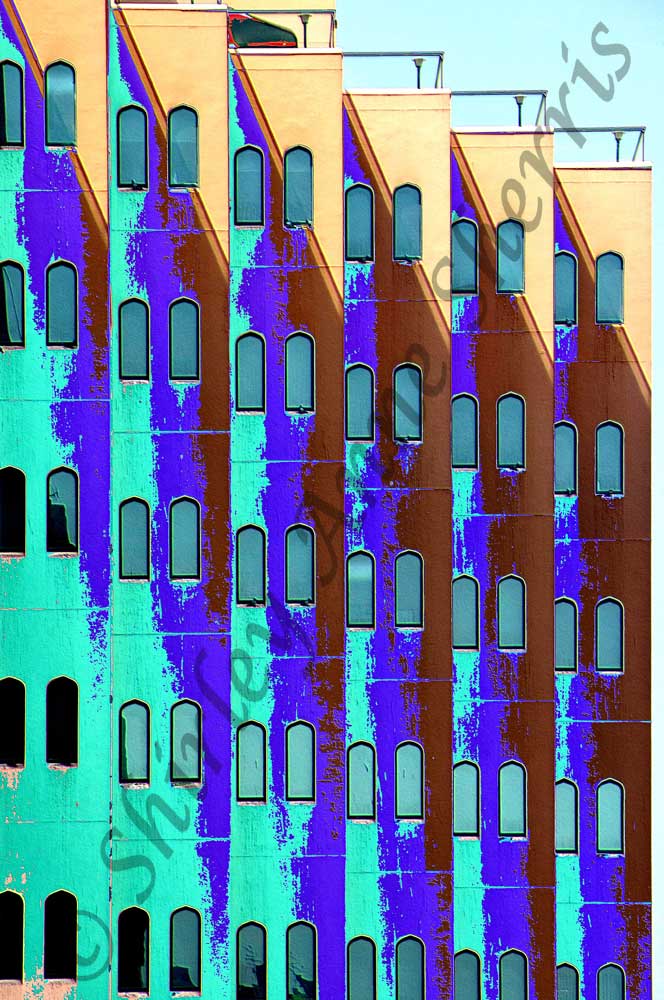
Again, applying different effects on it in Photoshop -


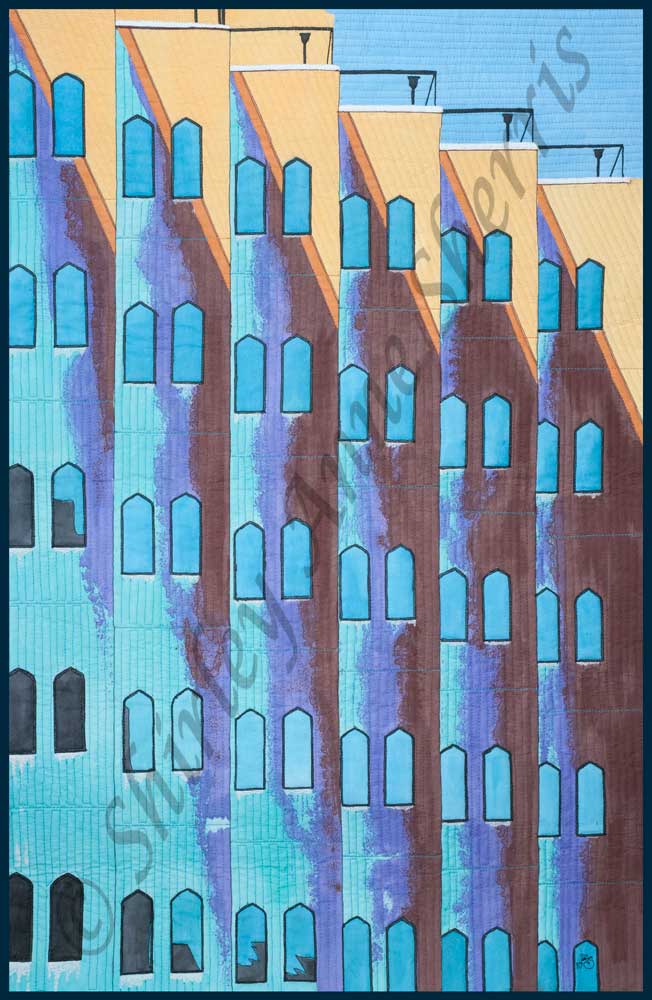
I quite liked this very colourful effect. I made a pattern and traced the design onto cotton, then painted it with acrylic paints. I free machined the painted design and applied some glitter black pen to ouline the windows.


The next image was of the wooden roof of the fabric souk. there were some incredible fabrics for sale in there but I resisted as I have a huge stock of fabrics and need to use them up. The roof was was created from wooden arches with large ornate lights hanging down.


I simply inverted the colours of this and they turned out to be blue and perfect to make an art quilt.


This design was printed onto silk and free machined.


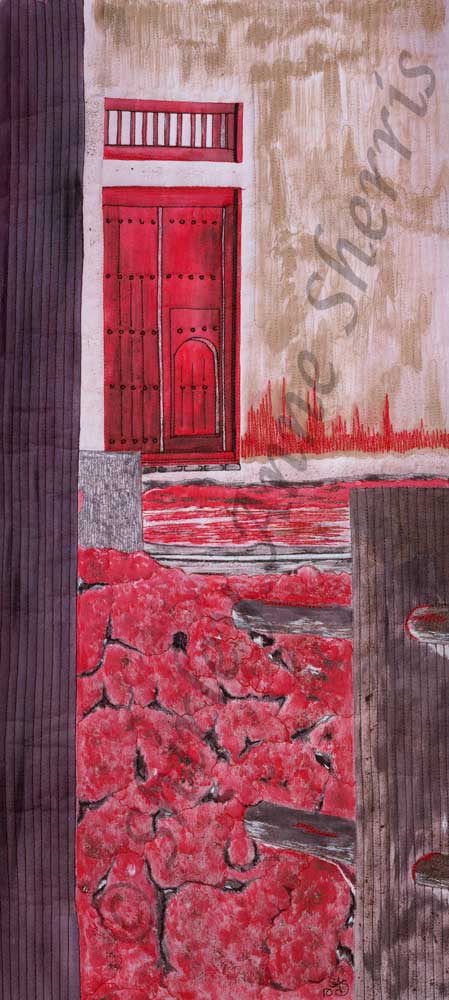
The next image was taken in the Heritage village. In the foreground there is a part of the original old Dubai fortress wall which has been preserved.


As before, I played with it in Photoshop until I found a design and effect that I liked.


I made a pattern and traced the design onto cotton, then painted and sponged the design ready to free machine.


Another potograph from the Heritage village was a close up shop of a decorative ballistrade which I liked.


I have cloned out the ark lights which light the village up at night. I had to do a lot of work in photoshop in order to create a flat image of just the ballitrade. This too was played with in Photoshop.


I printed this design onto silk and applied some metallic paints and some gold paints.


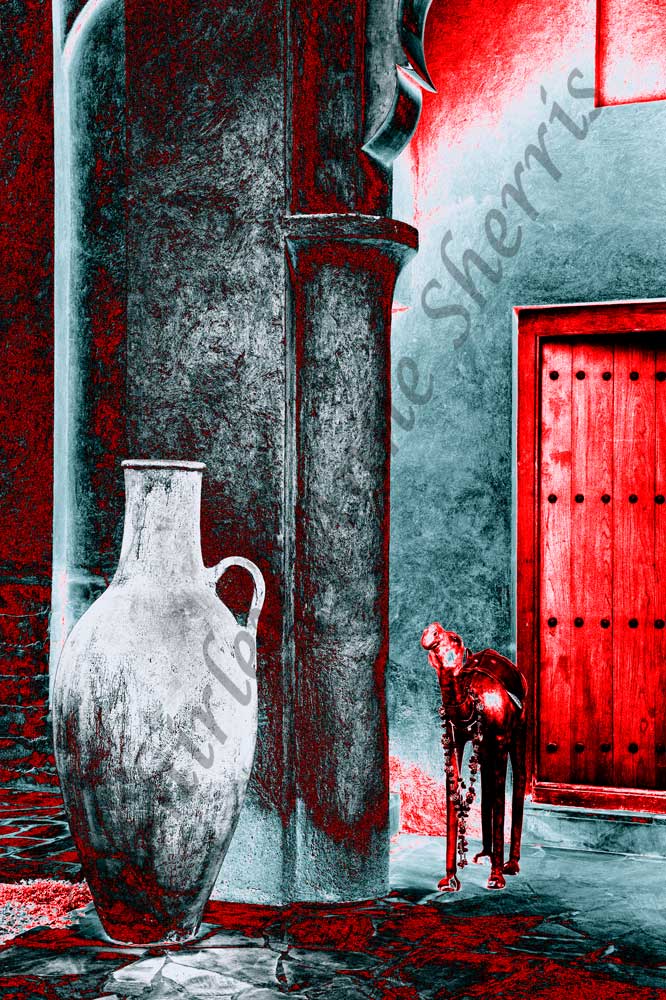
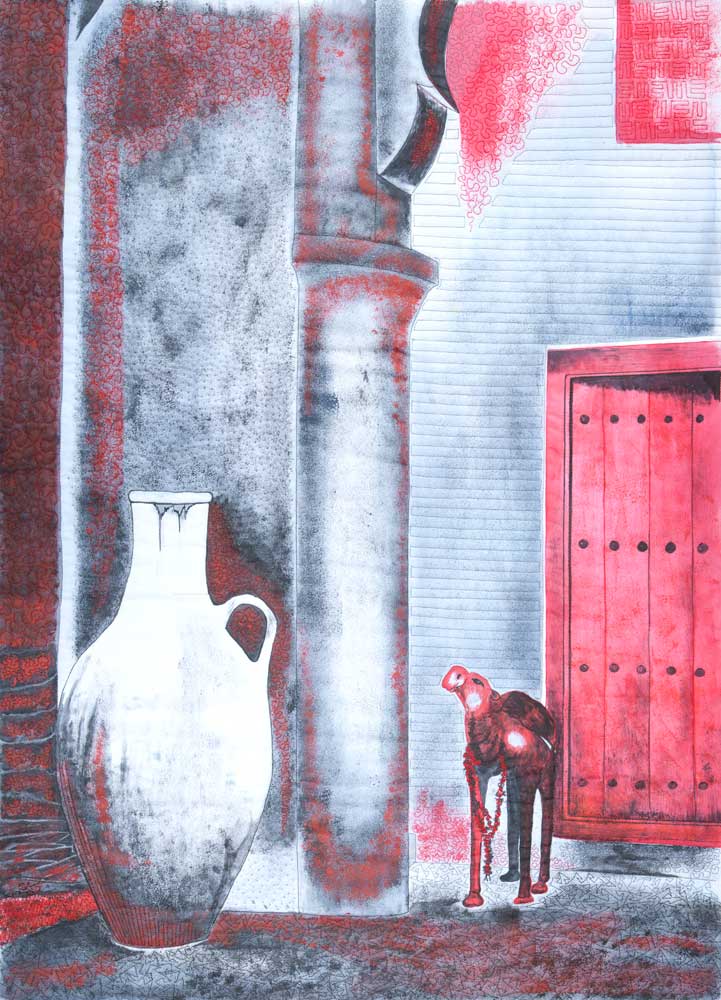
The final quilt was the largest and so was the most difficult to free machine. It was another image taken in the Heitage village and included a carved wooden camel in a doorway.


I used the same effect as for the old wall art quilt. Red seemed to suit these images and had they not occurred while applying different effects and filters I would not have thought of using these colours. This is one of the main reasons I use these filters. I get colour schemes I would not have dreamt up myself.


Ths design was enlarged with the height being more than a metre. I made a pattern and had to print out several sheets and join them together. the pattern was traced onto white cotton and then I sponged the colour using metallic paints and paper to mask as I sponged. I do not use a long arm quilting machine so it was difficult dealing with such a large quilt.


This quilt was so big I had to photograph it in sections and stitch it together in Photoshop as I had to do with the fabric souk roof art quilt.

That is all six art quilts. I wish I had the wall space to display them all but they are already full with lots of other textile work.

The piece I am working on at the moment is taking a long time as it is all hand stitching. It has turned out to be quite a challenge with a lot of padded leather work so it may be a while before I can blog about it.

So until the next blog

Cheers everyone

Sunday, 2 January 2011

A Happy New Year & the start of my Dubai Project

A Happy New Year to everyone and I hope it brings you a satisfying and creative one.

I spent my first day of this new year sorting and storing a cupboard full of completed textile pieces. They are all - as best I could - in their appropriate box or file. All the pieces should be easier to find now. I also sorted the pieces and samples I am going to take to the next workshop I am giving later this month. The first talk is one I have given before so that is ready but the one after that is a talk about the jewellery project which led to my book. I need to plan the order of pieces and create the slide show to accompany it. All the pieces have been photographed so it shouldn't take too long. A good start...

The rest of the day was spent creating the jewelled fabric and tracing all the designs of the Dubai motif jewellery and a motif hanging. I managed to free machine the two sides of the purse and the pendant. Still a lot of pieces to free machine - a necklace and a bracelet - hopefully tomorrow.

I began the Dubai project last month - last year!!!- sounds a long time ago doesn't it? I completed a box, a bag and a folder.

I will begin with the box- which had the starting design source from an image of the lift pod in the hotel we stayed at. We stayed at the Arabian Courtyard Hotel in the old part of Dubai not far from the Creek. (I can hiighly recommend this hotel - very friendly and very very helpful). The lift pod was one of two which ran up and down a central well in the hotel.


I used this image and played with it - as I do - in Photoshop and Paint shop pro. I used a kaleidoscope filter and came up with this design.


I knew immediately what technique I would use so first I made a pattern.


Then I used gold metal shim and embossed the design for the lid. The box was created from a bright red silk fabric and the centre of the design was used for small shim 'flowers' on each of the sides.


I used my usual method which allows the box to be stored flat. I free machined the design on the inside of the lid.


The next piece was designed using the image of one of the buildings on the side of the Creek. We went for a trip on the Creek on an Abra which is a water taxi. We hired the taxi to ourselves for an hours trip up and down each side of the Creek. I was able to take many photos of the life and buildings along the sides of the Creek. This was just one of them.


I zoomed in and took just the green squared windows.


Again, I played with the image in the computer and came up with a design which was ideal for printing onto fabric.


This gave me ideas for more than one piece - I created a folder and a bag from the same design.

First, the folder.

I printed the design onto silk fabric. I cut and dyed and sprayed a piee of pelmet vilene the same size. The silk was mounted onto the vilene with a thin layer of wadding then free machined. I free machined each of the squares then threaded some cord through between each of the squares. the edges were satin stitched and I made a wrapped cord to fasten and stitched small beads around the outer edges.


The square machining created a stitched pattern on the lining to match the outside.


To make the bag, I printed the same design onto cotton. This was made into a quilt sandwhich and again I free machined each of the squares then pulled cord through between the squares. I gave the surface a coat of acrylic wax to waterproof and protect it. Then I stitched tiny seed beads around all the squares. The bag was constructed and a handle made from machine wrapped cord and applied with more tiny sed beads. I made tags to complete the effect. It has a zip to close and a satin lining the colour of the original windows on the building.


So there is the start of the project.

I have created six art quilts too but they have yet to be photographed. Some are very large and the weather and light have not been right for the job. Hopefully I will have done that for the next blog.

The only good thing about all the snow and bad weather is being able to stay indoors and be creative both with my textiles and still life photography of which I have done a lot. However, I do miss the photo shoots so I hope the weather will improve enough to go out and do some outdoor photography other than dashing in and out to take pictures of the snow like this one which I played with afterwards for a bit of fun. These are stones in my garden and with the snow on the top looked like little heads. Half an hour after I took this photo it snowed heavily and they were completely buried under a couple of feet of snow - brrrr.


OK - that's it for this blog so until the next one - cheers everyone.

Wednesday, 1 December 2010

Free machine while it snows!!

I suppose I should blog about the S-N-O-W. We have a LOT of it and it is still coming down with no sign of an end to it.

But I won't.

Instead I am going to blog about free machining.

I had a hit on my blog from a lady in America who has posted about my art quilt free machining on her blog. Many thanks for her complements.

It set me thinking. Although I am a fibre, textile and mixed media artist using many many different techniques in my work, I have always been an avid free machiner.

In my early days I was influenced by Liz Hubbard and bought both of her books. It led me to begin buying my stock of threads: cotton, rayon and metallics. I even dyed my own variagated threads and wound them onto empty reels - thanks to a gadget my husband made for me to make it easier. At the time, Guttermann sold packs of 50m themed threads and I bought every set - almost every colour that Guttermann produced. Then I added other makes to them and started my collection of rayon and metallic threads. I am still adding to the collection. You can never have enough threads.

Another influence was Annameike Mein and her work led me to creating 3D pieces.

Free machining has continued to be an integral part of my work and at the moment I am really into creating free machined art quilts. I have already posted a number of them in recent posts and have just finished another seven of them - yet to be photographed.

For this post, I thought I would show some of the diversity of free machining dating back over many years.

Here are some examples of my 'Thread Painting'. I took the photographs, painted the fabric then free machined.


I made a box with thread painted images on each face and a gold thread free amchined image on the inside lid.


These were the days before computers and printers. I had to use the negatives and project them onto fabric (mainly calico and sometimes satin for a richer finish) and mark out the features with a pencil before painting with a mixture of diuted acrylics, fabric paints and silk paints. Oh how technology has changed things; computers, digital cameras, printers and many new products appearing all the time to continue the diversification - wonderful.

I also created the covers for books - this one is a digitised image created in photoshop, printed onto transfer paper, applied to fabric then free machined. Free machined lace added surface texture thanks to soluble fabrics.


I used free machining to create the surface texture on fabrics for bags as with these two bags. They started out as a silk skirt my daughter no longer wanted. I free machined and surface embellished the squares of the design before making up into bags.


When I was creating jewellery, I used a great deal of free machining as with the next series of images.


This last jewellery piece was the one chosen for the cover of my book - Embroidered Jewellery. Sorry, but I could not miss an opportunity to give it a plug. All the techniques for creating these pieces are in the book, however, the skill of free machining is down to practice and dexterity.

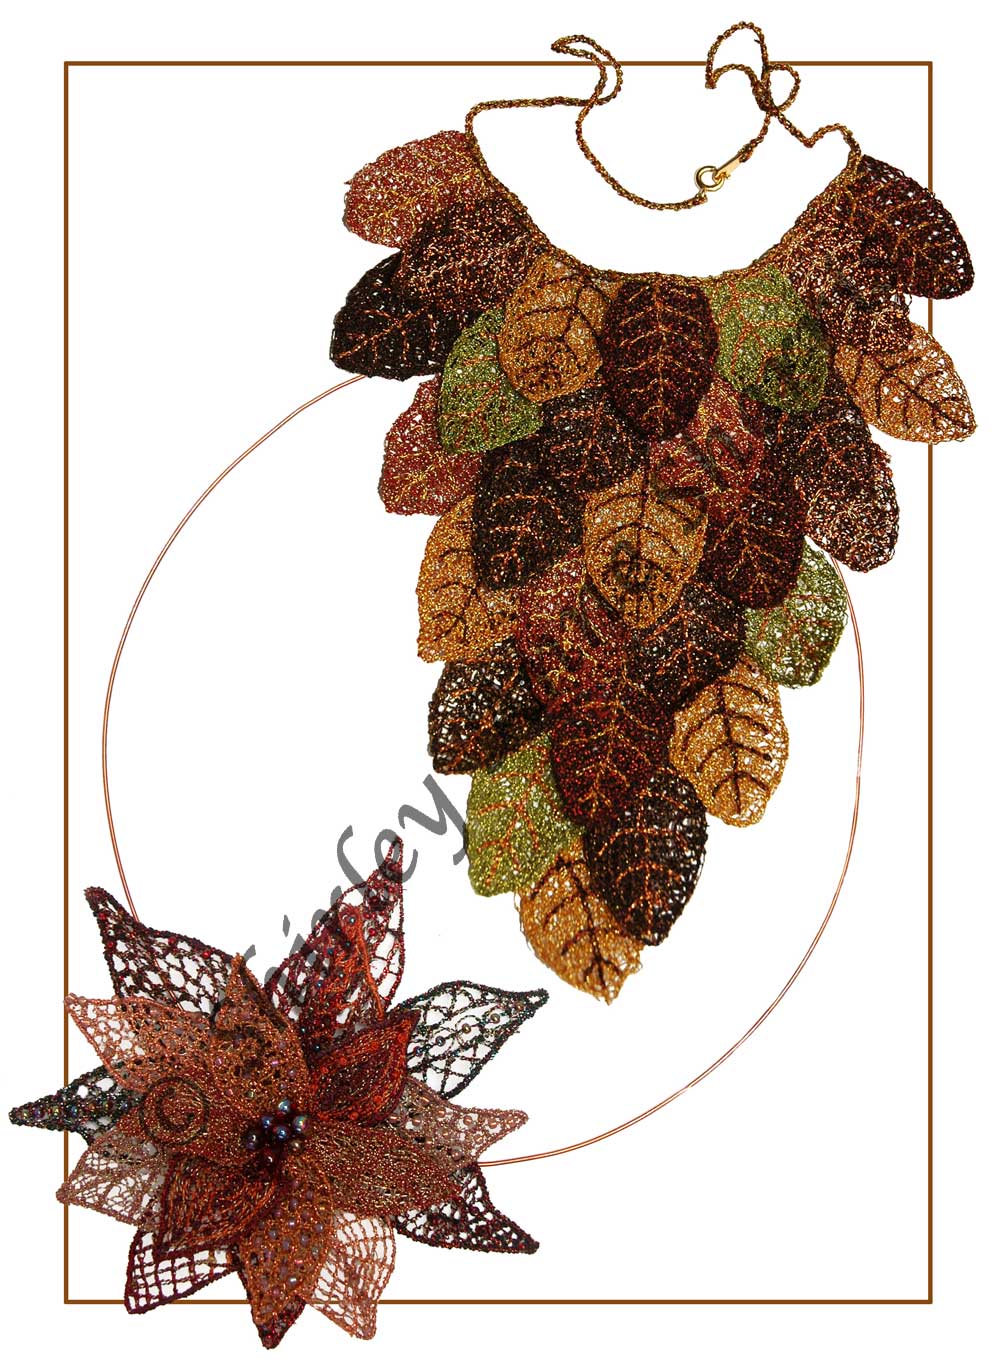
As soon as I have managed to photograph my latest art quilts I will post images of them but there are lots to see on previous posts - Domes of Venice ; Purple palm; Richmond falls; Himalayan Poppy; Rusty kaleidoscope to mention just a few!!

So as I have shown, free machining is a very diverse technique once mastered and modern sewing and embroidery machines have made it even easier so if you haven't tried it - have a go.

And it is still SNOWING!!!

Cheers for now.