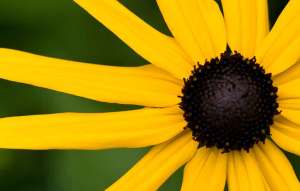
A few blogs ago I mentioned a visit to Richmond castle - the one in North Yorkshire. I posted an image of a swathe of Rudbeckia in the castle gardens.
These flowers caught my eye and I took several photos of them including my favourite kind - macro.
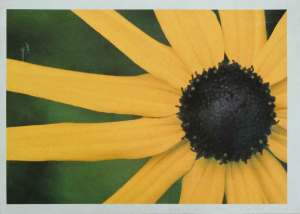
I decided to use this image for the cover of a pad folder.
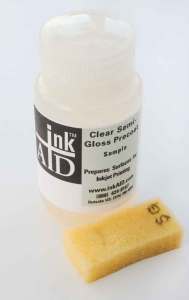
I bought some Evolon at a show this year and wanted to use it and see how it behaved. I decided to print the image onto it. Not having printed on it before I didn't know how it would print so to be on the safe side I gave it a coating of InkAid to ensure a better vibrancy of colour.
InkAid is a fluid which will coat any surface and if it will go through an inkjet printer, you can print on it. The ink does not soak into the surface and lose its vibrancy. If you have never used it, it is worth a look.
I use a dense piece of sponge to apply it to the surface. On this occasion I used the clear semi gloss precoat.
Be sure that you take note which side of the fabric you coated - which I didn't!!! so I am not sure if the coated side was the one which was printed. The colours were vibrant enough so I hope it was the right side.
This synthetic fabric is strong and can be free machined without a stabiliser. I free machined some detail lines onto the petals and then began to create a padded centre for the flower. First I tacked several layers of wadding in the centre to create a 'dome'. Next I took a piece of black felt and covered it with a layer of black crystal organza and backed it with a piece of black stabiliser. I then, using black metallic thread, stitched lines in two directions across the suface to closely represent the centre of the flower.
This was then stitched in place over the 'domed' padding.
Next I stitched three rows of fringe using a fringe foot which I have had for at least three years and never used before. I used a very unfriendly black thread which kept shredding so I had a lot of ends to stitch in. Even though this can be a bit tedious, I prefer to persevere and use these threads for their effect rather than not.
I stitched gold glass beads at intervals into the fringe. This completed the front of the folder.
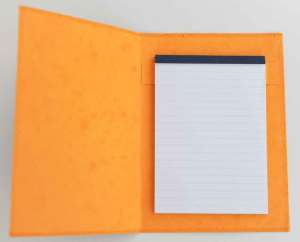
The inside was created from a piece of golden yellow card which was adhered to the front using a spray glue. I trimmed the edges and then zigzgged the edges together.
I used a piece of the yellow card to make a holder for the pad. It was folded and creased - completing the folder.
A simple and effective technique.
At the moment I am trying to decide on a new project and have a couple in mind but nothing definite yet. No sooner do I think I have decided than I come up with another one and off I go again with indecision. So frustrating - lots and lots of notes and scribbles growing by the day. I need to take 'the bull by the horns' and make a start. Once I do that I will be focussed and the project will grow. Hmmmmm.
Tonight I must process my image of the day so until I have something else to blog -
Cheers everyone.







3 comments:
I found a bottle of Ink Aid in my studio that I had forgotten about (unopened) so your post is timely. I shall have to have a go! Your photo has made a very attractive cover for the pad folder.
I'm just enjoying having some leisure time and doing the 'next blog' thing and came across yours. How lovely and how strange I haven't seen it before.Your friends are my friends!There's Julie above me!
I've been hearing a lot about this Evalon, looks as if it's printed beautifully, the finished piece is lovely.
As usual a super clear account of the method.
Post a Comment