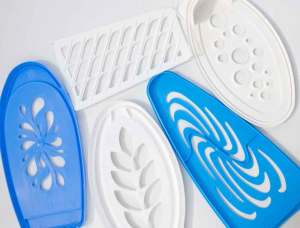
It is surprising what comes in useful even from something as mundane as buying air fresheners. I no longer buy these gadget ones which need refills. You pay out for the gadget then after a while they stop producing the refills and you have to buy the next gimmick gadget. So instead I buy those solid gel ones which are much cheaper anyway. The solid gel is inside a plastic container with a cutaway pattern on the front. These patterns change every so often and I now have quite a collection. When the gel is finished, I pull off this front part and I have a very sturdy stencil. They are also good for pressing into clay giving a raised relief.
This is my collection so far.
Now for some more creative pieces.
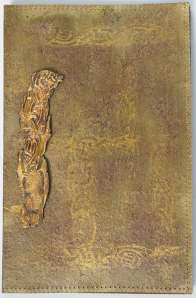
Once again I was using up some samples. For this pad folder I used up a clay Celtic motif which was made by pressing model magic air drying clay onto a Celtic rubber stamp which was left to dry and set. You could also use Hearty clay.
I painted it with black acrylic paint then fingered gilding wax over the surface to pick out the relief of the design. The size of the motif dictated an A6 size pad folder.
I decided to use a sheet of dark olive green card. I painted the card with the olive/copper starburst stain. While it was still wet I worked the stain into the surface with a stiff brush. This roughed up the surface and also revealed the olive part of the colour. When it had dried I gave the surface a couple of coats of acrylic wax. It made the surface of the card look leathery. Something I will use again.
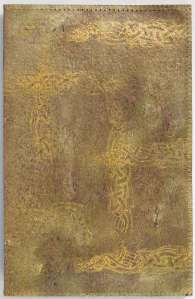
I used the same rubber stamp to print onto the surface using metallic gold paint. I lined the card with mottled paper and stitched around the edges. The clay motif was stuck onto the side of the front of the pad folder.
This is the back of the folder. I attached an A6 pad inside.
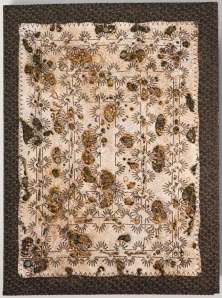
This next pad folder was the result of trying out some Moonshadow sprays - this one being the gossamer gold. I sprayed an A4 sheet of Tyvek. I used half of it which dictated an A5 folder.
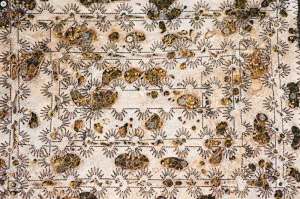
I used some metallic patterned fabric bought a number of years ago. The fabric was quite a stiff one so did not need stabilising. I stitched the Tyvec onto the fabric creating ever decreasing rectangles using a machine pattern. Next I used a heat gun and zapped the Tyvec creating lots of holes revealing the dyed fibres that I had spread thinly underneath. The stitching prevented distortion.
The holes were embellished with beads and sequins as you can see in this close up.
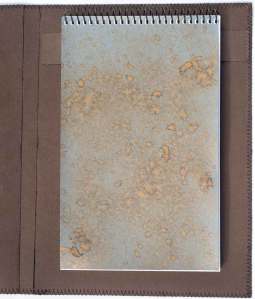
The fabric was lined with card and stitched around the edges. I fitted an A5 reporter pad inside but first I sprayed the front of this with the same gossamer gold moonglow.
You can also see how I attach the pads inside the folders.
This final folder used a small square of leather. My daughter had given me the squares of leather samples she had from when she was choosing the leather for her sofas. She never throws anything away until she checks with me first.
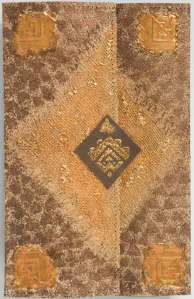
I stamped a design onto the leather using some pva. I sprinkled embossing powder over it and zapped with a heat gun. I chose a sheet of medium weight parchment card and sprayed this too with the gossamer gold. I folded the card making an overlapping front. I tea dyed some scrim and glued it onto the front flaps. I messed about some with the scrim and finally finished up with having brushed gold metallic paint into it and applying gold embossing powder to the surface.
Next I stamped bronze metallic triangles over the surface which I didn't like so I went over the top of this with sponging which looked a bit better. Still not happy I applied some pva to the corners, sprinkled and melted gold embossing powder and stamped the same design on the leather into the embossing powder. The leather was then glued onto the centre front flap. The result was not what I set out to do and I am still not happy with it but it looks OK - better than in this photo. It will take an A6 pad.
Having completed quite a number of pad folders I decided to have a change and I am now working on a series of art quilts.
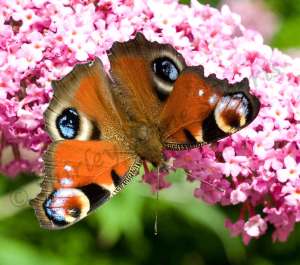
As the weather has been so nice I have been working in the conservatory and found myself watching the butterflies feeding on the budlia bushes. In fact I have been studying them more than getting on with my sewing. I have managed to take a lot of close up photos of them and here is just one of them - the peacock butterfly.
Finally I would like to thank all those who have sent their congratulations on the release of my book and to those who have sent lovely emails praising it - very much appreciated - and to Lynda (Purple Missus) and Mags (Digital gran) for their kind promotion and praise on their blogs.
I think that is about all for now. It is late and I need to get to bed so cheers everyone.




3 comments:
The pad folders are great. What an imaginative way to use the starburst stain. The butterflies are certainly very prolific at the moment and your photo is excellent. Waiting for your book to arrive from Amazon at the moment, it should be dispatched from next Thursday.
What a great recycle usage. I don't purchase those types of things as I'm an asthmatic. I'll have to ask friends if they use them though. Thanks.
Great write up on your book in "Stitches" well done great idea with the air freshners.Takes for the link to Vita Marie some wonderful work
Post a Comment