Now that the excitement of the book release is over it is time to get back to some serious blogging.
Everything is a bit quiet out there in blogland as many bloggers are taking a break from blogging. I do hope, however, that they still have a look and a read even if they don't comment and blog themselves at the moment. Having a lot of blogs to follow can eat into time and that is something we do not have enough of. We would all love to have more hours in the day, I know I would and it is true - the older you get the faster time passes. No sooner have I got up in the morning than it is time for bed and I am a night owl not going to bed until well into the early hours. Trying to fit in all the things I love to do (not including the dreaded housework and for me cooking!!! I might add) is getting harder.
OK now to the creative stuff.
Today I spent the day preparing my images on the computer and printing them onto silk ready to create some art quilts. I brought two rolls of freezer paper back from America for this but after using it for three prints some up to 30 x 60cm I find that it does the job and I will continue to use it - well I have to now that I have so much of it - but I prefer using 505.
Last week I continued to make more little pad folders using the same criteria as the ones on a previous blog ie. to use up the many samples I have stored. I will show a couple of them as I can't find the images of three of them so will have to take them again in daylight tomorrow.
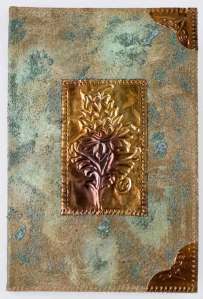
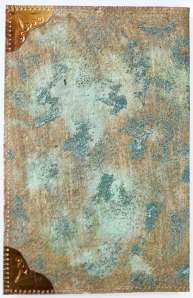
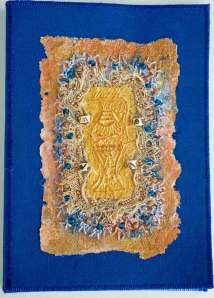
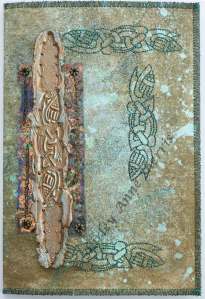
This one used the technique I used on a previous book - that of creating a rough patina finish. I painted a piece of card with the metallic bronze paint and while it was still wet splashed it with green patina fluid and sprinkled bronze patina embossing powder over the surface. When it was dry I zapped it with a heat gun.
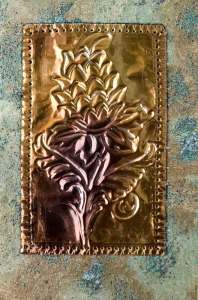
Next I burnished some copper shim and embossed a design onto it and machined this onto the front of the folder. I also made four embossed shim corners. I lined the folder with some mottles paper and stitched around the edges.
This is the front.
This is the back.
And this is a close up of the embossed shim.
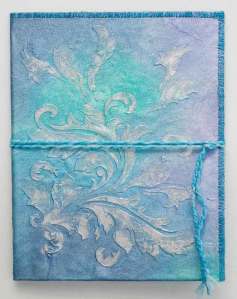
As many of you out there have done, I too bought Lynda Monk's book and used one of her techniques for this next folder.
I made a number of stencils to use with this technique and to use with paint too. I always get carried away when I do these things and actually finished up with a lot of stencils.
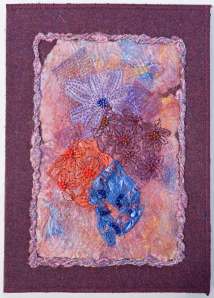
I painted some twill fabric with white gesso then using one of my stencils and molding paste created the raised acanthus leaves on the front and back. When they were dry I painted the surface with acrylic paints. The colours were determined by having to try and use up some of the Alchemy paints which were now going off in spite of regularly adding water and mixing them. They do tend to dry out after a while although I have had them a few years now. Some of them have dried up altogether so I have ground them up and I mix them with some acrylic medium to use them for textured surfaces.
Anyway that is why it is the colour it is. I fingered some silver metallic paint over the raised design. The fabric was lined and stitched around the edges and a wrapped cord was made to fasten. The back is the same as the front.
I will retake the photos of the others and blog them another time.
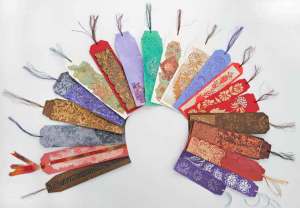
Yesterday I completed a batch of 20 bookmarks. They arose out of the need to use up off cuts of card which had accumulated from making the little folders and there was still more serendipity paper and samples to use and I did a little bit of experimenting too.
It was the first chance I had of trying out my purchase of Starburst stains. I also used some of the acetate stencils I made a while back and managed to use some of the stamp impressed Softsculpt from a couple of years ago. They took a lot longer to make than I envisaged as making decisions about how to do each one and how to use the bits etc took so long. In fact, making the decisions always takes longer than making and finishing them!!
Tomorrow I will start on the over painting of the printed images.
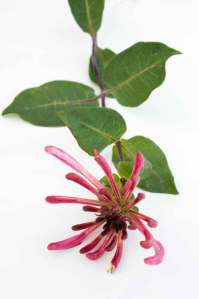
Earlier this year we tried to get rid of some honeysuckle which had become quite rampant in the garden. We thought we had removed it all but apparently not as there were flowers ready to open on the top of the hedge. I cut one to photgraph it as it was too high to reach and too windy to get a good shot.
I think it is much nicer to photograph when at this stage than fully open.
OK that's about it for tonight. Need to sort out the paints.
Cheers everyone.

