Thursday, 17 December 2009

The first snow of this winter - Brrrrrr

Today we have had the first snow of this winter with bitter cold winds too. A good day for staying in the workroom although I did venture out for part of a minute to take this photograph for my 'image of the day' which is 351 today. Not many to go to complete the year.


I have been busy lately with lots of things - not Christmas ones yet. They begin when my grandson finishes school and stays with me. I have sent out the cards which needed to be posted.

I have been spending time on my photography and digital imaging and laying out a book. How time flies when doing these.

There has been time too to create some textile pieces. They have been a mixture of art quilts, panels, books and folders.

I don't have time to show them all or go into the detail of how I created them but I am sure many of you will be able to see which techniques I have used. There is very little new out there just variations.


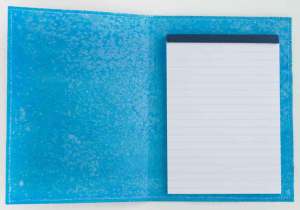
This is a letter or note folder. I have used white acrylic velvet and dyed it then layered it up with fibres, chips and black Misty Fuse. I free machined the scrolls over the top.


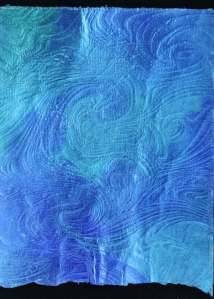
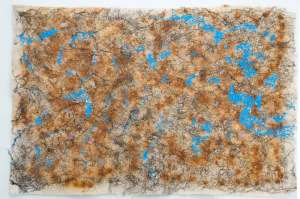
I have been experimenting a lot with making paper but not with pulp. This piece of paper is painted ready to embellish.


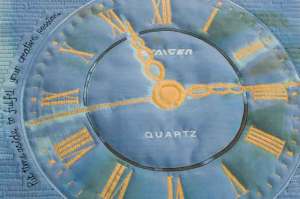
As I have already mentioned, I have been doing a lot of photography and one of the topics I am working on is 'Time Pieces'. My OH gave me a lovely carriage clock many years back for a wedding anniversary present and I took some photographs of it. I used one of the images, applied a special effect in Photoshop, enlarged it, printed it onto coated silk then free machine quilted it. I applied some gold paint on the numbers and pointers. I also free machined a message around one side of the clock face. Now here is a confession. The reason for the text is because when I printed the image onto the silk, I did or didn't do something and it printed to one side. I couldn't bear the thought of reprinting or cutting it down and wasting all that ink and silk so I created the text -"Put time aside to fulfil your creative passion". Neat Eh????


This little quilted panel was an attempt to use the basic technique and colour scheme of Lynda Monk and adapt it . I didn't quite get the colour scheme right and set myself the challenge of double machining the machine patterns so that they were exactly over each other. It worked but I like Lynda's colours better.


Now the colours on this little book were what I was trying to achieve. I must be bolder when it comes to 'washing' over the top with another colour. The cover was another paper experiment.

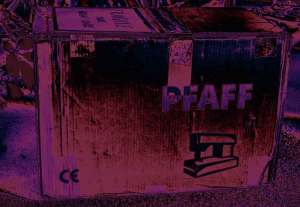
Bad news at the moment - my embroidery machine has had to go back to be repaired AGAIN. So I had to pack it all up again to be collected by the courier.


The last time I did this I took a photograph of the box and applied a special effect to it. Didn't expect to be using this image again so soon. Why do we feel such a personal loss when our machines have to go away?? I do have another one so I can still do all my sewing but........

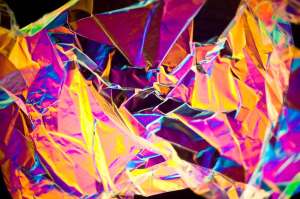
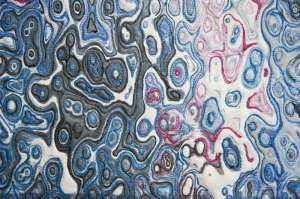
And speaking of photography again. I did a study using a sheet of polorising filter and here is one of the images.


and another one-


I think I finished up with 90 images from this session.

I haven't time for more. Must get something to eat which reminds me - My 10 year old grandson said to me a couple of weeks ago when it was time for bed -'if we didn't have to go to bed and didn't have to eat or go to the toilet, we would have much more time to do what we want.' Hmmmmm now there's a thought.

Cheers everyone

Saturday, 24 October 2009

Rudbeckia folder

It has been a while since my last blog but I have something to blog about tonight.

A few blogs ago I mentioned a visit to Richmond castle - the one in North Yorkshire. I posted an image of a swathe of Rudbeckia in the castle gardens.

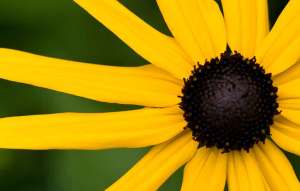
These flowers caught my eye and I took several photos of them including my favourite kind - macro.

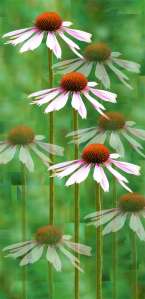
Rudbeckia

I decided to use this image for the cover of a pad folder.

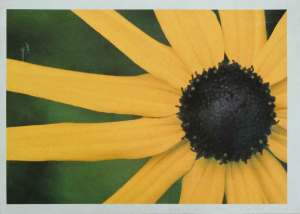
I bought some Evolon at a show this year and wanted to use it and see how it behaved. I decided to print the image onto it. Not having printed on it before I didn't know how it would print so to be on the safe side I gave it a coating of InkAid to ensure a better vibrancy of colour.

Ink-aid-2

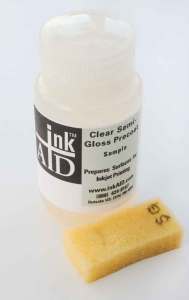
InkAid is a fluid which will coat any surface and if it will go through an inkjet printer, you can print on it. The ink does not soak into the surface and lose its vibrancy. If you have never used it, it is worth a look.

Ink-aid

I use a dense piece of sponge to apply it to the surface. On this occasion I used the clear semi gloss precoat.

Be sure that you take note which side of the fabric you coated - which I didn't!!! so I am not sure if the coated side was the one which was printed. The colours were vibrant enough so I hope it was the right side.

Print-on-Evolon

This synthetic fabric is strong and can be free machined without a stabiliser. I free machined some detail lines onto the petals and then began to create a padded centre for the flower. First I tacked several layers of wadding in the centre to create a 'dome'. Next I took a piece of black felt and covered it with a layer of black crystal organza and backed it with a piece of black stabiliser. I then, using black metallic thread, stitched lines in two directions across the suface to closely represent the centre of the flower.

This was then stitched in place over the 'domed' padding.

Next I stitched three rows of fringe using a fringe foot which I have had for at least three years and never used before. I used a very unfriendly black thread which kept shredding so I had a lot of ends to stitch in. Even though this can be a bit tedious, I prefer to persevere and use these threads for their effect rather than not.

I stitched gold glass beads at intervals into the fringe. This completed the front of the folder.

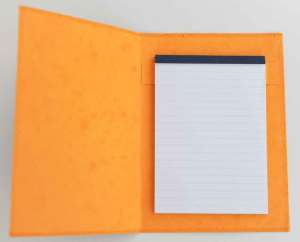
The inside was created from a piece of golden yellow card which was adhered to the front using a spray glue. I trimmed the edges and then zigzgged the edges together.

Inside-finished-folder

I used a piece of the yellow card to make a holder for the pad. It was folded and creased - completing the folder.

Rudbeckia-pad-folder

A simple and effective technique.

At the moment I am trying to decide on a new project and have a couple in mind but nothing definite yet. No sooner do I think I have decided than I come up with another one and off I go again with indecision. So frustrating - lots and lots of notes and scribbles growing by the day. I need to take 'the bull by the horns' and make a start. Once I do that I will be focussed and the project will grow. Hmmmmm.

Tonight I must process my image of the day so until I have something else to blog -

Cheers everyone.

Wednesday, 7 October 2009

Bronze art quilt

A bit of a gap since my last blog but I have something to blog about at last.

I have spent much of my time mastering the music editing software 'Audacity' and iMovie to create AV's. I have created three so far. It has meant that I have had to browse through all my image files, sorting out the images I wanted to use for them. It is only when I needed to do this did I realise just how many images I have in store.

I did a photo shoot on some antique pocket watches which had the most wonderful detailed and delicate engraving on them. I want to do another AV using these images so I am now trying to find music to go with them. Hmmm.

Now on with the textile part of the blog.

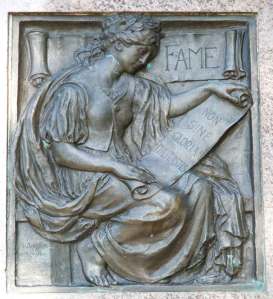
Earlier this year, I went to my town's public park to do some photography and came across a bronze plate sculpture. It was created by a local sculpture who became quite renowned for his bronze sculptures. The bronze plate was a memorial dedicated the the fallen of the second world war. As it is the 60th anniversary of that war it was rather fitting that I use this bronze plate as my tribute to those who sacrificed so much.

Bronze-plate-original

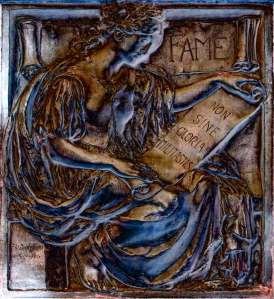
I took the image into Photoshop and put a special effect on it.

Bronze-plate-effect

I decided to make an art quilt of the plate. First I needed to make a pattern so I turned the image into black and white and then applied another filter onto it to crate a more defined contrast. I resized and printed out this image.

Bronze-plate-b&w-pattern

I pinned tracing paper over this image and traced the most defined lines. I decided to leave out the scroll across the top and also the text on the scroll she was holding. I went on line and found a Latin translator and devised my own Latin words to put on this scroll. "Never forget their sacrifice"

Once I had the traced pattern I could prepare the fabrics. I had in store some wonderful very dark gold and black sheer but it was a bit too gold so I used some habutai silk and painted it with a bronze colour which when placed under the sheer gave a very effective metal bronze. This was made into a quilt sandwich with 2ox wadding and black background fabric. The traced design was pinned over the top and using a black and gold metallic thread, free machine quilted the design.

When the design was stitched and all the tracing paper fully removed - a bit of a tedious job but not one to skimp - the edges were stitched and then the patina effect applied. I had intended to use a blue metallic paint for the patina effect but eventually I used both blue and green (ver de gris) metallic paints. I gently fingered the paint over the areas I wanted to be patina'd!!

It really did look like the bronze plate in the park.

Completed-quilt

Here is a close up of the head.

Bronze-art-quilt-close-up

I have now begun my next piece which is very different - not an art quilt - but it will have to wait as tomorrow I am off down to London to Ally Pally. We are staying overnight near to London so that we can get to the show for its opening. I have never been to Ally Pally before and it may be my only visit.

To make this an even better visit - I am meeting up with Lynda Monk (Purple Missus) and we are going to spend the day together. We have never met but have become good friends via blogs and emails. I am taking my copy of her book for her to sign and hopefully she will have her copy of my book for me to sign. I am really looking forward to Thursday. It is going to be a super day. So it is off to bed - packing to do in the morning and an early start.

Cheers everyone.

Tuesday, 22 September 2009

Rusty folder

I wondered why I have been feeling so tired and lethargic of late but yesterday I discovered why. I have developed a throat infection and cough and it is affecting my ears too. However I don't feel so tired and lethargic now so the worst must be over. Just need to get rid of the sore throat and cough.

I have not been doing quite so much in the textile field as I have been learning how to create photo slide shows with music. They are usually referred to as VA's. I created my first one for my daughter's birthday - at her husband's request. It started out as just being a little slide show of her growing up but developed into one with music and all the photos fitting the words of the song.

With one under my belt, I decided to go further and use some of my own photography and create a VA I have called 'The Changing Year'. I used iDVD on my Mac to make the first one but I wanted even more control over this one so I have had to learn how to use iMovie on my Mac. I knew which music I wanted to use but I only had a copy of it on an old cassette so I had to go on line and find a new CD copy which I found and bought with a few others!!! Like my music.

I waded through all my photographs and reduced the choice down to 72 of them. I played with the different transitions and times and calculated that I needed about 8 and a half minutes. This meant that I would have to have at least two pieces of music and join them together. No probs - there is a free download of a program for editing music. It is called Audacity. I downloaded it and have learned how to use that and have now not only joined two pieces of music with fade in and out and removing bits that didn't fit at the blend but also selected a phrase of music and pasted it in to lengthen it by 30 seconds to fit my slideshow exactly. I found it all much easier than I envisaged although that is down to the two programs making them reasonably easy to use.

So I now have an AV called The Changing Year which runs for just over 8and a half minutes with music. Planning my next one now. Just looking for the images to fit the piece of music I have chosen.

Now for a textile piece.

When I was at the FOQ, I bought some Rusting powder so this piece is the result of trying it out.

I cut a piece of fabric, wet it and laid it in a tray and sprinkled some rusting powder over it then spritzed it with white vinegar.

Rusty-1

I left it to cook for a couple of days until the depth of colour was strong enough.

Cooked-fabric

It was washed and ironed ready to decide what to do with it.

I have been going through a bit of a 'can't decide what to do next' so eventually decided to use this fabric and create something. I decided to make another pad folder as it was the right size.

I sponged the surface with bronze metallic paint then ironed some black FuseFX over that followed by blue transfer foil.

Adde-layers

Again, a chance to use up some sample bits - I painted a paper cast of a brooch and some Tyvek which had been imprinted with a stamp design using an iron.

I also dyed some yarn to couch over the surface.

Open-cover

The motifs were stitched in place with free machining and the dyed yarn was machine couched in a design picked up from the centre paper motif.

I painted some blue card with brusho and sprayed Starburst stains over that and sprinkled salt over that to create the mottled lining.

Inside-folder

It was edged with a zigzag over stitch with a metallic thread.

Cover

And here is the finished pad folder which has turned out better than expected.

Now back to' what do I do next'???? Off to the workroom and hopefully.....

Cheers for now everyone.

Tuesday, 8 September 2009

Canvas file cover

At last I have finished the canvas file cover. It has taken a long time as it has all been hand stitching.

I have always enjoyed doing all the different techniques in textile work and that includes the traditional as well as the very new. In fact I always use whichever technique that gives me what I want and I often combine them if that is what is required.

Because I have had this wide range of interests it means that I have a wide range of materials and 'stash' as we like to call it now. It is a good word - it sums up my hoard perfectly - another good word!


I have been doing a bit of reorganising lately - making room for more 'stash' and came across a roll of canvas the hessian coloured kind. I decided to use some of it but for what. Then I spotted the large ring files I have in store - 8cm deep ones. They are useful to store samples and small pieces in clear plastic files and being 8cm deep means you can store quite a lot. I have one in use at the moment which i made a cover for not long ago. So I decided to make another cover ready for when the current file is full.

I cut the canvas to size - large enough to make flaps at either end and turn unders along the edges.

I painted the canvas on one side with black acrylic paint. When it was dry I used Liquitex gold, green and blue interference medium and gently finger brushed it over the surface blending the three colours as you can see on the back of the cover.

Not as shiny and vibrant as in reality.
I placed squares of Irise film behind to catch the light. It also reflected the same colours as the interference mediums I was using. I would be stitching through the film to hold it in place.

Next I had to decide what to embellish on the front. I began to scribble and as you can see doodle as I incessantly do.


I could not get squares out of my head probably because the canvas is all squares. So I decided to go with a squares design. The one above was the starting point and guide and I didn't change it too much.
I sorted threads , mainly metallics - my favourites. I didn't have all the colours I wanted so first I had to dye some. Once I had my threads I began with the square in the bottom right corner. I couched the cord around a square. Inside that I canvas stitched another square. Now here's the suprise. A number of years ago I bought lots of those hanks of glitter threads you see hanging on some of the stands at the shows - cheap. On returning home and emptying out the goodies comes the - 'why on earth did I buy that!' The answer is usually impulse and it was cheap. So they are stored away probably never to be used. Well, while picking out my threads for this piece which always includes every box I have I came across this hank of very shiny glittery 'Christmassy' coloured metallic cord. The biggest suprise was that it worked. It looked right. This sent me rushing to get other shiny glittery threads which would contrast in the same way (but not quite as much!!)
I had already decided to use a burnished copper shim for the centres of the large squares so that was the next task - to draw a little square design to emboss on the shim.


I embossed this little design onto the shim and stitched it into the centre of the square outlining it with another metallic twist. I left the remainder of the shim squares until the end so as not to damage them during the stitching. I just wanted to see how one would look in case it didn't work - but it did.
Now I could continued with the rest of the squares. To help set it out I cut paper squares of different sizes and laid them onto the front and when in the correct position I pinned them in place.
At this point I came up with another idea. I had thought of using black felt squares with machining on them and stitching them to the surface but didn't like it when I placed a piece of felt on the surface but then I decided to stitch a machine pattern of squares on strips of felt and when I placed these on the surface I liked them so they were stitched in place.
All the large squares were stitched first followed by the next size and so on. How each was done was decided as I came to them and so the design grew.
The space between all the squares was originally to be small square blocks spread randomly around but as I began it changed into being an all over checkerboard fill using dyed glitter thread and six stranded embroidery thread. I had to keep dying a bit more and a bit more of the threads as I went as I wasn't sure how much it would use to do this pattern.
When all this stitching was done I embossed the shim and stitched them in place. I used my logo for the square on the spine. Here it is reversed.

I reversed the logo before embossing so that when the shim was turned over the logo would be prominent rather then indented.
I also stitched beads in the centres of the smaller squares and a jewel was held in place in one of the squares with knitted metal tubing/ribbon but a very fine black one.
The edges were turned under and I over stitched with a thick black rayon yarn that I had in store.
The end flaps were turned under and stitched and the file inserted.


It took quite a long time to stitch but I like the finish. It does look much more vibrant in reality than in this image. Metallics are so difficult to photograph.


I have been doing other things while making this file cover.
On our grandsons last day of the school holidays we took him to Richmond castle (the one in North Yorkshire not far from us). He enjoyed his photo shoot and the picnic.
We climbed up to the top of the castle keep and had I known how many steps there were I may have stayed below. The views were stunning to compensate.
Lots of wall texture.

And swathes of bright yellow Echinacia in the castle garden.
and patterns on the paths.

Lots to photograph.

We went down to the waterfalls which are a very special colour due to the peat content. The are very loud when you get close to them but we took some fabulous photographs freezing the spray and water in mid air.
Yesterday was such a glorious day we went to the Yorkshire aircraft museum which has lots of outside displays. Lots to photograph including this very rusty wheel centre just for Lynda.


A long post and now I am ready for lunch so cheers everyone.

Friday, 28 August 2009

FOQ and FAQ

Last Thursday my DH and I set off at 6am and headed for the NEC at Birmingham to the FOQ - Festival of Quilts. An unusually easy journey down which meant we got there sooner than expected. We had a coffee, went to look for a loo and then joined the queue to wait for the show to open.
I decided to do the stands first and the quilts later. I also wanted to see if my book was on the book stands. What a strange feeling seeing it there with all the others. I found out some days later that on one stand they had sold out and were waiting for more to arrive which sounds promising. I do hope those who bought it liked it and found it useful. I have had some lovely emails praising it and one purchaser wrote what can be described as an 'essay' in a review on Amazon.
I digress. I gave most of the fabric stands a miss as I don't buy fabrics. I prefer to dye and print my own. I bought some Evolon and another large piece of bleached mulberry bark at a very reasonable price for the size. I bought some rusting powder and have already had a play with that. Some threads and that's about it.
Then I went around the quilts. There were some amazing quilts my favourite being the art quilts. The winner was well deserved - beautiful work.
I called at the Computer Textile Design Group stand and had a chat to those who were stewarding something I had done a lot of myself in the past.
I particularly wanted to see the stand of Linda and Laura Kemshall whose work I really like. I bought their book.
We didn't stay until the end which meant we could miss the worst of the traffic and had a smooth trip back home.
A friend told me that there are usually about 2000 quilts displayed but not as many this year. Not sure that I would want to look at that many.

Now for the FAQ - Finished Art Quilts.
In my last post I showed a finished and a couple of not quite finished art quilts.
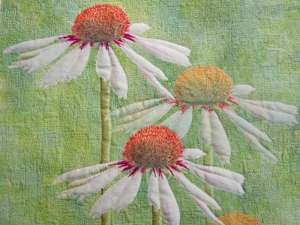
I have now finished all four quilts. Here is the finished Echinacia quilt.

I found the border fabric in my green fabric box and was the left over fabric from when I made my sister in law's curtains many many years ago. It was a glazed cotton and worked well around the piece. Everything comes in useful eventually!!

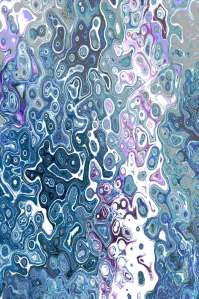
The blue quilt which was a computer generated design and when I had finished the quilting I couched some black metallic twist along one of the lines working down the design then decided to add some free machined sheer fabric leaves which were on the computer affect prior to this one combining the two.

Here is a close up of the leaves.


The last of the quilts was again generated in the computer and printed on silk. It was from a photograph of some hydrangeas.


I used a simple filter on the image which enhanced the colours and features if the flowers. I must have done something else as the printed image was much lighter than this. I really must remember to write down what I do as I play with images on the computer. I tell everyone else to do this and forget to do it myself.

Once the image had been printed, I added some acrylic paints on the petals and large leaves then free machine quilted it.


It was edged with some silver grey slub silk. I rather think I would have preferred the stronger image and am wondering why I didn't use that one. Ah well c'est la vie.

I am now on with something completely different. I have a roll of hessian coloured tapestry canvas which I bought back in the days when I was really into contemporary canvas work. I have never used any of it so decided to try and think of something to at least use some of it.
I decided to make a cover for a large A4 ring file which is about 8cm thick. I cut the canvas and painted it black. Then I finger rubbed blue, gold and green interference over the surface letting them blend together. It looks really nice.
Now I am embellishing the surface which will be mostly hand stitching. I have dyed threads and yarns to go with the piece which I expect will take quite a while to finish so until then
Cheers everyone.

Wednesday, 19 August 2009

My first time to the festival of Quilts.

I have my tickets and will be making a very early start on Thursday heading for the festival of quilts for the first time. We have to set off at 6am in order to get there for the doors opening. We just hope the traffic isn't bad or it will take even longer than that. It will be my first visit and I just hope it turns out to be as good as everyone tells me.

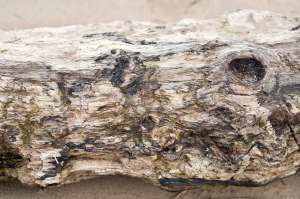
Coincidentally, I have been working on four art quilts recently all involving my photography and printing onto silk and cotton. The first one I finished started as a photograph of a piece of driftwood on a local beach. We were with our camera club on their summer photo shoot location which was - this summer - to Saltburn by the sea. It wasn't a very nice evening and everyone found it quite challenging. I, as usual, was also looking for shots which would transpose into textile work. This piece of driftwood was just one of those shots.

Driftwood

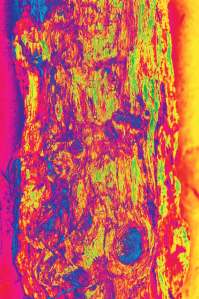
I turned the shot vertical and then began to play around with it using the filters in Photoshop. I came up with a very bold and colourful psychedelic effect which I quite liked.

Driftwood-psy-effect

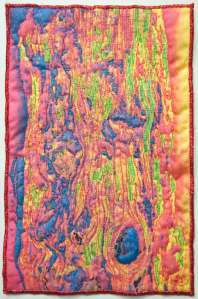
I decided to print this onto cotton mainly to see how pigment inks printed directly onto untreated fine cotton. There was no bleeding - brilliant result. After the first print I put it through for a second time for a stronger colour, taking care to line it up exactly.

Next I painted parts of the image with metallic acrylic paints, mainly the blue and lime green to add to the surface texture.

I made up the quilt sandwich and free machined picking out the features of the image. I added more texture with hand stitching - seeding and French knots - and finished with a satin stitch edging.

Psychedelic-driftwood

It remains as a panel at the moment but I might use it for a book cover. No rush to decide.

The remaining three quilts are not quite finished yet but I'll show what I have done so far with one of them.

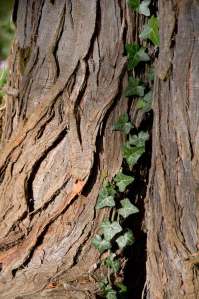
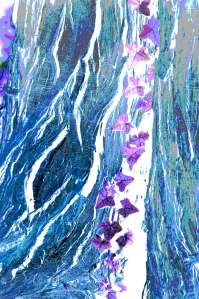
It began with a photo of some ivy wrapped around a very deep textured tree trunk.

Ivy-climbing-tree-trunk

Again I loaded it into Photoshop and created the invert image.

Ivy-climbing-tree-trunk-inverted

I continued to play with the filters and came up with this-

Ivy-climbing-tree-trunk-copy-2

I decided to go with this one. I printed it onto treated habutai silk. I matched the threads using polyester, rayon and metallic and quilted the design. Here is a close up of the surface.

Quilt-surface-close-up

I am now in the process of adding surface texture and came up with another idea tonight so it will take a bit longer to finish. Watch this space for the finished quilt.

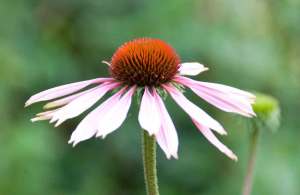
When on a visit to a university botanical garden I took this photo of an Echinacea.

Echinacea-2007

And again, I loaded it into Photoshop and created this design.

Echinacea-design

This was also printed onto treated silk and quilted. I have just finished the hand stitching and it is ready to be edged. Here is a close up of part of it. I'll post the full quilt when it is finished.

Echinacea-close-up

The fourth quilt will have to wait for the next post as it is getting late and I still have things to do. I want to print out the floor plan of the quilt show and the list of exhibitors and traders. I shall also have to call on the CTDG stand where there is some of my work displayed and say hello to some fellow members. I didn't know until last week that I was going at all and didn't know until today which day I was going so I couldn't volunteer to steward for them. Apologies for that.

So until the next blog - cheers everyone.