Another long gap but I have been busy. The work I have been doing has been rather time consuming so not a lot to blog about while creating them. It is another case of 'not enough hours in the day'. So much I want to do and not enough time to do them. Housework tends to slip to the bottom of the list although I did do a good dust bust and hoover yesterday - well actually, my OH did the hoovering bit while I did the dist busting bit.
We have been out on a number of photo shoots and when we return there is always a long and time-consuming session processing and playing with the images. I have also given two talks to embroidery groups with another one later this month. i was also persuaded to give a workshop for one of them so have been looking at ideas and creating samples for that too.
Another new passion of mine is creating AV's (audio visuals) from my photography. I have created five of them now. The latest one evolved from the need to scan and rescue our huge library of slides taken when we used a film camera. They were beginning to degrade and were also covered in dust particles and tiny bits from just the general showing of them over the years. Each one has been scanned, every tiny dust mark removed, the image enhanced and brought back, as close as was possible, to the original and saved as a digital image. It brought back so many memories of that trip that I decided to create an AV from some of the best images. We did not have the camera or the lenses of today and you can imagine the results of taking images sitting in a sanpan travelling over the water with the boat going up and down, an iso of 100 and no VR lens (for those not in the know about this - it means slow speed film and no anti shake lens). Many of the images were a bit blurred but in spite of that I did manage to sharpen and enhance them enough to use in the AV.
I have used a fabulous piece of music called Fishing junks at sunset - perfect for this AV. It is about 8 minutes long and uses about 74 images. I have also learned how to pan and zoom which makes for a more interesting effect.
These are a few of the images I used.
This is Hong Kong in Cantonese and was part of the intro.
We were there a few years before Hong Kong was handed back to China and I created this Dragon box as a memory of that visit.
We are now in the process of putting together another visit to Hong Kong to see how it has changed over the years and now that we have a camera and the lenses to do the photography should get a fabulous record of the place. I loved every minute of the last visit. I hope the next one will be as memorable (in good ways with no disasters).
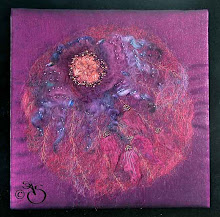
I have still been creating some textile work - and yes, more art quilts. I am really into these at the moment.
When we were over in Florida we went to NASA space centre again - having lost all our photographs of it from the last visit when my computer crashed. I took this image of some very large leaves which were outside a restaurant. This image has been played with a little to get a better composition.
I played with this image in Photoshop and Paint Shop Pro and came up with several designs for art quilts. The first one was created using PSP and the kaleidoscope filter.
I also played with the colours and quite liked this rusty red effect. I also extended the design with some copy and paste. I made it 30cm wide so that I could print it on the A3 printer to its maximum size. The colours were saturated for the printing and I used pigment inks on white cotton. I also put it through the printer twice to enrich the colour. I have devised a way to fool my printer so that it will overprint. Once printed, it was made up into a quilt sandwich and free machined.
I couched some thick yarn and added beads for effect. 
The second quilt was quite different. I kept the leaves but played with the colours and effect. I also selected some leaves and pasted them over the top to create a balanced design. I used these selected leaves and printed them separately to apply on top of the finished quilt.
This is the finished art quilt. It is 60cm wide so fairly big.
I had to divide the design into two and printed the two halves separately - each 30cm wide. They had to be joined with a single seam down the middle which is partly hidden by the applied leaves.
Again, when the printing and joining was complete it was sandwiched and free machined. The separate leaves were stabilised with vilene and free machined. Then they were cut out and stitched in place over the top to create a 3D effect. I made six of these.
And that's about it. I am now ready to start designing the next project. I have more designs based on the leaves ready to print but might do something else. I have noticed that the bluebells are pen in the garden so may go and bring some inside and do some macro photography on them. Hmmmm - a bluebell art quilt!!!! but I really need to use some of my other materials. In a quandary as to what to do next. Watch this space.
Cheers for now everyone.


