Wednesday, 20 May 2009

Nautilus Quilt

It has been a while since I posted. That is because the piece I have been making has taken longer than usual.

I have wanted to do a piece using the nautilus shell as the design source for a long time and now so that is what I have been doing.

I used these two images which show special effects on the open shell.

nautilus-shell-10

nautilus-shell-11

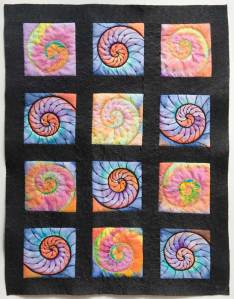
One of them was sized, changed to black and white and a pattern printed. Then I cut twelve pieces of Habutai silk 13 x 13cm. I stretched each one onto a frame and traced the design with a soft pencil. I planned to paint six light colours and six dark colours so I used gold gutta for the light ones and black gutta for the dark ones. I always repeat the resist on the reverse to ensure there will be no bleeding of the paint. Once the resist was complete I began to silk paint the colours. I had to work quickly in order to get the silk paints to blend into each other. Although I used the same colours on all the shells, they were not painted identically.

By the time I reached number twelve, I have to admit that I was a bit fed up of repeating them. I even toyed with the idea of reducing the number of painted shells to either nine or eight but - true to form - as I had already cut twelve pieces of silk I couldn't waste any so twelve it was.

Once all the shells had been painted I ironed a soft Vilene stabiliser onto the back at the same time as setting the colours. Next I cut the border pieces using black silk. With hind site, I should have stabilised these too with iron on Vilene to reduce the stretch and distortion. They were all joined together, the seams ironed and then a quilt sandwich was made.

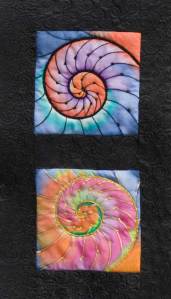
I free machined the coils and then couched Japanese gold thread over the top on the light shells and black metallic fingering over the coils on the black ones. I also stitched French and bullion knots around the coils. Each shell was then outlined along the seam line.

Finally I free machined coils all over the black borders using black metallic thread. There was some distortion and lessons learned but it is very colourful.

Nautilus-quilt

Here is a close up of the two shells and borders.

Nautilus-quilt-close-up

Another idea put to bed!! On with the next project.

I am continuing with my image per day and there is a wealth of photography in the garden now although I do use other sources for my images including digital composites. Here are a few of the garden images.

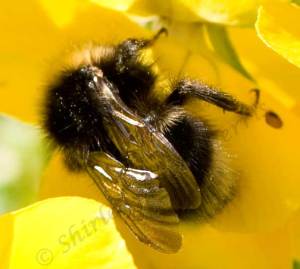
Bumble-bee

This bee just would not turn round for me and it isn't as sharp as it should be - didn't use the tripod!! tut tut.

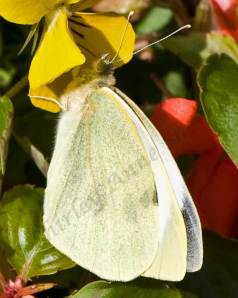
Cabbage-white-butterfly

This too was hand held - not too bad considering it wasn't there very long.

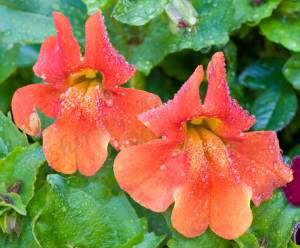
Monkey-flower-09

One of my favourite flowers. I only know it as the 'Monkey flower'. They are so prolific and such brilliant, vibrant colours. They keep flowering and flowering all summer.

My family are over in Florida at their villa for a few weeks but we are keeping in touch with Skype. It is amazing that we can see each other and talk for free for as long as we want. Apparently the weather there is wet and thundery at the moment which isn't going down too well with my grandson. He was showing me the water guns they have bought which hasn't gone down too well with me as I know what I am in for when we get there. We will be going out to join them shortly so I won't be blogging for a while.

I have been putting some hand sewing together to take with me. I am not taking too much as I want space to bring things home although the exchange rate isn't as good as it was last time we were there.

I am giving a talk to an embroidery group in a couple of days so I have been preparing for that too. I hope the weather improves as it is quite a drive up into the Yorkshire Dales so we are hoping to be able to do some photography on the way making a day of it.

That is all I have time for so cheers for now.

Wednesday, 6 May 2009

Busy, busy and busier!

Time for another blog with a bit of a mixed bag.

I have been busy doing a lot of different things at once which makes life a bit hectic.

First of all I will show a couple more of the pieces that I have finished recently.

On the last but one blog I mentioned a panel I had finished but would show later - well here it is.

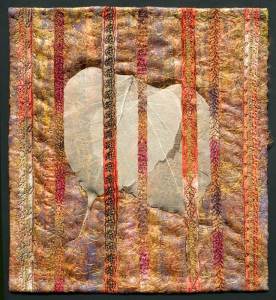
skeleton-leaves

It is a mixture of a number of techniques. It began with painted bondaweb ironed onto some purple fabric. Then I spread some dyed fibres over the top and ironed them in place. Next I ironed two skeleton leaves over this. I made a quilt sandwich and then I used sari ribbons and some ribbon yarn and machined them in place with machine patterns. Not sure about this piece but it is colourful.

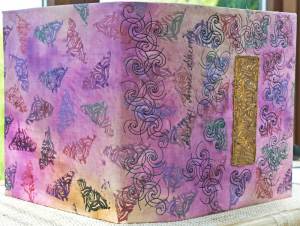
After this piece, I began work on two pieces and this file cover was one of them.

file-cover-open

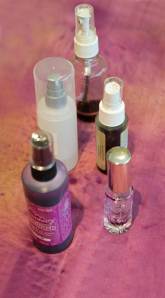
I began by spray dying some calico.

118-apr-28th-spray-dying

I wet the fabric first then just sprayed the different colours and let them bleed into each other. Then I gave the surface a coat of acrylic varnish so that the stamped motifs would be more vibrant. This was good for the metallic paints but not so good for working with as the surface was stiff and difficult to work and stitch. A softer varnish next time!! I used part of a Celtic stamp and stamped the design randomly over the surface using four colours. I sometimes used a couple of colours together on the stamp and let them blend together to vary the effect.

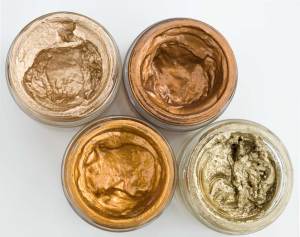
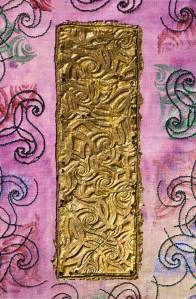
I used the whole of the Celtic stamp to make a paper cast of the design. I varnished this and then painted it with a dark bronze metallic paint and then..... I used one of those sumptuous gilding waxes that Lynda (Purple misses) blogged about.

121-may-1st-gilding-wax

I just couldn't resist buying some. They are very creamy and have a lovely polish smell when using them. Mmmm. Love them - a bit extravagant of me though. I fingered the dark gold over the relief of the paper panel which was to be stitched into the centre of the front.

123-may-3rd-cover-plate

Next I used the design on the stamp and created two designs which I then digitised on the computer with the machine software and then sent the designs to the machine to stitch out. Here is where the stiff varnished fabric was difficult. The thread kept breaking so I had to resort to a much larger needle in the machine. It was also very stiff to manipulate under the machine while stitching. Lesson learned. I used three different threads to stitch out the two designs. As you can see on the finished cover, I stitched three designs down the spine. I also free machined my name on the front too.

The metal panel was machined in place and French knots added to look like studs. I also couched a metallic thread around the outer edge. The edges were turned under and the flaps stitched ready for the file to be slipped inside. Voila - a cover for a file which I will endeavor to fill with small pieces of work.

While all this was being done I was also working on the last chapter of the first draft of my next book which is now complete. It will, of course, need a second draft but the content , the sample pieces and images are all done so it shouldn't be a big job.

I have also created the visuals for a talk on my embroidered jewellery so I could delete all the many files of the jewellery from my computer. There is back up on disc but I no longer need it on the computer so a clear out.

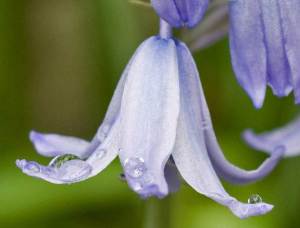
I have, as usual, been keeping up with my image a day which is made much easier now that there is so much going on in the garden. The bluebells are now open and on a drizzly day I got this photo of the raindrops on the bell. You can see the reflection of the leaves on a bush nearby in one of the drops.

bluebell-water-drops

I didn't notice this until I was processing the image on the screen.

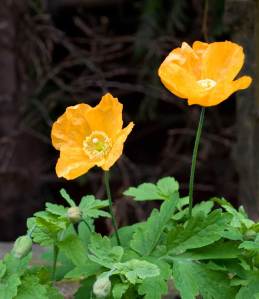
The Welsh poppies are also opening up and there are going to be a lot of them!

poppy-welsh-3

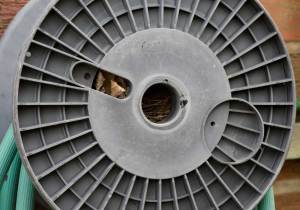
I think I mentioned that we have a wren making a nest. Well here it is inside this drum.

wren-nest-09

Sometimes we think it has been abandoned and then he or she turns up again with more nest material so we will try to keep an eye on it in case eggs are laid. Sometimes the wren tries to fly in with a twig too wide for the hole and finished up on the floor. Quite comical.

My grandson had a good week last week. He won a trophy for his golf and achieved his silver award for survival in swimming. He has asked his grandad to build him a 'trophy cabinet'!!!

Tomorrow I am going to start my next piece which I designed today from an idea I have had in my head for a while so looking forward to that. My OH is going away for five days to the Ise of Man. He crews and engineers for a rally team who are quite successful. weather doesn't look good though. It may be a wet rally.

So... I have time to myself apart from the usual sleep over on Friday by my GS.

Cheers for now everyone.