Wednesday 26 November 2008

Paper shells and Doodle birds!!

Yesterday, I went to watch my grandson in his school production. It was his first speaking part and he was so nervous. Apparently all the boys try to sing and speak badly so that they will not be chosen for parts. it didn't work but at least there were only a few lines for him. He says he prefers just to be in the choir doing the singing. So, no treading the boards for him then!! It was lovely to see his little face light up when he saw us in the audience and he gave us a sneaky wave. He had it to do again in the evening when his parents were in the audience. Not so nervous the second time round apparently.

Now.....

As I mentioned in my last post, when I took the paper shells out of the moulds they had turned out really well. All the detail I'd hoped for was there. They were separated and then I gave them a coat of matt varnish so that the paint wouldn't soak into the paper. I painted them matching the colours loosely to my digitised image. They were given a final coat of varnish.


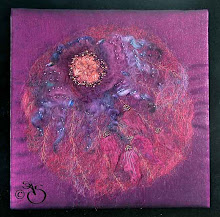
Next I had to decide on a background. I chose a white polyester velvet which I sponged with the colours of the digital image background. This was overlaid with a turquoise sheer also sponged with metallic paint and then sprinkled with embossing powders. The embossing powders were heated and set and the paper shells positioned. The background fabric was touched to create the effect of waves of wet sand. This was free machined to hold it in place. The shells too were free machined in place.

I added swathes of beads along the ripple lines and some dyed curly mohair to represent the seaweed. It was cut to size and satin stitch edged.


An unconventional image of shells on the beach but the colours worked well and I do like to be different!! Unfortunately, it hasn't photographed well as there are too many metallic and sheer surfaces and the shells are three dimensional.

While I was working on this piece I was also experimenting and playing with another piece. I have always been a 'doodler'. I cannot hold a pencil without doodling. In fact, when I was at college, the art students would pass me pieces of paper, even pads, to doodle on during lectures. Then they would take them and use the designs. It is a compulsive thing and I can't not do it. I am banned from handling some papers and magazines.

I bought a new machine earlier this year and with it came software which had sketch and pattern designer modules. I have been digitising for years using the earlier version of this software but now I had the bits I needed to do what I had always planned to do. As always, to learn how to use something, I plan a piece so that I have to learn what I need to in order to fulfil my ideas.

First I had to draw a design which was this bird.


The idea was to fill every space with a different pattern - doodles. In the software there are some built in patterns which I used and I designed some patterns myself as part of the learning curve. The drawing was loaded into the software and the spaces were filled with patterns. As with all digitising, you have to work in a logical way so as not to create long jumps from area to area.

When the digitising was complete and the final painstaking editing done, it was time to stitch it out. Ooops!! I had created it to be A4 size but my largest hoop would not take the design so..... I treat myself to a bigger grand hoop. It also means that I can now go the step further with some free hand doodling next time.

I chose an ivory Thai silk as the background and mounted it in the hoop with a stabilising fabric. Then I had to learn how to get the design from the computer and into the machine. I had to read the manual this time - not something I a do as a rule. Once the machine was ready I chose the threads - mainly rayons and metallics - and stitched out the design. lots of changing of threads and rethreading the machine but I have never minded that. The finished result was what I had in mind.


Now I plan to really doodle and will be using the sketch module to create some abstract doodles so watch this space.

While I have been creating these two pieces, the second draft layout for my book arrived from the publisher so I have been reading that through and making the final edits and amendments. It is ready to go back. The next draft to arrive will be how it will be going to the printers. The end product is in sight.

I think that's it for now so cheers everyone.

Monday 17 November 2008

Paper shells!!!

Having flirted with peacocks and the work of Aubrey Beardsley it is time for a new subject. This time it is to be a piece using one of my own photographs.

I had a photo shoot at Whitby and Sands End and this is one of the photos taken down on the beach at Sands End.

shells-seaweed-original

As usual, I put the photo into Photoshop and played with it, coming up with this effect which I quite liked - shells with a difference.

shells-seaweed

I saw the piece as three dimensional which meant that I needed to make some shells which could be applied and stitched to the surface. This would have to be paper in some form. First, I needed to make moulds of shells. I was going to use Forma blocks or clay but then decided to use up the plasticine which my grandson used to play with. I soften up the plasticine and pressed shells I had collected into the plasticine. I put them in the fridge to harden.

shell-molds

There was plenty of detail there so I hoped this would transfer to the paper. I used loo paper. I put layers of paper over the moulds wetting it to dissolve it and pressing it down into the moulds. After a few layers I used some stiffening medium and covered the paper with it followed by more layers of paper and a final coating of stiffening medium. They were left to dry and then into the fridge to harden off again before I separated the paper from the moulds.

paper-prep

I have now separated them and the results are brilliant. Very detailed 3D shells ready to paint and apply to my textile surface. I will post an image of them when I have photographed them. Now to make the background fabric and texture. Hmmm!!!

Yesterday as it was a sunny day for once and not to be missed, my OH and I went down to the river Tees estuary to a place called Paddy's Hole. The Tees estuary is very wide and there are indents along the estuary mouth. They are used by fishermen who have built huts and moor their boats in a little natural harbour. It isn't as pristine and picturesque as it used to be - a sign of the times - which means there are different kinds of photos to be taken. The tide was out so the mud flats were revealed. All the boats were grounded alongside old derelict boats and empty hulls - right up my street. It was midday and the sun was blazing across the water. I chose to set the exposure to make it look as though it was a moonlight shot with lots of silhouettes. It has taken me most of today to process all the photos and I am really pleased I managed to get so many great images. Here is one of them.

paddys-hole-1

And another one.

inner-harbour-sand-banks-2

Now it is time to put some thought into my shell piece so cheers everyone.

Thursday 13 November 2008

More Peacocks!

It has been a while since my last blog but I have been busy with checking through the first draft of my book which is now complete and has been returned to the publisher and the piece I have been working on has taken a long time too so I didn't really have anything to blog about - textilewise that is. That piece is now compete at least enough to blog about so here goes.

Last year I bought a book from Dover books. It was a book of all of Aubrey Beardsley's illustrations which were on a CD too. He was an illustrator of the 1890's. He was a controversial character and his works vary from the strange and somewhat grotesque to stylised and decorative. I like a lot of his work and ignore the not so nice illustrations.

I quite liked the two illustrations of peacocks and they followed on from my first peacock based piece. They are very stylised and I have interpreted them with art quilting. This is the second quilt.

I began with the black and white illustration from the CD.

beardsley-peacock-in-the-farden-immageI put this into Photoshop and applied the filter 'Find Edges' which gave me a pattern. I resized this and printed it out for a pattern to trace. It was to be about 65cm high.

peacocks-on-the-garden-find-edges

I had to make a few edits and fill in the white square at the top. Once that was done I prepared the base fabric. I used a fine white lawn and colour washed it. Then I trraced the design onto the fabric with a soft pencil. This was placed over 2oz wadding and a backing fabric of white polyester cotton.

The design was then developed using a mixture of paint, over painting, sheers, free machine quilting and some final hand stitching. I edged the piece with a rich dark blue satin. I added a few tiny petrol coloured sequins on the peacock combs.

peacocks-in-the-garden

I have made a support rod, painted it metallic blue and dyed some threads to make a hanger and tassels to hang down the sides of the piece.

I had planned to make sheer feathers and layer them over each other to create the tail but having made one I decided against it and painted the tail instead which has worked quite well.

I am still deciding whether or not to add decoratrive quilting to the cloak of the girl.

Close up detail of the tail

Now I am off to finish the hanging and tassels and to plan the next piece so ...

Cheers everyone until the next blog.