Friday 28 August 2009

FOQ and FAQ

Last Thursday my DH and I set off at 6am and headed for the NEC at Birmingham to the FOQ - Festival of Quilts. An unusually easy journey down which meant we got there sooner than expected. We had a coffee, went to look for a loo and then joined the queue to wait for the show to open.
I decided to do the stands first and the quilts later. I also wanted to see if my book was on the book stands. What a strange feeling seeing it there with all the others. I found out some days later that on one stand they had sold out and were waiting for more to arrive which sounds promising. I do hope those who bought it liked it and found it useful. I have had some lovely emails praising it and one purchaser wrote what can be described as an 'essay' in a review on Amazon.
I digress. I gave most of the fabric stands a miss as I don't buy fabrics. I prefer to dye and print my own. I bought some Evolon and another large piece of bleached mulberry bark at a very reasonable price for the size. I bought some rusting powder and have already had a play with that. Some threads and that's about it.
Then I went around the quilts. There were some amazing quilts my favourite being the art quilts. The winner was well deserved - beautiful work.
I called at the Computer Textile Design Group stand and had a chat to those who were stewarding something I had done a lot of myself in the past.
I particularly wanted to see the stand of Linda and Laura Kemshall whose work I really like. I bought their book.
We didn't stay until the end which meant we could miss the worst of the traffic and had a smooth trip back home.
A friend told me that there are usually about 2000 quilts displayed but not as many this year. Not sure that I would want to look at that many.

Now for the FAQ - Finished Art Quilts.
In my last post I showed a finished and a couple of not quite finished art quilts.
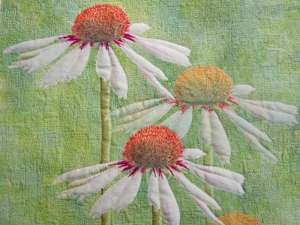
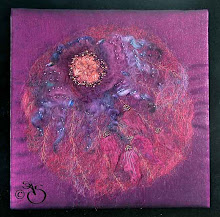
I have now finished all four quilts. Here is the finished Echinacia quilt.

I found the border fabric in my green fabric box and was the left over fabric from when I made my sister in law's curtains many many years ago. It was a glazed cotton and worked well around the piece. Everything comes in useful eventually!!

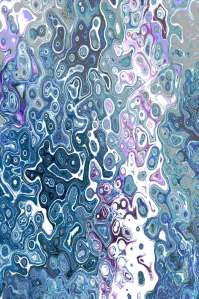
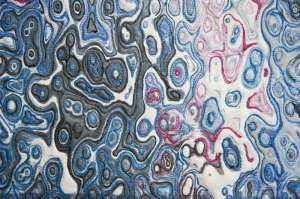
The blue quilt which was a computer generated design and when I had finished the quilting I couched some black metallic twist along one of the lines working down the design then decided to add some free machined sheer fabric leaves which were on the computer affect prior to this one combining the two.

Here is a close up of the leaves.


The last of the quilts was again generated in the computer and printed on silk. It was from a photograph of some hydrangeas.


I used a simple filter on the image which enhanced the colours and features if the flowers. I must have done something else as the printed image was much lighter than this. I really must remember to write down what I do as I play with images on the computer. I tell everyone else to do this and forget to do it myself.

Once the image had been printed, I added some acrylic paints on the petals and large leaves then free machine quilted it.


It was edged with some silver grey slub silk. I rather think I would have preferred the stronger image and am wondering why I didn't use that one. Ah well c'est la vie.

I am now on with something completely different. I have a roll of hessian coloured tapestry canvas which I bought back in the days when I was really into contemporary canvas work. I have never used any of it so decided to try and think of something to at least use some of it.
I decided to make a cover for a large A4 ring file which is about 8cm thick. I cut the canvas and painted it black. Then I finger rubbed blue, gold and green interference over the surface letting them blend together. It looks really nice.
Now I am embellishing the surface which will be mostly hand stitching. I have dyed threads and yarns to go with the piece which I expect will take quite a while to finish so until then
Cheers everyone.

Wednesday 19 August 2009

My first time to the festival of Quilts.

I have my tickets and will be making a very early start on Thursday heading for the festival of quilts for the first time. We have to set off at 6am in order to get there for the doors opening. We just hope the traffic isn't bad or it will take even longer than that. It will be my first visit and I just hope it turns out to be as good as everyone tells me.

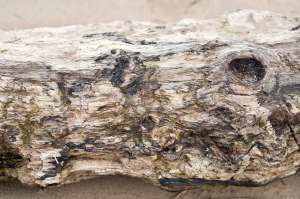
Coincidentally, I have been working on four art quilts recently all involving my photography and printing onto silk and cotton. The first one I finished started as a photograph of a piece of driftwood on a local beach. We were with our camera club on their summer photo shoot location which was - this summer - to Saltburn by the sea. It wasn't a very nice evening and everyone found it quite challenging. I, as usual, was also looking for shots which would transpose into textile work. This piece of driftwood was just one of those shots.

Driftwood

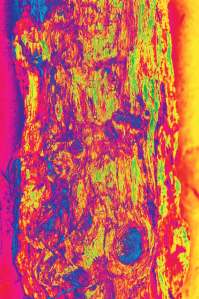
I turned the shot vertical and then began to play around with it using the filters in Photoshop. I came up with a very bold and colourful psychedelic effect which I quite liked.

Driftwood-psy-effect

I decided to print this onto cotton mainly to see how pigment inks printed directly onto untreated fine cotton. There was no bleeding - brilliant result. After the first print I put it through for a second time for a stronger colour, taking care to line it up exactly.

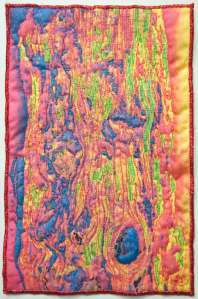
Next I painted parts of the image with metallic acrylic paints, mainly the blue and lime green to add to the surface texture.

I made up the quilt sandwich and free machined picking out the features of the image. I added more texture with hand stitching - seeding and French knots - and finished with a satin stitch edging.

Psychedelic-driftwood

It remains as a panel at the moment but I might use it for a book cover. No rush to decide.

The remaining three quilts are not quite finished yet but I'll show what I have done so far with one of them.

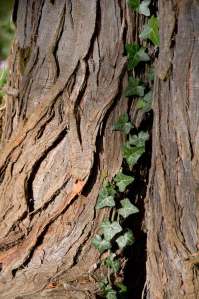
It began with a photo of some ivy wrapped around a very deep textured tree trunk.

Ivy-climbing-tree-trunk

Again I loaded it into Photoshop and created the invert image.

Ivy-climbing-tree-trunk-inverted

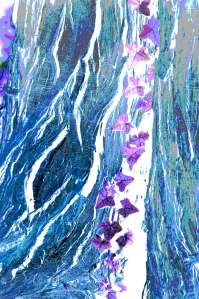
I continued to play with the filters and came up with this-

Ivy-climbing-tree-trunk-copy-2

I decided to go with this one. I printed it onto treated habutai silk. I matched the threads using polyester, rayon and metallic and quilted the design. Here is a close up of the surface.

Quilt-surface-close-up

I am now in the process of adding surface texture and came up with another idea tonight so it will take a bit longer to finish. Watch this space for the finished quilt.

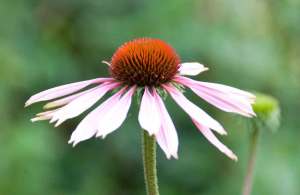
When on a visit to a university botanical garden I took this photo of an Echinacea.

Echinacea-2007

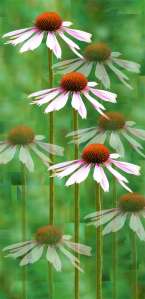
And again, I loaded it into Photoshop and created this design.

Echinacea-design

This was also printed onto treated silk and quilted. I have just finished the hand stitching and it is ready to be edged. Here is a close up of part of it. I'll post the full quilt when it is finished.

Echinacea-close-up

The fourth quilt will have to wait for the next post as it is getting late and I still have things to do. I want to print out the floor plan of the quilt show and the list of exhibitors and traders. I shall also have to call on the CTDG stand where there is some of my work displayed and say hello to some fellow members. I didn't know until last week that I was going at all and didn't know until today which day I was going so I couldn't volunteer to steward for them. Apologies for that.

So until the next blog - cheers everyone.

Saturday 8 August 2009

Pad folders and free stencils!!

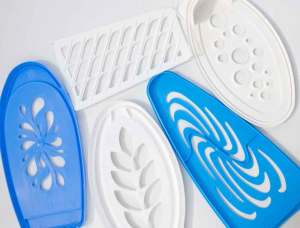
It is surprising what comes in useful even from something as mundane as buying air fresheners. I no longer buy these gadget ones which need refills. You pay out for the gadget then after a while they stop producing the refills and you have to buy the next gimmick gadget. So instead I buy those solid gel ones which are much cheaper anyway. The solid gel is inside a plastic container with a cutaway pattern on the front. These patterns change every so often and I now have quite a collection. When the gel is finished, I pull off this front part and I have a very sturdy stencil. They are also good for pressing into clay giving a raised relief.

Stencils

This is my collection so far.

Now for some more creative pieces.

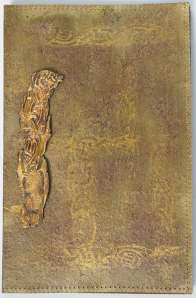
Celtic-faux-leather-pad-folder

Once again I was using up some samples. For this pad folder I used up a clay Celtic motif which was made by pressing model magic air drying clay onto a Celtic rubber stamp which was left to dry and set. You could also use Hearty clay.

I painted it with black acrylic paint then fingered gilding wax over the surface to pick out the relief of the design. The size of the motif dictated an A6 size pad folder.

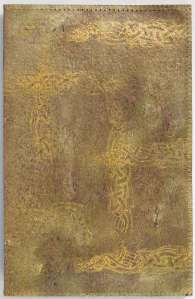
I decided to use a sheet of dark olive green card. I painted the card with the olive/copper starburst stain. While it was still wet I worked the stain into the surface with a stiff brush. This roughed up the surface and also revealed the olive part of the colour. When it had dried I gave the surface a couple of coats of acrylic wax. It made the surface of the card look leathery. Something I will use again.

I used the same rubber stamp to print onto the surface using metallic gold paint. I lined the card with mottled paper and stitched around the edges. The clay motif was stuck onto the side of the front of the pad folder.

Celtic-faux-leather-pad-folder-back

This is the back of the folder. I attached an A6 pad inside.

This next pad folder was the result of trying out some Moonshadow sprays - this one being the gossamer gold. I sprayed an A4 sheet of Tyvek. I used half of it which dictated an A5 folder.

I used some metallic patterned fabric bought a number of years ago. The fabric was quite a stiff one so did not need stabilising. I stitched the Tyvec onto the fabric creating ever decreasing rectangles using a machine pattern. Next I used a heat gun and zapped the Tyvec creating lots of holes revealing the dyed fibres that I had spread thinly underneath. The stitching prevented distortion.

The holes were embellished with beads and sequins as you can see in this close up.

Tyvek-stitched-and-zapped-folder-close-up

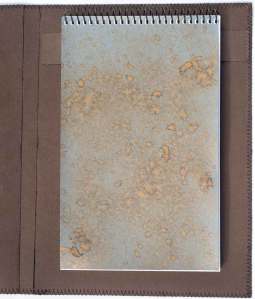
The fabric was lined with card and stitched around the edges. I fitted an A5 reporter pad inside but first I sprayed the front of this with the same gossamer gold moonglow.

Tyvek-stitched-and-zapped-folderTyvek-stitched-and-zapped-folder-inside

You can also see how I attach the pads inside the folders.

This final folder used a small square of leather. My daughter had given me the squares of leather samples she had from when she was choosing the leather for her sofas. She never throws anything away until she checks with me first.

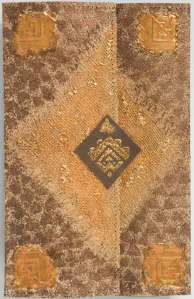
Embossed-leather-pad-folder-front

I stamped a design onto the leather using some pva. I sprinkled embossing powder over it and zapped with a heat gun. I chose a sheet of medium weight parchment card and sprayed this too with the gossamer gold. I folded the card making an overlapping front. I tea dyed some scrim and glued it onto the front flaps. I messed about some with the scrim and finally finished up with having brushed gold metallic paint into it and applying gold embossing powder to the surface.

Next I stamped bronze metallic triangles over the surface which I didn't like so I went over the top of this with sponging which looked a bit better. Still not happy I applied some pva to the corners, sprinkled and melted gold embossing powder and stamped the same design on the leather into the embossing powder. The leather was then glued onto the centre front flap. The result was not what I set out to do and I am still not happy with it but it looks OK - better than in this photo. It will take an A6 pad.

Having completed quite a number of pad folders I decided to have a change and I am now working on a series of art quilts.

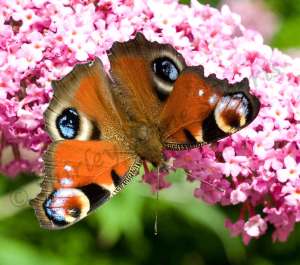
As the weather has been so nice I have been working in the conservatory and found myself watching the butterflies feeding on the budlia bushes. In fact I have been studying them more than getting on with my sewing. I have managed to take a lot of close up photos of them and here is just one of them - the peacock butterfly.

217-August-5th-Peacock-on-the-budlia

Finally I would like to thank all those who have sent their congratulations on the release of my book and to those who have sent lovely emails praising it - very much appreciated - and to Lynda (Purple Missus) and Mags (Digital gran) for their kind promotion and praise on their blogs.

I think that is about all for now. It is late and I need to get to bed so cheers everyone.